
Window Replacements vs DIY in Rancho Cordova
Smart homeowners weighing window replacements vs DIY in Rancho Cordova want clear guidance on cost, speed, and durability without the guesswork. Here’s a concise roadmap to decide when a licensed team is worth it and how to keep your project on budget.
Quick checklist:
- Choose the scope: replace all windows or stage the project by priority rooms.
- Confirm install type (retrofit vs full-frame) and any trim/stucco work.
- Pick a glass package for comfort and efficiency (Low-E, argon, U-factor/SHGC).
- Finalize measurements before ordering and confirm lead times.
- Compare 2–3 bids with the same scope (demo, install, disposal, exterior/interior finish).
- Confirm permit/inspection requirements and egress rules if applicable.
TL;DR: DIY works for a single sash or low-risk shed; whole-home upgrades, structural changes, and permit/inspection coordination fit a licensed crew. Aim for ENERGY STAR-rated units, plan lead times of 2–6 weeks, and book installation to avoid seasonal delays.
- Confirm window counts, sizes, and egress needs
- Check Rancho Cordova permit path for scope
- Order energy-efficient units with proper ratings
- Schedule install around weather and inspection windows
- Plan trim/paint touch-ups and cleanup
- Keep a contingency for rotten framing fixes
- Lock in your installer’s availability early
A Practical Overview For Window Replacements Vs DIY
| Decision | Why it matters | Quick check |
|---|---|---|
| Install type | Retrofit vs full-frame changes cost and finish work. | Confirm if trim/stucco and interior casing will be disturbed. |
| Glass package | Affects comfort, energy use, and condensation. | Compare Low-E/argon and key ratings (U-factor/SHGC). |
| Measurements | Ordering wrong sizes causes delays and rework. | Do final measurements before ordering; confirm egress where needed. |
| Lead times | Windows often drive the schedule. | Lock selections early and confirm delivery dates. |
- Choose low-maintenance vinyl or fiberglass frames for most budgets
- Use clad wood for character rooms that need warmer trim profiles
- Prioritize low-E, argon-filled glass for efficiency
- Match grids and sightlines to existing façade for curb appeal
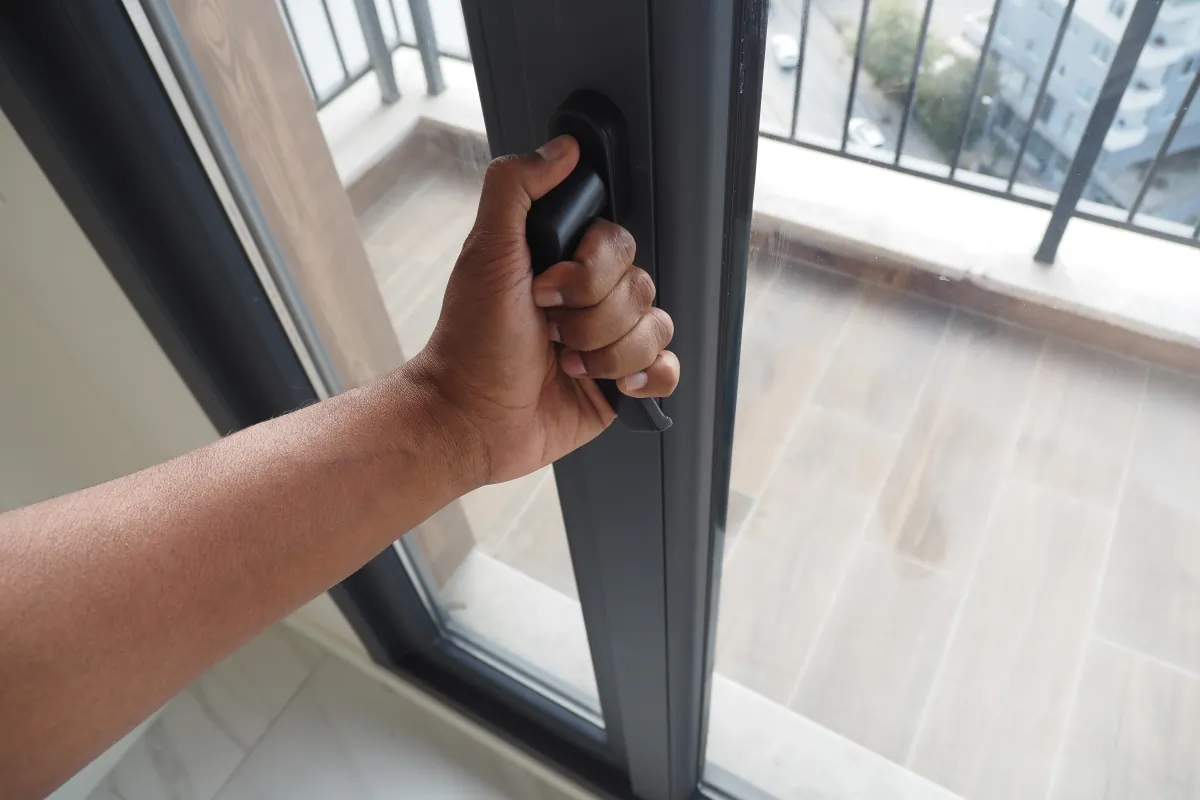
- Upgrade hardware to secure, smooth-locking levers
- Add trickle vents or screens where ventilation matters
- Integrate interior casing profiles with existing baseboards
- Plan exterior flashing and sill pans to control water
- Consider tempered glass near doors and in baths
- Coordinate interior paint or stain to finish day-of
- Reserve drip edge and head flashing for stucco openings
- Size replacements to maintain egress where bedrooms are involved
DIY replacement can feel straightforward until you hit hidden surprises like uneven framing or stucco tear-back. A licensed crew handles measurements, permits, disposal, and inspection scheduling so the opening is watertight the same day. For small-space layouts, slimmer frames and daylight-maximizing glass keep rooms bright without expanding openings.
Before/after snapshot: A homeowner with drafty aluminum sliders swapped to fiberglass casements. Before: condensation and sticking tracks. After: crisp sightlines, quieter interiors, and a 2-hour blower test improvement—completed in one day because measurements, flashing, and inspections were pre-planned.

Planning And Scope Decisions For Window Replacements Vs DIY
Decide early whether this is a single replacement or a phased, whole-home upgrade. DIY may fit a single insert window with standard sizes; a licensed installer is the right move for structural changes, stucco cutbacks, or multiple elevations in one push.
| Decision | DIY | Pro Install |
|---|---|---|
| Measurement risk | Higher; returns and delays | Verified; ordered to fit |
| Flashing/weatherproofing | Manual learning curve | Standardized, warrantied |
| Stucco or siding tie-in | Challenging | Managed with proper tooling |
| Inspection coordination | Self-managed | Handled and scheduled |
- Insert-style replacements: often faster; DIY materials only can be $250–$600 per unit, pro labor adds efficiency and finish quality.
- Full-frame swaps with flashing/siding: plan $800–$1,500+ per opening depending on size and trim.
- Lead times: 2–6 weeks for custom sizes; schedule install days to align with delivery.
- On-site time: 1–2 days for small batches, 3–5 days for whole-home projects.
Include a 10–15% contingency for hidden rot or reframing. Keep egress and tempered glass rules in mind for bedrooms and baths. Use this phase to map inspection sequences so the opening isn’t left uncovered overnight.

Material Choices And Lead Times
Frame options vary: vinyl keeps costs predictable; fiberglass resists warp in summer heat; clad wood offers warmth inside with a tough exterior skin. Pair low-E, argon-filled glass with proper U-factor and SHGC for our climate zone. Hardware should feel solid and lock cleanly; multi-point locks add security on tall casements.
Layout matters even for windows: in galley kitchens, tall awnings above counters vent steam without blocking workspace; in L-shape or U-shape kitchens, a centered picture window balances the triangle; islands benefit from high transoms for daylight without glare. Layer light by aligning window placement with ambient cans, under-cabinet task strips, and a couple of accent sconces to avoid dark corners. For flooring and trim tie-ins, match stain/paint to adjacent rooms so the upgrade looks intentional.
Expect 2–6 weeks for custom sizes; black or specialty finishes can add a week. Order screens and interior casing with the units to avoid second trips. Small-space layouts benefit from narrow frames and larger glass area to keep rooms feeling open.
Frequently Asked Questions
DIY can work for a single standard insert window with no stucco cutback, provided you’re confident in flashing and sealing. Whole-home upgrades or structural changes are better handled by a licensed crew.
Material choice, frame type, glass performance, exterior finish work, and whether stucco or siding needs repair affect price. Professional labor adds precision, faster turnaround, and warranty-backed weatherproofing.
Many replacements require permits, especially if you change sizes, egress, or structure. Our team coordinates with the city’s online permit portal and schedules inspections to keep the project moving.
Standard sizes can arrive in about 2–3 weeks; custom finishes and configurations typically take 4–6 weeks. We place orders after verified measurements to avoid reorders.
Fiberglass and high-quality vinyl perform well in heat and sun, while low-E, argon-filled glass improves comfort and energy performance. Proper flashing and caulking protect the assembly over time.
Clean tracks, check weep holes, re-caulk exterior joints annually, and ensure locks engage smoothly. Schedule quick inspections after major storms to catch early seal issues.
A licensed installer streamlines measurements, orders, permits, and inspections, installs faster with proper flashing, and leaves openings sealed the same day—reducing risk and rework across the home.