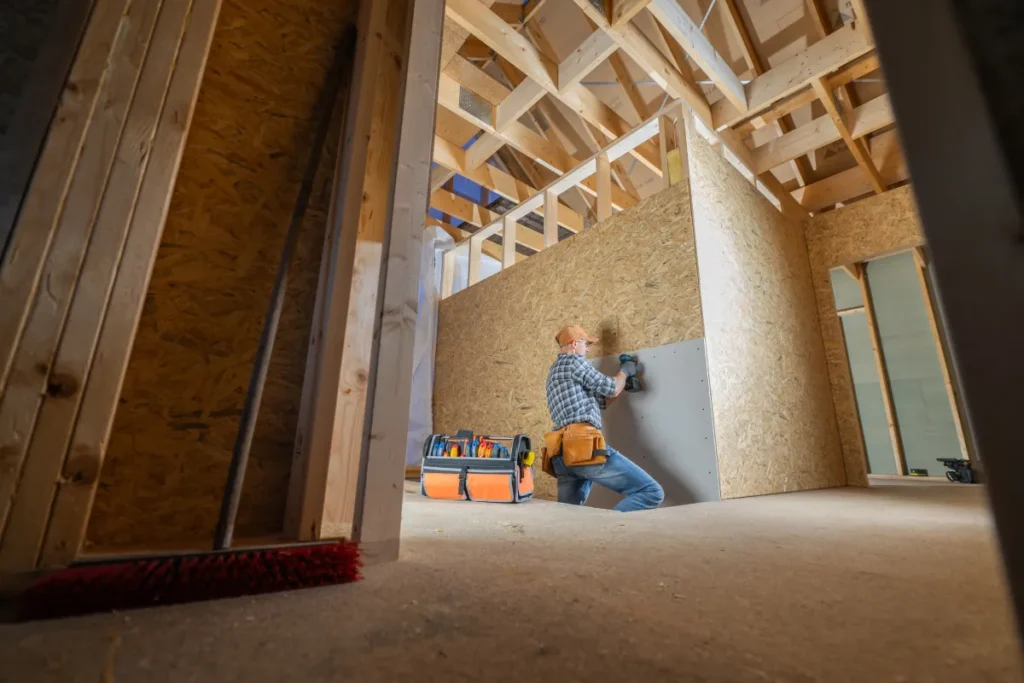
Planning a drywall repair or remodel starts with numbers. A drywall sheetrock calculator helps you estimate sheets, joint compound (mud), tape, and corner trim before work begins. That matters because once walls are opened, delays can snowball into extra time and mess.
Quick checklist:
- Define the scope and your must-have outcome (performance, budget, timeline).
- Confirm what work is involved and the order of operations.
- Finalize measurements and key selections before ordering long-lead materials.
- Collect 2–3 quotes and compare line-by-line (scope, allowances, cleanup, warranty).
- Create a simple schedule and pre-order the items that most often cause delays.
TL;DR: Measure every wall and ceiling surface you’re touching, choose board type and thickness, add a waste factor (extra material), and plan for drying time between coats of mud. If you’re working toward a move-in date or inspection window, a short planning call can keep the schedule realistic.
- List the rooms and surfaces (walls, ceilings, soffits).
- Measure length and height, then total the square footage.
- Pick sheet size and thickness (common: 4×8, 1/2-inch).
- Add a waste factor for cuts and mistakes (often 10–15%).
- Decide on finish: texture match or smooth walls.
- Build in drying time between mud coats and primer.
Homeowners often say “sheetrock” when they mean drywall. Sheetrock is a brand name; the planning steps are the same.
Signs It’s Time For Drywall / Sheetrock Calculator For Drywall Sheetrock Calculator
| Decision | Why it matters | Quick check |
|---|---|---|
| Scope | Defines what is included and prevents surprises. | Write a line-item scope and allowances list. |
| Site constraints | Access and hidden conditions can change the plan. | Check access and existing surfaces before work starts. |
| Selections | Long-lead items can drive the schedule. | Confirm availability before starting. |
| Permits | Some scopes require approvals and inspections. | Ask your city/county what applies to your project. |
Some drywall jobs are truly small. In addition, You patch a few holes and move on. In addition, A calculator becomes useful when the project touches enough surface area that running short on materials would stop the job—or when you’re comparing options that change the scope.
- You’re repairing multiple damaged areas (water stains, also cracks, soft spots) across a room.
- You’re remodeling a kitchen or bathroom and opening walls for plumbing or electrical updates.
- You want a smooth wall finish, so you’re considering a skim coat (a thin layer of mud over the whole surface).
- You’re finishing a garage, bonus room, or ADU space and need a full materials takeoff.
- You’re matching an existing texture and need extra mud for blending.
- You’re choosing specialty boards like moisture-resistant or fire-rated drywall.
What To Plug Into Your Estimate (So It Matches Real Life)
Start with square footage: wall length × wall height, added up for every wall you’re covering. Additionally, Include ceilings if they’re part of the job. In addition, Subtract big openings like large sliding doors, but don’t overdo it—offcuts often get used around windows and closets.
- Sheet size: 4×8 is common; 4×10 or 4×12 can reduce seams in tall rooms.
- Thickness: 1/2-inch is typical for walls; 5/8-inch is stiffer and common on ceilings or where extra fire resistance is necessary.
- Finish goal: texture match vs smooth walls changes labor, sanding, and mud quantities.
- Outside corners: count them so you can plan for corner bead (the trim that keeps corners straight).
- Ceilings and soffits: these add sheets fast and often need extra prep.
Planning Mistakes That Waste Sheets And Time
- Measuring only the floor plan and forgetting ceiling height changes room-by-room.
- Buying exactly the sheet count with no waste factor for cuts, damaged sheets, and layout changes.
- Ignoring butt joints (where short sheet ends meet), which usually take more mud to look flat.
- Forgetting backing and blocking for items you’ll hang later (cabinets, shelves, TVs).
- Underestimating sanding and dust control, especially in occupied homes.
- Skipping lead-safe planning in older homes (built before 1978) when paint may contain lead.
Tighter Layouts, Fewer Seams
Bathrooms, laundry rooms, closets, and hallways can be harder than big open rooms. For this reason, The goal is fewer seams in sight lines and cleaner edges around doors and fixtures.
- Use shorter sheets where turning long boards is impossible, then plan extra seams and mud.
- Center seams away from shower/tub edges so tile lines and trim look intentional.
- Plan access panels for shutoff valves so you don’t cut the wall later.
- In closets, prioritize straight corner lines; it’s where uneven mud shows up first.
If drywall is part of a larger remodel—like kitchen remodeling, bathroom remodeling, or whole-home updates—coordinate the drywall scope with trade work so the schedule stays clean. For example, See service examples on our site.
Common Upgrade Paths (What Changes Most) For Drywall Sheetrock Calculator
Drywall looks simple until you start choosing options. As a result, The board type and the finish level change both materials and labor, which is why two rooms with the same square footage can price out very differently.
Board And Finish Choices That Affect The Calculator
- Standard drywall: the default for most interior walls and ceilings.
- Moisture-resistant drywall: designed for humid areas like bathrooms or laundry rooms (it still needs the right paint and ventilation).
- Type X drywall: a fire-resistant board often used where code calls for extra protection, such as some garage or shared-wall situations.
- Cement board: used behind tile in wet zones like showers; it’s not drywall, so it changes the materials list.
- Level 4 vs Level 5 finish: Level 4 is standard taped-and-mudded walls; Level 5 adds a skim coat for the smoothest paint finish.
- Sound control add-ons: insulation, sound-damping panels, or resilient channels can change wall thickness and detailing.
Storage And Built-Ins To Plan Before Closing Walls
Drywall is the “skin” of the wall. Overall, Before you close it up, decide what needs solid backing. Additionally, Adding blocking now can prevent loose towel bars and sagging shelves later.
- Blocking for floating shelves, towel bars, and grab bars.
- Backing for wall-mounted TVs and heavy mirrors.
- Recessed niches and in-wall medicine cabinets (great in tight bathrooms).
- Closet organizer anchor points and rod supports.
- Access panels for plumbing cleanouts or shutoff valves.
Where Clean Drywall Matters Most
Buyers notice walls. Meanwhile, They may not know why a room feels “finished,” but straight corners, flat seams, and consistent texture signal quality. For this reason, If you’re thinking about resale, prioritize areas people stare at up close: entryways, living rooms, and kitchens.
- Smooth transitions at door trim and baseboards reduce the “patched” look.
- Consistent texture is better than a perfect patch in one spot and a mismatch next to it.
- In high-light rooms, a Level 5 finish can reduce visible joint lines after painting.
Maintenance And Touch-Up Tips After New Drywall
- Use a drywall primer before paint; it seals the surface and evens out sheen.
- Keep a small container of matching paint and a little patch compound for future nicks.
- Use the right anchors for heavy items; drywall alone won’t hold real weight.
- Watch humidity in bathrooms and laundry rooms; exhaust fans protect the finish.
Budget Ranges And Timeline (Typical)
Drywall costs and timelines vary by finish level, access, and how much trade work happens behind the wall. Also, Drying time between coats is a built-in constraint, so “fast” drywall often means more visits, not fewer steps.
Budget Ranges & Timeline (Typical)
- Small repairs: often land in the few-hundred-dollar range and take 1–3 days on the calendar due to drying between coats.
- Single-room re-drywall: commonly in the low-thousands range; plan roughly 3–7 days depending on texture, sanding, and paint readiness.
- Multi-room work or whole-home smoothing: varies widely; 1–3 weeks is common once you factor in protection, drying, and touch-ups.
- Add-ons: moving outlets, plumbing changes, insulation, or specialty boards can add time and may require inspections.
| Choice to make | What it affects | Decide it early because… |
|---|---|---|
| Texture vs smooth walls | Mud quantity, sanding, paint look | Matching later is hard and costly |
| Board type (standard, moisture-resistant, Type X) | Materials, code needs | You may need the right board in specific locations |
| Ceilings included or not | Sheet count, labor, dust | Ceilings can double the scope fast |
| Trade work behind walls | Permits, inspections, schedule | Walls can’t close until trades are signed off |
Permits And Scheduling Notes
In many cases, drywall replacement itself isn’t the permit item—the work behind it is. For example, Local rules vary across California, so treat permits as a planning question, not an afterthought.
When Permits May Come Into Play
- Moving or adding walls, changing framing, or altering structural elements.
- New or relocated electrical, plumbing, or HVAC inside the wall.
- Changes tied to fire separation (for example, garage-to-house walls in some homes).
- Major water damage repairs where other systems are involved.
Scheduling Realities Calculators Don’t Show
- Dry time: joint compound needs time to dry between coats; humidity and temperature matter.
- Inspection holds: if trades are updated, inspections often happen before drywall goes back up.
- Dust control: sanding creates fine dust; plan containment and air filtration in lived-in homes.
- Old-home safety: if your home was built before 1978, follow lead-safe renovation guidance (see EPA RRP info).
Serving Sacramento Homeowners
US Construction & Remodeling Corp. Overall, helps Sacramento homeowners turn drywall planning into a clear scope and timeline—so you know what happens when, and what materials are necessary. Overall, To talk through your schedule and options, book a planning call or call +1 (916) 234-6696.
How We Build A Reliable Drywall Plan (Not Just A Number)
- Confirm the scope: repair vs full replacement, walls vs ceilings, and any texture matching.
- Verify measurements and layout, including soffits, closets, and tight corners that change sheet usage.
- Pick materials that fit the room: standard, moisture-resistant, Type X, or cement board where needed.
- Map the schedule around drying time, access to the space, and any trade work that must happen first.
- Protect the home (floors, doorways, and air flow), then complete hanging, taping, and finishing.
- Do a punch list with you, then get the walls ready for paint or final finishes.
Sacramento Permit Tracking (When It’s Required)
If your drywall project includes changes that trigger permits, Sacramento permitting and plan review typically run through the City of Sacramento Community Development online portal (Accela Citizen Access). In addition, Homeowners can usually apply, pay, and track status online at the permit portal.
Practical Trust Checks Before You Hire
- Licensing and insurance: ask for current coverage and confirm the contractor is properly licensed for the scope.
- Permit responsibility: clarify who pulls permits when required and how inspections get scheduled.
- Communication cadence: agree on how you’ll get updates (text, email, or calls) and who your point of contact is.
- Workmanship verification: ask what finish level is included, how corners are reinforced, and how texture match will be handled.
- Written scope: make sure the quote lists what’s included (protection, patch blending, disposal, and paint readiness).
If you’re using a drywall sheetrock calculator and want a second set of eyes, we can sanity-check the takeoff and flag the items that most often get missed. Meanwhile, For fast questions, call the number above; for scheduling, the booking link is the easiest way to lock in a time.
Helpful Links
Frequently Asked Questions
A calculator can get you close if your measurements are accurate and you include the “extras” that drive real-world waste. It will never see your framing, corners, soffits, or texture needs, so treat it as a planning baseline.
- Add a waste factor (often 10–15%) for cuts and damaged sheets.
- Count ceilings, soffits, and closets separately so nothing gets missed.
- Decide texture vs smooth walls up front; smooth finishes usually need more mud and sanding.
- Account for corners (corner bead) and butt joints (short ends meeting) that take extra work.
Measure every surface you plan to cover. For each wall, multiply length × height to get square footage. Do the same for ceilings (length × width).
- Room-by-room wall lengths and wall heights
- Ceiling dimensions (if included)
- Big openings (large doors) to subtract lightly
- Number of outside corners for corner bead
- Any soffits, niches, or boxed-out areas
Tip: Don’t over-subtract for windows and doors. Offcuts often get used for returns and small patches.
Often, like-for-like drywall replacement is not the item that triggers a permit. Permits are more common when the job includes changes behind the wall.
- Moving or adding walls, or changing framing
- New or relocated electrical, plumbing, or HVAC
- Work tied to fire separation requirements
Rules vary by city and county. When in doubt, check with your local building department before you close the wall back up.
Humidity changes the material choice. Many homeowners use moisture-resistant drywall in bathrooms and laundry rooms, then protect it with proper primer, paint, and ventilation.
In true wet zones (like inside a shower), drywall is usually not the right substrate for tile. Cement board (or another approved backer) is common there, and it changes your materials list.
Drywall finishing is multi-step. Joint compound (mud) needs time to dry between coats, and humidity can slow it down.
- Plan for multiple coats on seams and corners (often 2–3).
- Expect sanding and dust control as part of the schedule.
- Use primer before paint to avoid blotchy sheen.
If you have a fixed deadline, build the calendar around drying time and access to the space.
A good scope is specific. It tells you exactly what you’re paying for and what “done” means.
- Areas included (walls, ceilings, closets, garage)
- Board type and thickness
- Finish level (including texture match or smooth finish)
- Protection plan (floors, doorways, dust containment)
- Disposal and cleanup
- How changes are handled (written change orders)
If permits are necessary, confirm who is responsible for pulling them and scheduling inspections.
Licensed, insured & trusted local contractor
US Construction & Remodeling Corp.
4424 Freeport Blvd, Sacramento, CA, 95822
Phone: +1 (916) 234-6696
CSLB License #: 1117562 Fully licensed and insured.