
Kitchen Remodeling Timeline In Rancho Cordova
A kitchen remodel can feel like a moving target when dates keep shifting. This post breaks down a kitchen remodeling timeline rancho homeowners in Rancho Cordova can use to plan decisions, orders, and inspections with less guesswork.
Quick checklist:
- Define the scope and your must-have outcome (performance, budget, timeline).
- Confirm what work is involved and the order of operations.
- Finalize measurements and key selections before ordering long-lead materials.
- Collect 2–3 quotes and compare line-by-line (scope, allowances, cleanup, warranty).
- Create a simple schedule and pre-order the items that most often cause delays.
TL;DR: Most delays come from late design decisions, long‑lead materials, and mid‑project changes. Lock your layout, order early, and keep inspection days on the calendar. For a written estimate, have photos of your current kitchen, a budget range, and the appliance sizes you want.
- Define scope: cosmetic refresh vs layout change
- Confirm appliance sizes and utility needs
- Pick cabinet type and lead time
- Choose countertop material and edge
- Plan dust control and a temporary kitchen
- Agree on change‑order and payment milestones
How To Hire For Kitchen Remodeling Timeline In Rancho Cordova (Without Guesswork) For Kitchen Remodeling Timeline Rancho
| Decision | Why it matters | Quick check |
|---|---|---|
| Scope | Defines what is included and prevents surprises. | Write a line-item scope and allowances list. |
| Site constraints | Access and hidden conditions can change the plan. | Check access and existing surfaces before work starts. |
| Selections | Long-lead items can drive the schedule. | Confirm availability before starting. |
| Permits | Some scopes require approvals and inspections. | Ask your city/county what applies to your project. |
When homeowners say a remodel took forever, it usually wasn’t nonstop work—it was waiting on decisions, materials, or inspections. For this reason, A good contractor helps you map those pinch points before you sign, so the schedule reflects real lead times and your household’s constraints.
This approach is also a fit if you’re changing cabinets, counters, or layout and you want a clear plan for who does what (demo, plumbing, electrical, cabinetry, countertops, and finishes). It also matters if you need to keep part of the home functional while work happens.
What A Realistic Timeline Should Include
- A preconstruction phase for design, selections, and ordering
- Key decision deadlines (appliances, cabinets, countertops, lighting)
- Permit/inspection touchpoints that can pause work
- Trade coordination dates (rough‑ins, drywall, install, finish)
- A punch‑list window before final payment
Contractor Interview Questions That Reveal Scheduling Skill
- What items do you need selected before demo starts?
- How do you handle long‑lead cabinets or backordered appliances?
- Who schedules subcontractors and inspections, and how far out?
- How do you document change orders (price + time impact) before work changes?
- Will you provide a written scope and a week‑by‑week schedule?
Common Homeowner Mistakes That Stretch The Schedule
- Starting demolition before the layout and appliances are locked
- Comparing bids that hide allowances or omit key line items
- Choosing materials one at a time during construction instead of upfront
- Changing cabinet sizes after rough plumbing/electrical is complete
- Skipping a final punch list and discovering issues after payment

Bid Comparison Checklist (Apples-To-Apples)
Two bids can look similar while describing completely different jobs. Additionally, Before you choose the lowest number, make sure each contractor priced the same scope, same material level, and the same responsibility for permits and coordination.
- Scope: what gets removed, replaced, and reused
- Cabinets: brand/line, box material, door style, hardware, and install details
- Countertops: material, thickness, edge, and who handles reconnects
- Electrical: new circuits, lighting locations, and under‑cabinet lighting
- Plumbing: sink location changes, new shutoffs, and hookups
- Protection: floor/wall protection, dust control, and daily cleanup
- Schedule: start window, milestones, and how delays are handled
If a line item shows an allowance, ask for the allowance amount and what it covers. Also, Low allowances often create expensive surprises later.
Contract Basics (Payment Schedule, Scope)
A contract should do two things: describe exactly what’s included and define how money and changes are handled. For example, You don’t need legal language to get clarity—you need specificity.
Contract Items That Protect Your Budget And Dates
- Detailed scope of work and material specs (including model numbers when possible)
- Allowance list with selection deadlines and what happens if costs differ
- Start window and milestone checkpoints (not just an estimated completion)
- Who pulls permits and who schedules inspections
- Change‑order process that requires written approval before extra work
- Cleanup standards and a punch‑list process
Payment schedules vary, but tie payments to milestones you can verify (for example: demolition complete, rough‑in complete, cabinets installed). Meanwhile, Avoid paying ahead for work that hasn’t been completed.
Timeline Planning And Change Orders
A kitchen schedule works best when you treat decisions as deadlines, not options. As a result, That mindset keeps crews moving and reduces stop‑and‑start gaps that drag out a kitchen remodeling timeline rancho homeowners depend on.
Typical Phases To Plan For
- Preconstruction: finalize layout, selections, and order long‑lead items
- Demolition + prep: remove old materials, protect adjacent areas, verify site conditions
- Rough‑ins: plumbing/electrical/HVAC work and any framing changes
- Inspections (when required): rough inspections before surfaces close up
- Drywall + paint: patching, primer, and finish coats
- Install: cabinets, countertops, backsplash, flooring, trim, and fixtures
- Closeout: appliance set, final adjustments, punch list, and final inspection
| Decision to lock | What it affects | Best time to decide |
|---|---|---|
| Layout + appliance sizes | Rough plumbing/electrical locations | Before ordering and permit submittal |
| Cabinet type | Lead time and installation date | Before demo, or immediately after |
| Countertop material | Template and fabrication timing | Before cabinet install |
| Flooring scope | Demo sequence and height changes | Before rough‑in begins |
| Backsplash + paint | Finish scheduling and rework risk | During rough‑in/drywall phase |
Accessibility And Aging‑In‑Place Options To Plan Early
Even if you don’t need them today, a few layout and hardware choices can make the kitchen safer and easier to use later. They’re also easiest to include before cabinets and electrical rough‑ins are final.
- Wider clearances around the island and main work triangle
- Pull‑out shelves, trash pull‑outs, and drawer bases instead of deep lowers
- Lever or touch‑activated faucets and easy‑grip cabinet pulls
- Brighter task lighting and lower‑glare under‑cabinet lighting
- Anti‑slip flooring and minimal floor height transitions
Change orders are sometimes unavoidable. Overall, When you keep them written and priced before approval, you can decide whether the upgrade is worth the added time.

Quality Checks Before Final Payment
Save your final payment for the end of the punch‑list process. In addition, That’s the moment you still have leverage to get the small details finished correctly.
Punch‑List Checklist (Quick But Thorough)
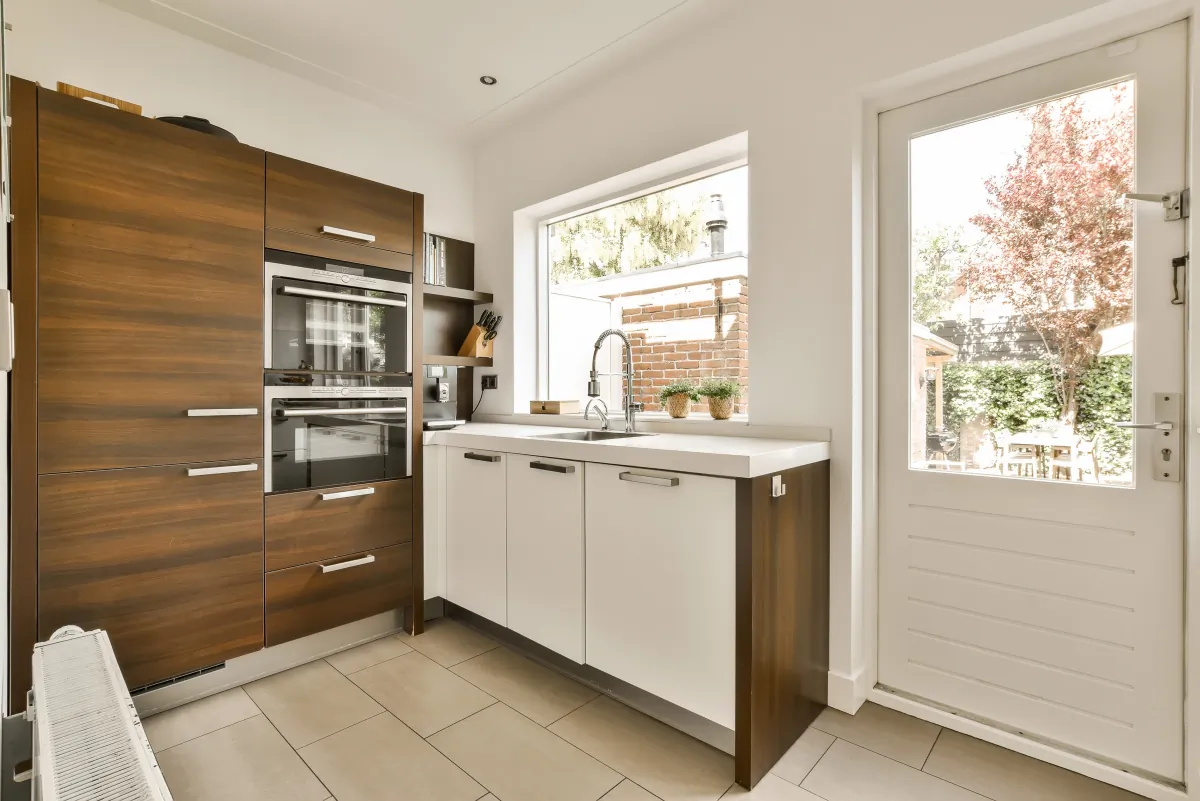
- Cabinet doors and drawers align, open smoothly, and close properly
- Countertops sit flat, seams look clean, and caulk lines are consistent
- Faucet and drain connections don’t leak under the sink
- GFCI outlets, lighting, disposal, and dishwasher run correctly
- Vent hood exhausts properly and the ventilation plan matches the equipment
- Backsplash grout and tile cuts look even around outlets and corners
- Paint touch‑ups, trim details, and flooring transitions look finished
Permit And Inspection Notes For Rancho Cordova
Permits and inspections depend on scope, but kitchens often trigger them when you move plumbing, add circuits, change gas lines, or modify walls. For this reason, Build inspection days into the schedule so crews aren’t waiting, and keep sign‑offs with your project documents.
In Rancho Cordova, the City provides online permitting for applications, payments, and inspection scheduling through its permit portal. Meanwhile, Your contractor can confirm what applies for your address and scope.
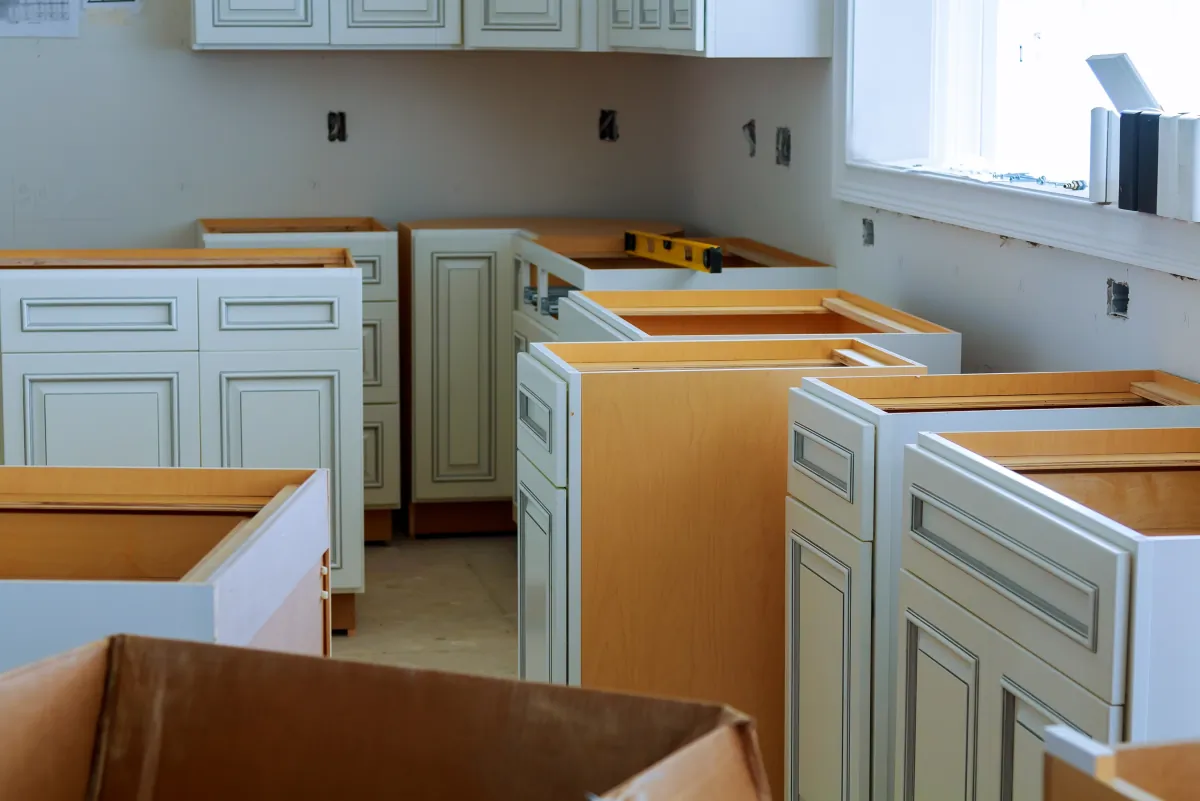
Decision Deadlines For A Kitchen Remodeling Timeline Rancho Plan
If you only track one thing, track decisions. For example, Put dates on cabinet ordering, countertop templating, and appliance delivery so the installer can keep moving.
- Cabinet order placed (with ETA confirmed)
- Countertop template date and install date
- Appliance delivery date and power/gas needs verified
- Final walkthrough + punch list date
If you want a clear plan before you demo, US Construction & Remodeling Corp. For this reason, can provide a written estimate with a scope you can compare. Overall, Call +1 (916) 234-6696 and have a few photos, your rough budget range, and your must‑have appliance sizes ready.
Learn more on our website.
Helpful Links
Frequently Asked Questions
Timeline depends on scope and lead times, so treat any one‑size promise as a red flag. A cabinet‑and‑counter refresh with minimal trade work can move fast, while a full remodel that changes layout, plumbing, or electrical typically takes longer.
The schedule usually has two parts: preconstruction (design, selections, ordering, and any permitting) and construction (demo through punch list). When you plan both parts up front, you get a kitchen remodeling timeline rancho homeowners can actually live with.
- Fastest projects: limited scope and in‑stock materials
- Longer projects: custom cabinets, layout changes, or multiple inspections
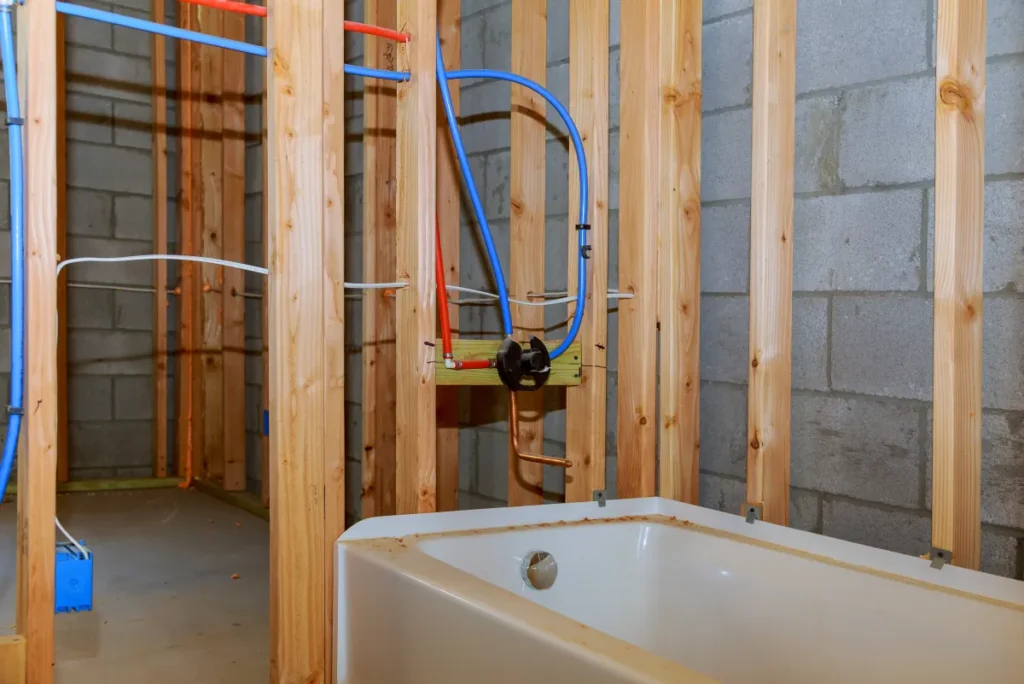
Before demo starts, lock anything that affects rough plumbing and electrical. Otherwise, crews may pause while you re‑decide locations and sizes.
- Finalize layout and confirm appliance dimensions
- Choose cabinet plan and hardware (or finalize allowance specs)
- Pick countertop material and sink type so cutouts match
- Confirm lighting plan: fixtures, switches, and under‑cabinet lighting
- Plan a temporary kitchen setup and protect adjacent rooms from dust
If you’re still shopping for key finishes, delay demo until the decisions are made. Waiting a week up front can save several weeks mid‑project.
Some kitchen updates don’t need permits, but many do once you change systems or structure. Moving plumbing, adding circuits, altering gas lines, modifying walls, or changing ventilation can trigger permit and inspection steps.
Plan for inspection checkpoints, since crews may need sign‑off before closing walls. The City of Rancho Cordova supports online permitting and inspection scheduling through its permit portal, which helps keep paperwork and inspections organized.
Your contractor should confirm the exact permit needs for your address and scope, and they should tell you when rough and final inspections will occur.
Ask each contractor to price the same scope and list what’s excluded. A low bid often comes from missing line items or unrealistically small allowances.
- Confirm what included means for demo, disposal, and protection
- Match cabinet and countertop specs, not just broad labels
- Review allowances for fixtures, lighting, tile, and hardware
- Check who handles permits, inspections, and trade coordination
- Look for a written schedule with milestones, not vague durations
If something is unclear, request a revised written estimate. Clarity now prevents conflict later.
There isn’t one universal schedule, but the safest approach ties payments to completed milestones you can verify. That keeps cash flow aligned with progress and reduces pressure to pay for work that hasn’t happened.
- Deposit: enough to secure scheduling and initial materials (if applicable)
- Progress payments: tied to milestones like demo complete, rough‑ins complete, cabinets installed
- Final payment: held until punch list is complete and required inspections are signed off
Ask for the payment schedule in writing and make sure it matches the scope and material lead times.
Every change has two costs: the price of the new work and the time it takes to re‑plan, re‑order, and re‑schedule trades. Even a small change can pause the job if it affects cabinets, plumbing locations, or inspections.
To keep the project moving, require change orders to be written, priced, and approved before work changes.
- Layout or cabinet changes after rough‑ins
- Switching countertop materials after templating
- Adding outlets or lighting late in the job
- Upgrading appliances that need different clearances or power
If a change is worth it, approve it quickly so the team can order and schedule without gaps.
Make final payment when the work is complete, the punch list is signed off, and any required final inspections are closed. This is also the right time to collect paperwork you may need later.
- All doors/drawers adjusted; appliances and fixtures tested
- Touch‑ups and caulking complete; site cleaned and ready to use
- Final inspection sign‑off (when applicable)
- Warranties, manuals, and care instructions for new materials
- Lien releases/receipts as provided in your contract
If something is still open, keep it on a written punch list with an agreed completion date.
Licensed, insured & trusted local contractor
US Construction & Remodeling Corp.
9821 Business Park Dr, Sacramento, CA, 95827
Phone: +1 (916) 234-6696
CSLB License #: 1117562 Fully licensed and insured.
Start with the pillar guide
For a complete overview (scope, timeline, and planning tips), see our main page: Kitchen Remodeling.


