Skip links

Floating Vanity Guide for California Bathrooms

A floating vanity can make a bathroom feel bigger without changing the footprint. When homeowners search for a floating vanity, they usually want more floor visibility, easier cleaning, and storage that still feels built in. This guide breaks down layout decisions, finish choices, typical budget drivers, and practical prep steps for California homes.

Quick checklist:

  • Define the scope and prioritize daily function (shower, storage, ventilation).
  • Confirm what trade work is involved (plumbing, electrical, drywall) and the order of work.
  • Choose finishes that hold up in wet areas and are easy to clean.
  • Collect 2–3 quotes and compare line-by-line (scope, allowances, cleanup, warranty).
  • Decide what needs to be ordered first (tile, fixtures, vanity) to keep the schedule moving.

TL;DR: Pick the vanity size and mounting height early; that choice drives plumbing, lighting, and storage. Protect the wall behind the cabinet, and keep shutoffs and the trap accessible for future service. If you are planning a full bathroom update, our team at US Construction & Remodeling Corp. can help you scope it correctly from day one.

  • Confirm the wall can carry the load (add blocking if needed)
  • Choose width, depth, and mounting height that fit the room
  • Plan drain, shutoff, and faucet locations before ordering
  • Pick a countertop/sink combo that resists water and stains
  • Map mirror, outlets, and lighting layers (ambient/task/accent)
  • Decide how you will replace lost storage (drawers, towers, medicine cabinet)

What Changes The Experience The Most For Floating Vanity

DecisionWhy it mattersQuick check
Wet-area finishesWet zones need durable, easy-clean surfaces.Choose materials rated for bathrooms and simple maintenance.
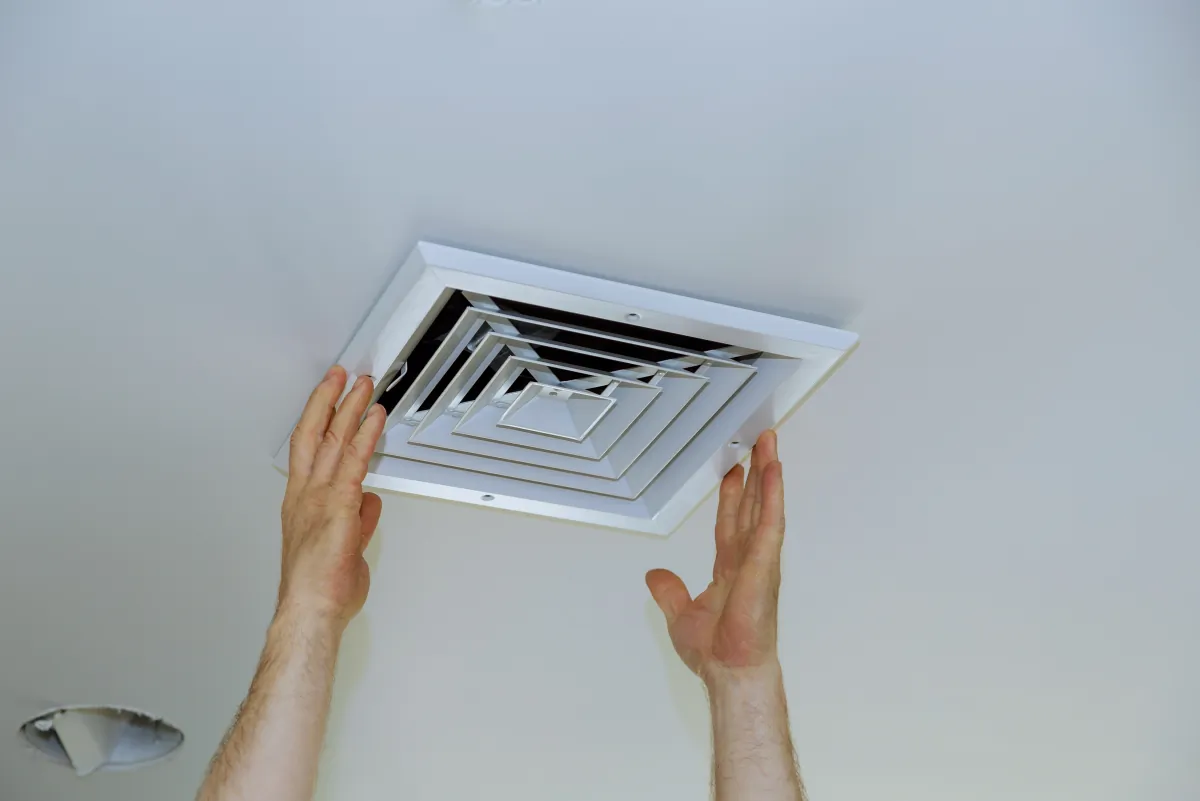
VentilationHelps prevent humidity and long-term damage.Confirm fan sizing and vent routing.
LayoutGood layout improves daily usability.Verify clearances and door swings.
Budget controlKeeps scope creep from blowing up the price.Use allowances and a written change-order process.
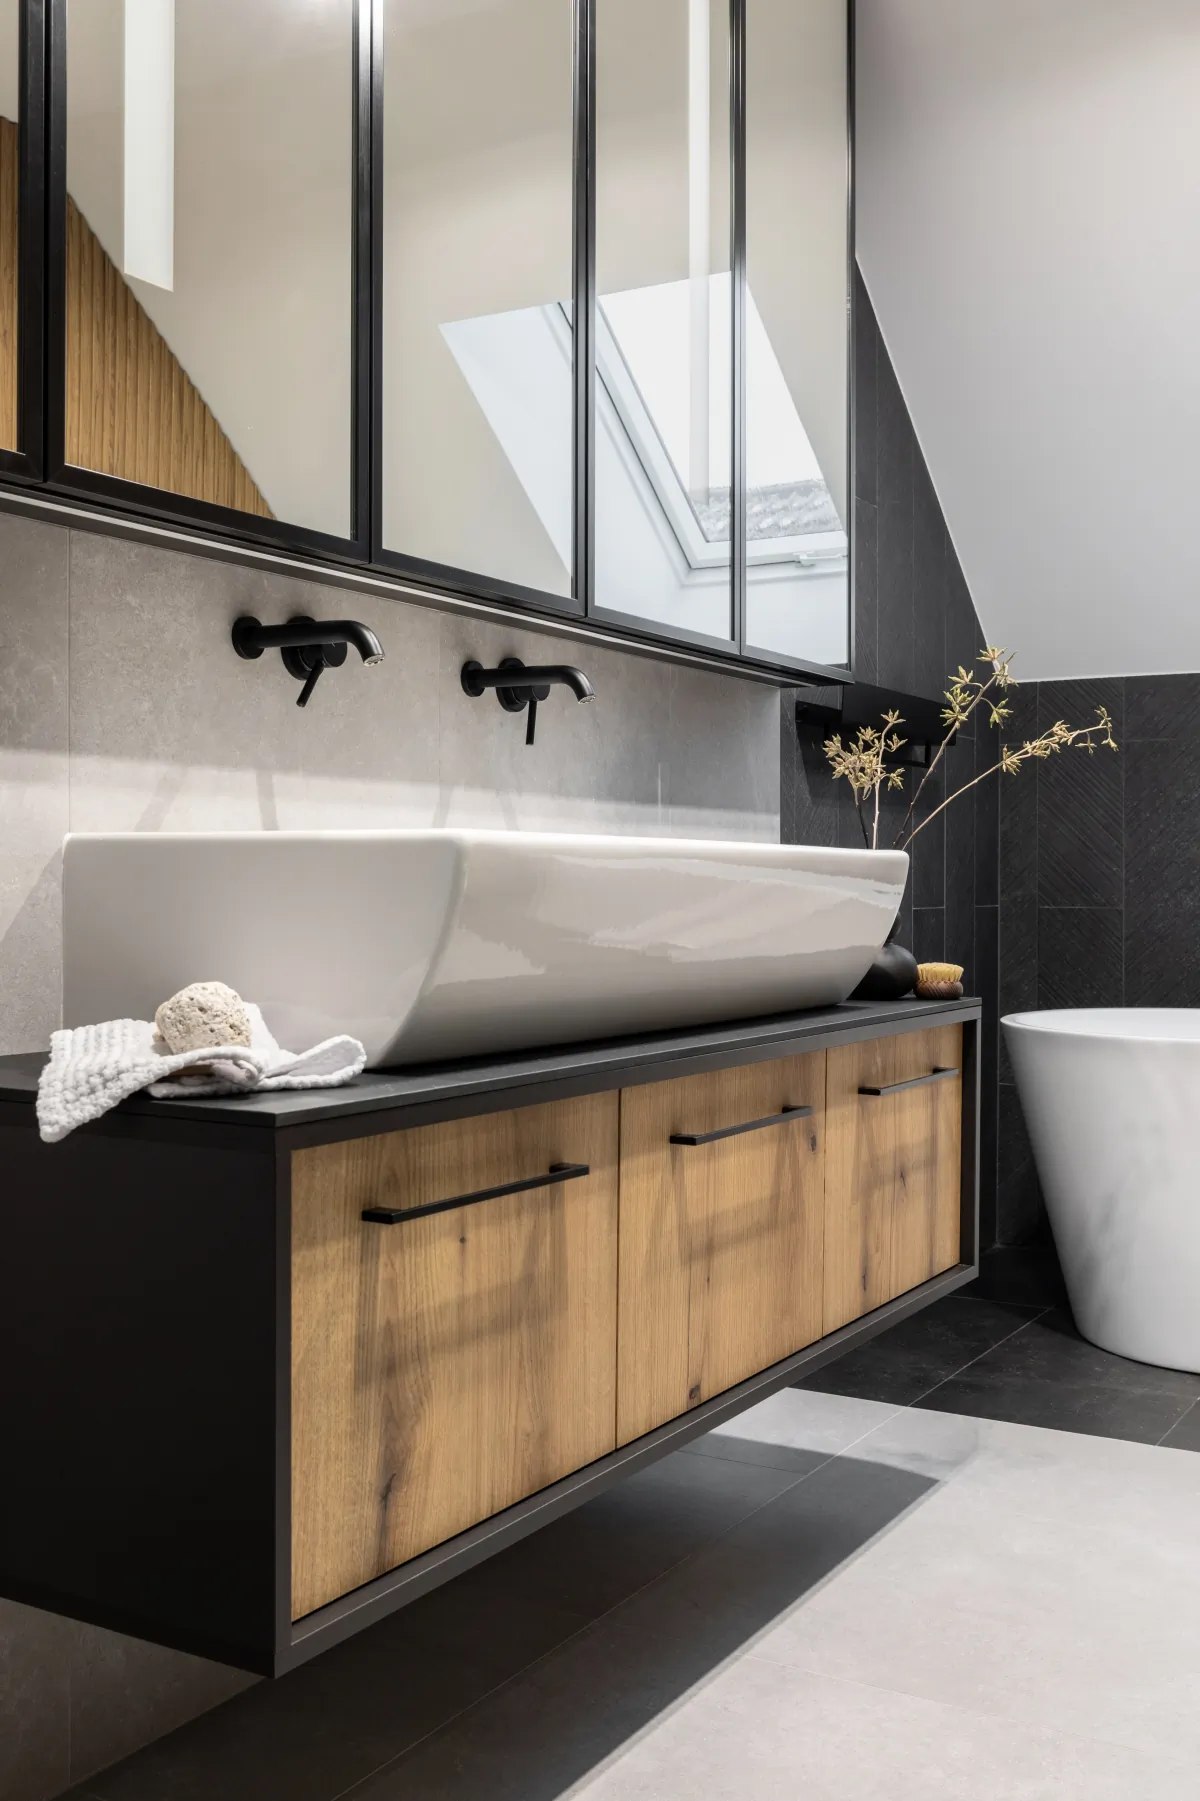
  • Set the cabinet height for your household (and leave room for cleaning underneath)
  • Use a shallower vanity depth to open up tight walkways
  • Choose deep drawers instead of doors for daily-use storage
  • Add under-vanity LED lighting for a safe night path
  • Pair a simple mirror with side sconces to reduce harsh shadows
  • Run a full-height backsplash or tile behind the sink zone to protect paint
  • Hide hair-tool clutter with an in-drawer outlet or pull-out organizer
  • Match hardware finish to faucets for a cleaner, also intentional look
  • Recess a medicine cabinet when wall depth allows for extra storage
  • Keep the countertop edge thin for a lighter, more modern profile

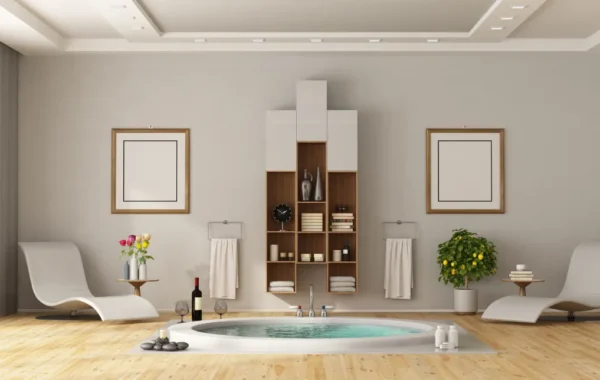
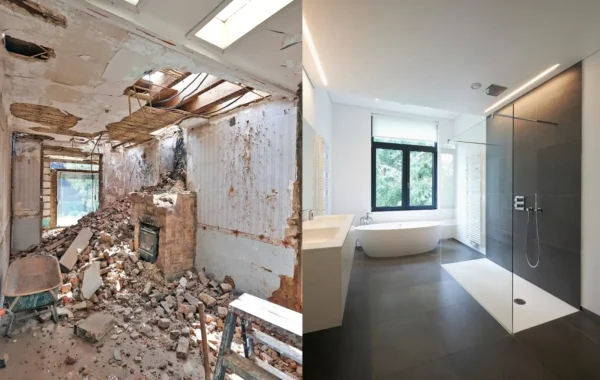
What changes the day-to-day feel most is how the cabinet is supported and how the surrounding surfaces are finished. Overall, Done well, a floating vanity makes the room look less crowded and gives you clear floor space for mopping.

This approach fits homeowners who want a modern look, easier cleaning, or a more open feel in a small bath. Additionally, If you need maximum enclosed storage or you do not want to open walls, a floor-set vanity can still be the better call.

If this is part of a bigger bathroom remodel, it helps to map the vanity decisions alongside the shower, flooring, and ventilation. Also, You can start with an overview of our bathroom remodeling services and then narrow down the vanity details.

Planning Mistakes That Cause Rework

  • Buying the cabinet before confirming studs, blocking, and wall condition
  • Forgetting where shutoff valves, the trap, and cleanouts will sit after install
  • Picking a sink that splashes because the faucet reach does not match the bowl
  • Leaving outlets and GFCI protection as an afterthought (cords end up draped)
  • Skipping wall protection behind the sink zone (paint fails fast in real life)
  • Not coordinating mirror size and lighting placement before patch and paint

floating vanity stylish bathroom interior

Layout And Function Improvements For Floating Vanity

A wall-hung vanity looks best when the rest of the bathroom supports it. As a result, Clearances around doors, toilets, showers, and towel storage decide whether the room feels open or awkward.

Layout Planning Checkpoints

Start with circulation and reach. In addition, Keep the vanity usable with the door open, make sure drawers clear nearby fixtures, and plan where you will stand when you use the sink.

  • Walk-in shower vs. For example, tub/shower: the wet-zone footprint often dictates the best vanity width
  • Single vs. For this reason, double sinks: two basins need more countertop and better lighting coverage
  • Door swings and drawer pulls: the cleanest design still needs practical clearance
  • Plumbing reality: keeping supply and drain lines close to their current location usually saves time and cost

In larger primary baths or connected dressing areas, storage can even follow familiar kitchen patterns. Meanwhile, A galley layout uses two parallel runs (vanity on one side, storage on the other). An L-shape tucks a linen tower or makeup counter on the adjacent wall. A U-shape wraps storage on three sides when the room is wide enough. An island-centered plan is rare, but it can work in very large spaces with a central makeup station or freestanding tub and perimeter vanities.

Small-Space Layouts That Still Feel Open

  • Choose a narrower cabinet and add a recessed medicine cabinet to regain storage
  • Use a wall-mounted or compact faucet to maximize usable countertop depth
  • Consider a single large mirror to visually widen the room
  • Keep towel storage vertical (hooks, slim tower) instead of bulky shelves

Storage Upgrades That Pay Off Daily

  • Full-extension drawers for toiletries (less bending and less lost space)
  • Drawer dividers for hair tools, makeup, and medicine
  • Pull-out hamper or trash where it will not block plumbing access
  • Open shelf zones for baskets when you want a lighter look than closed doors

Finishes That Support Function

When you lock the layout, choose finishes that make cleaning and moisture control easier. Overall, For cabinet doors, shaker profiles feel timeless, slab fronts read modern, and recessed panel doors sit in between. Countertops like quartz, solid surface, or porcelain resist stains and water well; natural stone can look great but needs more care. For flooring, many homeowners choose porcelain tile for durability, while luxury vinyl plank can feel warmer underfoot when installed correctly. Finally, plan layered lighting: ambient overhead light for the room, task light at the mirror, and accent light (including under-vanity) for comfort and safety.

floating vanity modern bathroom interior design with hanging sink

Materials And Finish Options

US Construction & Remodeling Corp. Meanwhile, helps homeowners plan and install wall-hung vanities with proper backing, straight plumbing alignment, and clean finish work, so the cabinet looks intentional and feels solid. We serve Sacramento and other California service areas, and we can scope a vanity upgrade on its own or as part of a full bathroom renovation.

Schedule a free estimate online to review your layout, selections, and a clear scope. Also, If you prefer to talk through options by phone, call +1 (916) 234-6696.

Cabinet Construction And Moisture Resistance

Bathrooms punish cabinetry, so focus on the box construction and edge sealing. Additionally, Plywood boxes hold fasteners well, while moisture-resistant engineered panels can work when the manufacturer seals edges and you keep ventilation in check. Soft-close hardware and full-extension drawer slides make a bigger difference than most people expect.

Countertops, Sinks, And Wall Protection

Quartz and solid surface remain popular because they clean easily and handle splashes. Overall, Porcelain slab tops can look sharp and stay stain-resistant, while marble delivers a high-end look with more maintenance. An integrated sink reduces seams, which also reduces places for grime and water to sit.

Plan the wall surface behind the sink zone at the same time. Also, A tile backsplash or a full-height tile wall behind the vanity protects paint and makes the installation look finished.

Hardware, Mirrors, And Lighting Details

Pick hardware that matches your faucet finish so the room reads cohesive. Additionally, For lighting, aim for even face lighting at the mirror, and add a softer accent layer for night use. When the vanity floats, a strip light underneath can also highlight the open floor and improve safety without blasting the whole room.

Flooring Coordination

Coordinate the vanity selection with the floor transition and base details. Overall, Porcelain tile works well around wet zones, and slip-resistant finishes help in family bathrooms. If you are using vinyl flooring, confirm the product and installation method suit wet areas and that the edges are protected from standing water.

Frequently Asked Questions

It depends on the scope. A simple replacement that keeps plumbing and electrical in the same locations may not need a permit, but opening walls, moving drains/supplies, or adding electrical often does.

  • Keep-in-place swap: often simpler
  • Plumbing relocation or new circuits: commonly permit-triggering
  • When in doubt: check with your local building department

Most homeowners choose a height that feels like a standard counter, but the best height depends on who uses the bathroom. Mock it up with painter’s tape, then confirm mirror and outlet placement before installing.

Solid support behind the wall finish matters most. That usually means anchoring into studs with proper fasteners and adding blocking when the existing framing does not line up with the cabinet mounting points.

For many households, quartz or solid surface tops are the most forgiving. Pair them with an integrated or undermount sink, keep edges sealed, and use a backsplash or tile behind the sink zone to protect the wall.

The price usually rises when the work extends beyond the cabinet swap.

  • Wall reinforcement and drywall/paint repair
  • Plumbing moves (drain/supply relocation)
  • Electrical work (outlets, GFCI, lighting)
  • Countertop, sink, and tile selections

Compare written scopes, not just totals. Ask who handles permits when required, how changes get approved, and what the final walk-through includes. Also verify licensing and insurance before you schedule work.

Leave a comment

This website uses cookies to improve your web experience.
Explore
Drag