
Schluter Trim Guide: Tile Edges Done Right
Clean tile edges make a remodel look finished. In showers, tub surrounds, and backsplashes, schluter trim protects exposed tile edges and keeps corners looking intentional.
Quick checklist:
- Define the scope and your must-have outcome (performance, budget, timeline).
- Confirm what work is involved and the order of operations.
- Finalize measurements and key selections before ordering long-lead materials.
- Collect 2–3 quotes and compare line-by-line (scope, allowances, cleanup, warranty).
- Create a simple schedule and pre-order the items that most often cause delays.
TL;DR: Pick the edge plan (where tile stops, where trim starts) before you order anything. Match the finish to fixtures and lighting so it looks built-in, not bolted on. If your schedule matters, book a short planning call to map timing and next steps.
- Confirm tile thickness and trim height
- Choose a profile shape that fits the style
- Decide how corners will be finished (mitered vs pre-formed)
- Plan where tile will terminate at drywall or paint
- Specify grout and sealant colors up front
- Write the scope so every edge is accounted for
Quality, Safety, And Long-Term Value For Schluter Trim
| Decision | Why it matters | Quick check |
|---|---|---|
| Scope | Defines what is included and prevents surprises. | Write a line-item scope and allowances list. |
| Site constraints | Access and hidden conditions can change the plan. | Check access and existing surfaces before work starts. |
| Selections | Long-lead items can drive the schedule. | Confirm availability before starting. |
| Permits | Some scopes require approvals and inspections. | Ask your city/county what applies to your project. |
- Frame a shower niche with a matching profile for a clean, also picture-frame edge
- Use a square-edge profile for a modern look; choose a rounded profile for softer lines
- Match trim finish to faucets, shower hardware, and cabinet pulls for a coordinated set
- Use contrast only on one feature (like a niche) so the room stays calm
- Finish the outside edge of a half-wall or pony wall with a straight, durable line
- Terminate a backsplash cleanly at a cabinet line instead of leaving a jagged cut edge
- Protect curb, bench, and shelf edges where chips happen most often
- Use trim to “reset” a pattern change without awkward slivers at the edge
- Choose pre-formed corners for consistent joints, or miter corners for sharper geometry
- Coordinate grout and sealant color so the trim reads as a crisp outline, not a patchwork
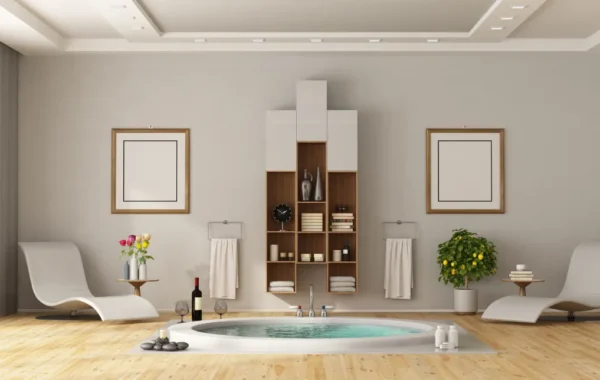
Tile trim looks small, but it carries a lot of weight in the finished result. For this reason, It protects exposed tile edges, softens sharp corners, and makes the whole installation look planned instead of pieced together.
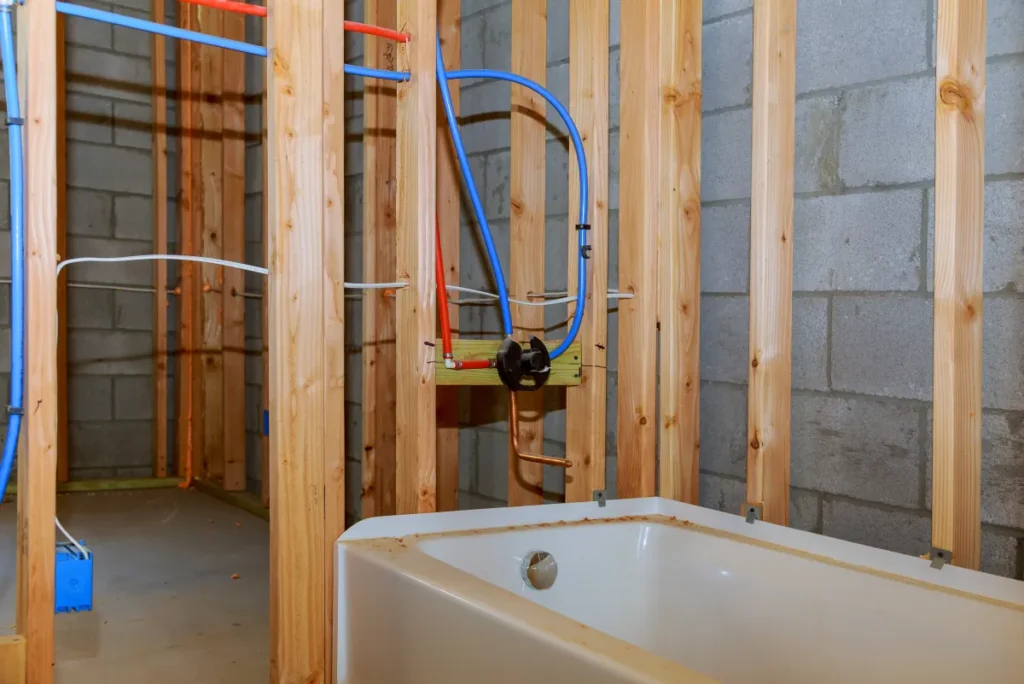
In wet areas, trim is only one part of the system. Additionally, A clean edge still needs a solid substrate, proper waterproofing where required, and the right joints in the right places.
Quality Checks That Matter
Good trim work looks simple because the installer controls the details. For example, A quick review of a few checkpoints can tell you whether the edges will stay straight, clean, and durable over time.
- Trim depth matches the tile-plus-setting-material build so tile sits flush
- Edges run straight and stay consistent from one plane to the next
- Outside corners look intentional (no sharp burrs, no wavy cuts)
- Grout joints line up through the trim detail instead of drifting
- Plane-change joints are treated correctly (sealant where appropriate, not forced grout)
- Trim ends look finished at door jambs, niches, and transitions
- Finish is consistent across the project (no accidental mix of tones)
Planning Mistakes To Avoid
Most trim problems start during planning, not on grout day. Also, These are the issues that commonly cause rework or a “close enough” look.
- Picking a profile before confirming tile thickness and layout
- Forgetting to plan the last tile at the edge, which creates tiny slivers
- Mixing metal finishes without a clear reason, so nothing matches
- Assuming trim will hide uneven walls or out-of-plumb corners
- Skipping corner strategy (miter vs corner pieces) until installation day
- Not calling out every exposed edge in the scope, so some get left raw
- Using abrasive cleaners on metal finishes and dulling them early

Materials And Maintenance Notes For Schluter Trim
Schluter trim comes in a range of materials and finishes, and the right choice depends on the room and how you use it. Overall, The best-looking option is the one that holds up to cleaning, moisture, and daily wear without needing special treatment.
What Fits Where
- Stainless steel: a solid choice for durability, especially in wet zones and high-use areas
- Anodized or coated aluminum: popular for modern finishes; choose cleaners carefully to protect the coating
- PVC profiles: practical in some applications, though the look is usually less “premium” than metal
Where Edges Land
Trim planning is really layout planning. As a result, In a shower, you want visible edges to land in places that look intentional: niche perimeters, the curb edge, the outside vertical edge at the entry, and any transition to painted drywall.
In kitchens, trim often shows up at backsplash terminations and feature panels. Meanwhile, Layout changes the edge story, so it helps to decide early where tile starts and stops:
- Galley kitchen: backsplash runs in long lines, so straight edges and consistent termination points matter
- L-shape: corners and end-caps need a plan to avoid mismatched cuts
- U-shape: more corners mean more opportunities for visible trim transitions
- Island-centered: waterfall edges or feature backsplashes benefit from a consistent profile choice
Finish coordination matters, too. In addition, Cabinet door style (shaker, slab, or raised panel) changes the visual weight of the trim profile, and countertop options (quartz, granite, laminate, or butcher block) influence whether a sharp square edge or a softer profile looks more natural. Flooring choices also influence the read of the space, especially when tile meets LVP or hardwood at a doorway.
Lighting can make or break the look of metal. For example, Plan for layered lighting—ambient light for the room, task light at mirrors or counters, and accent light in niches or toe-kicks—so the trim finish doesn’t shift unexpectedly from warm to cool.
Small-Space Layouts: Detail-Focused Ideas
In small bathrooms and compact showers, trim decisions can reduce visual noise while still looking custom.
- Use a slimmer profile to keep edges crisp without heavy outlines
- Frame one focal feature (like a niche) and keep other edges minimal
- Align niche height with grout lines to avoid “almost” matches
- Keep finish consistent with one metal family to prevent clutter
- Use vertical tile or stacked layouts to make the room feel taller, then terminate edges cleanly
Maintenance Tips You Can Actually Use
- Use a pH-neutral cleaner for tile and grout; avoid harsh acids or abrasives on metal finishes
- Rinse after cleaning and dry metal edges to prevent water spotting
- Inspect sealant joints periodically and address cracks early
- Use a soft brush on grout, not a scouring pad on the trim
Value & ROI (General Guidance)
Trim details rarely drive resale value by themselves, but they do shape the buyer’s impression of quality. Also, Clean edges, consistent corners, and a coordinated finish package read as ‘well-built,’ especially in showers and kitchens where people look closely.
If you’re prioritizing ROI, focus on details that reduce future repairs and keep the space looking sharp:
- Protect high-contact edges (curbs, benches, outside corners, and niche openings)
- Keep finishes consistent across fixtures, trim, and accessories
- Make sure wet-area assemblies are built correctly behind the tile, not just pretty on the surface
- Choose a profile style that fits the home (timeless usually wins over trendy)
Timeline And Expectations
Trim work can be a quick add-on during a tile install, or it can become a larger scope when it’s retrofitted after the fact. For this reason, The fastest path is planning the edges before tile goes on the wall.
How A Trim-Focused Scope Gets Written
- Confirm where tile starts and stops, and list every exposed edge
- Select the profile type, height, material, and finish
- Decide the corner approach (mitered, corner pieces, or a mix)
- Confirm grout and sealant colors for clean lines at transitions
- Coordinate the sequence with related work (plumbing trim-out, glass, paint)
Budget & Timeline (Typical)
- During a new tile install: trim usually adds precision work with minimal schedule impact
- Retrofit after tile is set: limited cases work, but many situations require rework; plan extra time
- Full shower refresh: often needs multiple visits for prep, tile setting, and cure time
- Finish availability: specialty finishes can add waiting time, so confirm early if you have a deadline
Quick Decision Table
| Decision | Why it matters | Typical impact |
|---|---|---|
| Profile height and depth | Controls flushness and edge protection | Affects layout and cut quality |
| Corner strategy | Determines the look at outside edges | Changes labor and finish consistency |
| Material and finish | Sets durability and cleaning needs | Influences long-term appearance |
| Tile format and pattern | Drives grout alignment at the edge | Can increase layout time |
| Scope around wet areas | Affects what’s needed behind the tile | Can add coordination steps |
Hypothetical Before-And-After Example (For Illustration)
Hypothetical example: A homeowner wants a shower update that looks finished without changing the whole bathroom layout.
- Starting point: exposed cut tile edges at the shower entry and a niche with uneven corners that catch soap residue
- Updated detail: a coordinated edge profile at the entry, clean niche framing, and consistent joints that are easier to wipe down
If you’re coordinating around a move-in date, a rental turnover, or a family schedule, get the timeline discussion done early. Additionally, Call +1 (916) 234-6696 to talk through the scope and sequencing.

Book A Free Estimate In Sacramento
US Construction & Remodeling Corp. As a result, helps Sacramento homeowners plan and install schluter trim details as part of shower upgrades, tile projects, and broader home remodels. Also, You’ll get clear scope, practical finish guidance, and a timeline conversation that matches how you actually live in the space.
Book your free estimate to talk timeline, finish options, and edge details. Prefer the phone? Call +1 (916) 234-6696.
Trust & Accountability (Quick)
- License and insurance: verify documentation before any work begins, and confirm the contractor is active in California
- Permits: some scopes require permits depending on the work and jurisdiction; clarify responsibility in writing
- Communication: agree on who your point of contact is and how updates will be delivered
- Workmanship verification: review edge lines, corners, and joints on-site before final sign-off
- Sacramento note: when permits apply for City of Sacramento addresses, status tracking typically runs through the Community Development portal (Accela Citizen Access)
Helpful Links
Frequently Asked Questions
Homeowners use schluter trim to finish exposed tile edges at corners, niches, curbs, benches, and transitions to drywall. It protects tile from chipping and helps the installation look intentional.
Start with tile thickness and layout, then pick a profile that matches the style of the room.
- Confirm the trim height fits the tile plus setting material
- Choose square profiles for modern lines and rounded profiles for softer edges
- Match the finish to nearby fixtures and hardware
Sometimes, but it depends on how the existing edges were built. Many retrofits require removing and resetting tile to get a clean, durable result, especially at outside corners and wet-area transitions.
Timing depends on scope and site conditions. Trim added during a tile install can be quick, while a full shower refresh often needs multiple visits for prep, installation, and cure time.
It depends on what the project includes. Cosmetic tile work may not trigger permits, while changes to plumbing, electrical, or structural elements often do. A contractor should explain the likely path for your specific scope and jurisdiction.
Look for clarity on what edges are included and how they will be finished.
- List of every exposed edge (outside corners, niche perimeters, curb, transitions)
- Profile type, material, finish, and corner method
- Grout and sealant plan at plane changes
- Schedule assumptions and any dependencies on other trades
Licensed, insured & trusted local contractor
US Construction & Remodeling Corp.
9821 Business Park Dr, Sacramento, CA, 95827
Phone: +1 (916) 234-6696
CSLB License #: 1117562 Fully licensed and insured.
Frequently Asked Questions
Homeowners use schluter trim to finish exposed tile edges at corners, niches, curbs, benches, and transitions to drywall. It protects tile from chipping and helps the installation look intentional.
Start with tile thickness and layout, then pick a profile that matches the style of the room.
- Confirm the trim height fits the tile plus setting material
- Choose square profiles for modern lines and rounded profiles for softer edges
- Match the finish to nearby fixtures and hardware
Sometimes, but it depends on how the existing edges were built. Many retrofits require removing and resetting tile to get a clean, durable result, especially at outside corners and wet-area transitions.
Timing depends on scope and site conditions. Trim added during a tile install can be quick, while a full shower refresh often needs multiple visits for prep, installation, and cure time.
It depends on what the project includes. Cosmetic tile work may not trigger permits, while changes to plumbing, electrical, or structural elements often do. A contractor should explain the likely path for your specific scope and jurisdiction.
Look for clarity on what edges are included and how they will be finished.
- List of every exposed edge (outside corners, niche perimeters, curb, transitions)
- Profile type, material, finish, and corner method
- Grout and sealant plan at plane changes
- Schedule assumptions and any dependencies on other trades


