
Siding Timeline in Alameda: A Homeowner Planning Guide
If you’re searching for a siding timeline alameda homeowners can plan around, the goal is simple: know what happens when, and lock in the choices that usually cause delays.
Quick checklist:
- Pick a siding material and finish that matches climate and maintenance goals.
- Confirm moisture management details (housewrap, flashing, caulking) in writing.
- Define the full scope (trim, soffit/fascia, paint, insulation upgrades).
- Confirm access/safety plan and how landscaping/property will be protected.
- Compare 2–3 itemized quotes and verify warranty coverage.
- Check permit requirements if altering exterior walls or doing structural repairs.
TL;DR: Decide the siding material and finish before you order, and set a realistic plan for any hidden repairs behind the old siding. If permits or inspections apply, start that conversation early so the crew doesn’t sit and wait. Call +1 (916) 234-6696 or request a written estimate online.
- Pick the material (vinyl, fiber cement, wood) and the finish (painted vs factory-finished)
- Decide if you want full replacement or only certain walls
- Ask how rot or damaged sheathing will be handled (allowance vs time-and-material)
- Confirm whether permits/inspections are necessary for your exact scope
- Verify material lead time and a realistic start date
- Agree on daily cleanup, protection, and where debris will go
How To Hire For Siding Timeline In Alameda (Without Guesswork) For Siding Timeline Alameda
| Decision | Why it matters | Quick check |
|---|---|---|
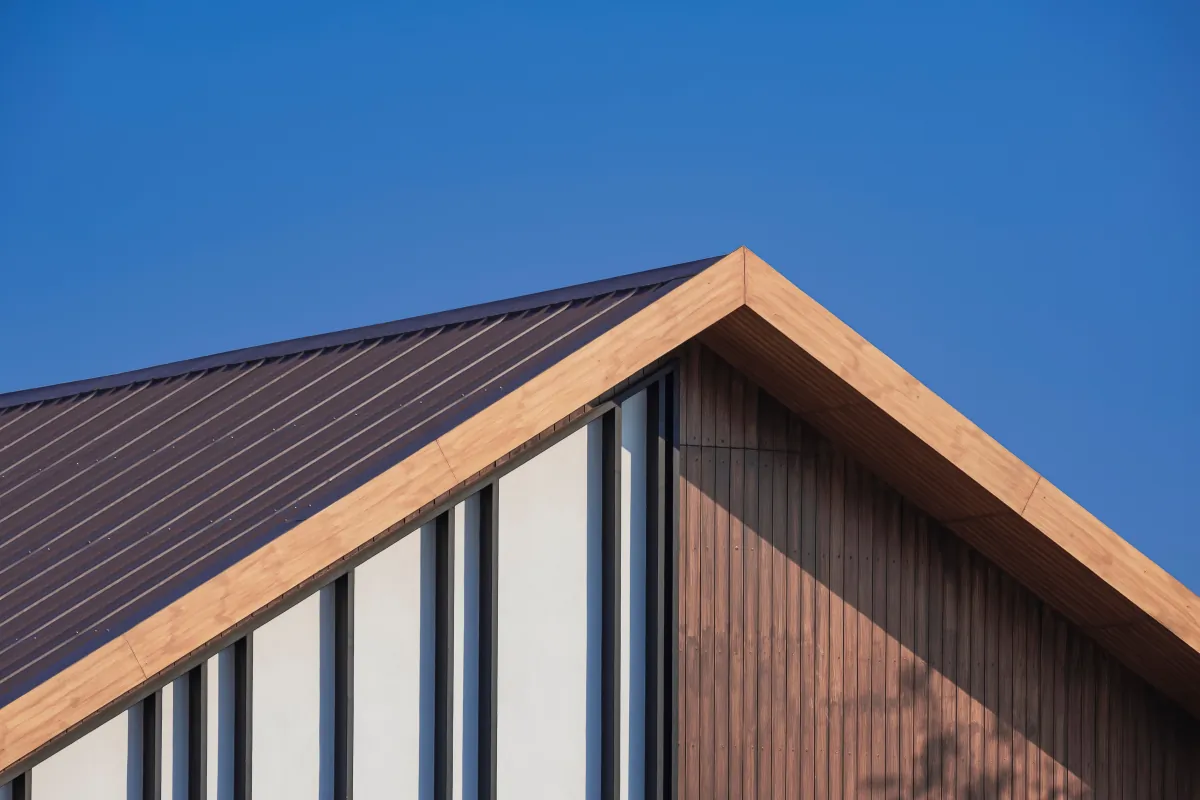
| Material choice | Durability and maintenance differ by material. | Compare fiber cement vs vinyl and verify warranties. |
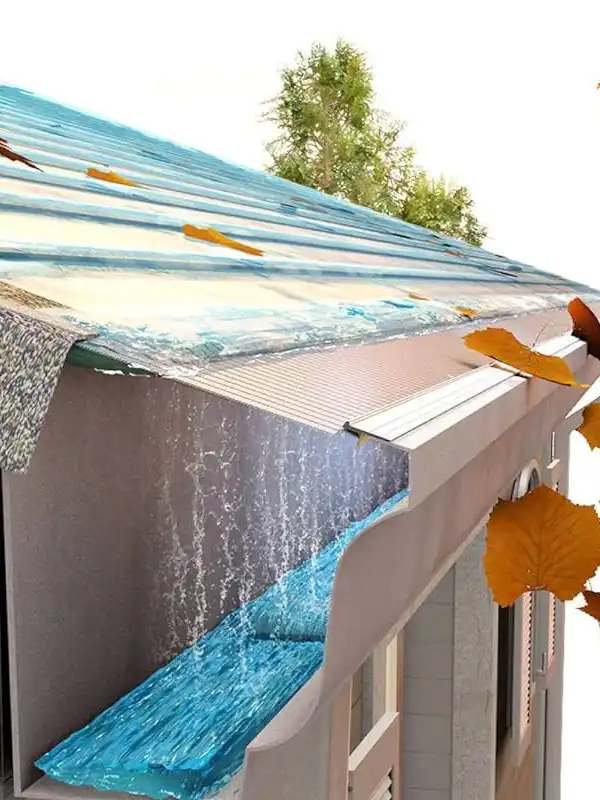
| Moisture management | Water control prevents rot and mold. | Confirm housewrap and flashing details around openings. |
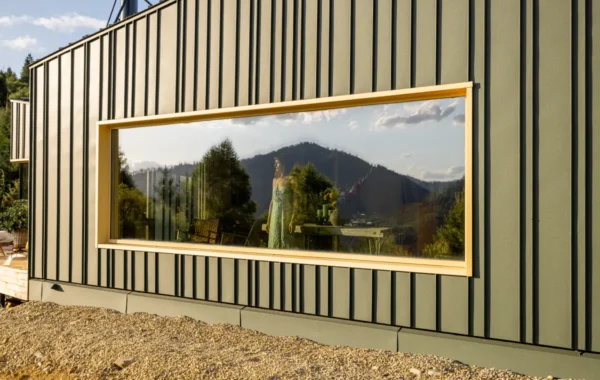
| Trim & transitions | Details control fit and long-term sealing. | Specify corners, soffit/fascia scope, and finish plan. |
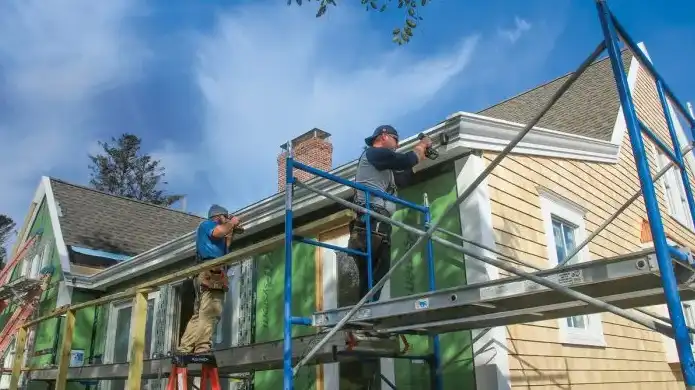
| Access & protection | Staging affects speed, cost, and safety. | Plan scaffolding, landscaping protection, and cleanup. |
A siding schedule stays on track when the scope is clear and the contractor can plan around real constraints: material lead times, access, and any inspections. A vague bid usually turns into delays. You can avoid that by hiring based on details, not just a total price.
What A Useful Timeline Includes
- Projected start date and expected working days (not calendar days)
- Material order date and delivery window
- Daily work hours and who supervises the crew
- How the crew will protect landscaping, windows, and entryways
- How repairs behind the siding will be approved and scheduled
Questions To Ask Before You Hire
- What siding system are you proposing, and why is it a fit for this house?
- Will you remove the existing siding or install over it?
- What’s included in trim, flashing, caulk, and paint/touch-ups?
- How do you document progress (photos, daily notes, punch list)?
- Who do I contact the same day if something changes?
Common Mistakes That Stretch The Schedule
These are the issues that most often blow up timing on siding projects, even with good crews.
- Choosing materials after demolition starts (lead times can pause the job)
- Skipping a written repair allowance for rot or damaged sheathing
- Comparing bids that don’t match on tear-off, disposal, or trim details
- Assuming permits aren’t needed without checking the City requirements for the scope
- Not planning access for vehicles, dumpsters, and safe walkways for the household

Bid Comparison Checklist (Apples-To-Apples) For Siding Timeline Alameda
If two bids don’t describe the same work, the timelines won’t compare either. Use this checklist to get each contractor quoting the same scope, so you can judge price and schedule fairly.
Items That Should Be Written In Every Bid
- Siding material, profile, thickness, and color/finish
- Removal plan: full tear-off vs overlay, plus disposal method
- Weather barrier (often called housewrap) and how seams will be taped
- Flashing details (thin waterproof pieces that direct water away) at windows/doors
- Trim scope: corners, fascia, soffit interfaces, and transitions to other materials
- Caulk/finish expectations and touch-up responsibilities
Apples-To-Apples Questions (Copy/Paste)
- What conditions would extend the schedule, and how do you handle them?
- How do you price hidden damage repairs (rate sheet, allowance, or change order)?
- Who is responsible for permits and inspection scheduling if required?
- What is your cleanup plan each day, and where will debris be staged?
- What is the payment schedule tied to (milestones vs dates)?
| Decision / cost driver | Why it matters | Possible schedule impact |
|---|---|---|
| Hidden rot repairs | Repairs can’t be priced until siding is opened | Adds 1–5+ days depending on extent |
| Material lead time | Some colors/profiles ship slower | Can add days to weeks before start |
| Painted vs factory-finished | On-site paint needs dry time and prep | Adds 1–4 days for prep/finishing |
| Permits/inspections | Some scopes require review and sign-off | May shift start date or add waiting days |
When a bid looks short, ask what’s missing. If it doesn’t spell out water-management details (housewrap, flashing, and trim transitions), you’re not really comparing the same job.

Contract Basics (Payment Schedule, Scope)
A clear contract protects your budget and your calendar. The two areas that prevent most disputes are scope (exactly what’s included) and how changes are approved. If you see the word “allowance,” ask what it covers and what happens if the real cost is higher.
If you want a written estimate you can compare, ask for line-item detail and a schedule that matches the scope. US Construction & Remodeling Corp. provides written estimates for Alameda homeowners that spell out materials, assumptions, and what would trigger a change order.
Payment Schedule Basics (Homeowner-Friendly)
- Use milestone payments tied to completed work, not just dates on a calendar
- Keep a final payment for the punch list, cleanup, and any required inspection sign-off
- Make sure the contract states what triggers each payment (deliveries, install stages)
Scope Language That Keeps The Timeline Stable
- Exact siding areas covered (all elevations vs selected walls)
- Who handles trim removal/reinstall and how corners/transitions will look
- How the crew will handle discovered damage (rot, pests, water intrusion)
- Protection plan for windows, plants, walkways, and any outdoor fixtures
- Communication plan: who updates you, how often, and what happens if you’re away
Permit Notes For Alameda Homes
Permit needs depend on the exact scope and address. In Alameda, many building and planning applications and status checks run through the City’s online permit portal (Accela). If your siding project includes structural repair, changes to exterior openings, or other code-triggering work, permits and inspections may apply.
Ask each bidder to state in writing whether they expect permits, who will pull them, and who schedules inspections. If permits are necessary, build that time into the start date so your job doesn’t get pushed mid-project.
Frequently Asked Questions
Most siding projects fall into a range because scope and hidden repairs matter. A smaller, straightforward replacement may take about a week of on-site work. Larger homes, complex trim, or widespread repairs behind the siding can push that into multiple weeks.
The cleanest way to plan is to separate the schedule into: (1) decisions and estimating, (2) permits if required, (3) material ordering, and (4) installation and finish work. Your contractor should be able to explain which part is the longest for your project and what can be done early to reduce waiting.
Sometimes. Permit requirements depend on what you’re changing, not just that you’re touching the exterior. If the work includes structural repairs, changes to windows/doors, or other code-triggering items, permits and inspections may apply.
In Alameda, many permit steps and status tracking run through the City’s online portal (Accela). Ask your contractor to state (in writing) whether they expect a permit for your scope, who will pull it, and how inspections will be scheduled. When in doubt, confirm with the City for your exact address and scope.
Pricing depends on the size of the home, the material you choose, how much trim work is involved, and what the crew finds once the old siding comes off. The biggest “surprise” cost driver is hidden damage—rot or deteriorated sheathing (the wood panels behind siding) that needs repair.
- Material: vinyl, fiber cement, and wood each price differently
- Prep and protection: protecting landscaping and access areas takes time
- Repairs: allowances vs time-and-material changes the final total
- Finish: on-site painting adds labor and days
The most reliable way to control cost is to get a detailed, written estimate that spells out what is included and how repairs will be handled.
Vinyl often installs faster because it’s lightweight and usually arrives factory-finished. Fiber cement can take longer because it’s heavier, involves more cutting, and may need additional finishing steps depending on the product.
“fastest” isn’t always “best for your home.” The right choice depends on your goals for appearance, durability, and maintenance. Ask your contractor to explain the material lead time, whether painting is necessary, and how the chosen system handles water management details like flashing and trim transitions.
You can’t eliminate every unknown, but you can reduce surprises with better documentation. The contract should describe the exact siding areas, the trim scope, and the approach to repairs behind the siding.
- Use a written repair allowance for likely hidden damage
- Require photos and a written price + time impact for any change
- Make selections (color, trim style, finish) before ordering materials
- Confirm access needs for deliveries and debris removal
If a change order comes up, slow down and get it in writing before work continues.
Clear info up front leads to a more accurate price and a more reliable schedule. Here’s what helps most.
- Your address and any access notes (gates, tight driveways, parking rules)
- Photos of each side of the home, plus closeups of damaged areas
- The material you prefer (or two options you’re deciding between)
- Any HOA requirements, color rules, or exterior change approvals
- Your target window for start and completion
If you’re not sure what you want yet, that’s okay—just say so. A good estimate can include option pricing and timelines.
Walk the perimeter in daylight and look for clean, consistent workmanship. Pay close attention to water-management details around windows, doors, and corners—this is where leaks start if the installation is sloppy.
- Even lines and tight joints
- Neat trim transitions and sealed gaps
- No loose panels, cracked boards, or exposed fasteners
- Site cleanup completed (including nails and debris)
If permits applied, confirm you have any required inspection sign-off. Keep a short punch list and release final payment after it’s completed.


