Skip links

Kitchen Remodeling vs DIY in San Francisco: Planning, Permits, and Practical Decisions

Debating whether to hire help or tackle it yourself? For many homeowners, kitchen remodeling vs diy in San Francisco comes down to how much you’re changing—layout, utilities, and surfaces—and how much downtime you can tolerate. US Construction & Remodeling Corp. can translate your wish list into a clear scope and a written estimate before you commit.

Quick checklist:

  • Define the scope and your must-have outcome (performance, budget, timeline).
  • Confirm what work is involved and the order of operations.
  • Finalize measurements and key selections before ordering long-lead materials.
  • Collect 2–3 quotes and compare line-by-line (scope, allowances, cleanup, warranty).
  • Create a simple schedule and pre-order the items that most often cause delays.

TL;DR: DIY fits cosmetic updates and simple swaps when the layout stays put. Once cabinets, plumbing, electrical, or inspections enter the picture, a licensed contractor usually brings better sequencing and fewer costly do-overs.

  • Are you keeping the same layout (sink, range, fridge)?
  • Will you touch plumbing, gas, or electrical circuits?
  • Do you need new cabinets or just new doors/hardware?
  • Are countertops being templated and fabricated off-site?
  • Can you live without a functional kitchen for weeks?
  • Do you want permits and inspections coordinated for you?

Planning, Permits, And Practical Decisions For Kitchen Remodeling Vs DIY

DecisionWhy it mattersQuick check
ScopeDefines what is included and prevents surprises.Write a line-item scope and allowances list.
Site constraintsAccess and hidden conditions can change the plan.Check access and existing surfaces before work starts.
SelectionsLong-lead items can drive the schedule.Confirm availability before starting.
PermitsSome scopes require approvals and inspections.Ask your city/county what applies to your project.
  • Keep the layout, also upgrade the look: new cabinet doors, hardware, and fresh paint.
  • Pick a low-maintenance countertop (quartz or solid surface) that cleans fast.
  • Add layered lighting: recessed ambient plus bright task lighting at prep areas.
  • Use under-cabinet lights to eliminate shadows on the countertop.
  • Go full-height backsplash behind the range for easier wipe-down.
  • Swap base cabinets for deep drawers so storage works the way you cook.
  • Add a pull-out trash and recycle center near the main prep zone.
  • Choose a cabinet door style (Shaker, slab) that fits your home’s character.
  • Improve ventilation so heat and odors leave the kitchen, not just the hood.
  • Plan outlets where you actually use appliances, not just where walls exist.

DIY can stretch your budget, but it also shifts risk onto you. Overall, Paint, hardware, and other cosmetic updates can be manageable if you protect surfaces, control dust, and plan for haul-away. Additionally, Once you start moving utilities or opening walls, coordination and code compliance matter more than any single finish.

A Quick Filter

  • Keep layout: staying in the same footprint reduces complexity and usually keeps DIY options open.
  • Move plumbing/gas: relocating a sink or range often requires trade work and inspections.
  • Cabinets and counters: precision installation affects doors, drawers, seams, and long-term durability.
  • Electrical and lighting: new circuits, GFCI/AFCI protection, and can lighting benefit from a pro plan.
  • Downtime: the longer the kitchen is offline, the more you feel it day-to-day.

ROI And Resale Priorities

If resale value is on your mind, prioritize function and build quality over novelty. As a result, Buyers notice an efficient layout, sturdy cabinetry, solid lighting, and clean finish work. When permits apply, keeping work documented and inspected can also reduce headaches later.

kitchen flooring stylish scandinavian open space interior of kitche

Planning Checklist (Scope, Materials, Budget) For Kitchen Remodeling Vs DIY

Planning is where DIY projects either stay controlled or spiral. In addition, A contractor-led remodel typically front-loads measurements, drawings, selections, and sequencing around inspections and lead times. As a result, You can still plan like a pro, even if you DIY parts of the work.

Scope, Materials, Budget: Planning Checklist

  • Measure the room and note window/door swings, soffits, and vent locations.
  • Map the “work triangle” (sink, range, fridge) and keep walkways practical.
  • Decide what stays: flooring, appliances, or existing cabinet boxes.
  • List every trade touch: electrical, plumbing, gas, drywall, tile, flooring, paint.
  • Choose finish levels now (cabinet grade, countertop type, hardware, tile size).
  • Plan temporary kitchen needs: coffee, microwave, dishwashing, trash.
  • Set a decision deadline for long-lead items (cabinets, counters, specialty tile).

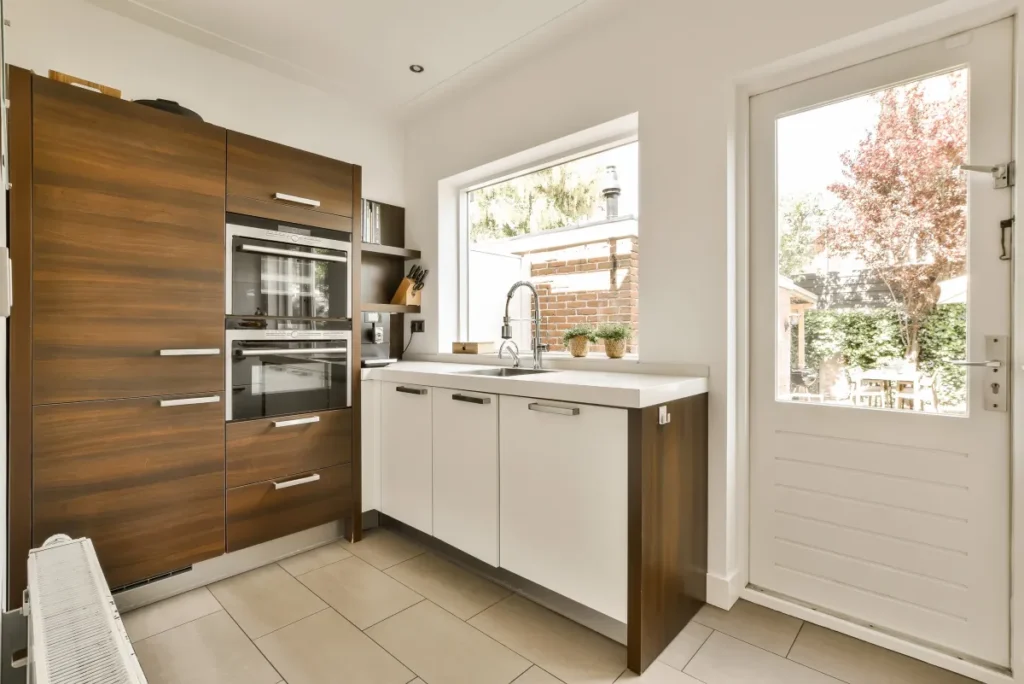
Layout Planning (Galley, L-Shape, U-Shape, Island-Centered)

Layout changes drive cost and complexity. They also decide whether DIY is realistic.

  • Galley: great for tight spaces; prioritize clear aisle width and strong task lighting.
  • L-shape: opens a corner and creates a natural prep run; consider a pantry tower at one end.
  • U-shape: maximizes counter space; watch for cramped corners and plan lazy Susan or pull-outs.
  • Island-centered: adds prep and seating; confirm clearances and plan power for small appliances.

If you keep plumbing and gas where they are, you can upgrade function without ripping open everything. For this reason, When you move utilities, the project becomes more trade-heavy and inspection-driven.

Small-Kitchen Layout Moves That Pay Off

  • Use tall uppers or stacked cabinets for vertical storage.
  • Choose drawer bases for heavy cookware; they waste less space than shelves.
  • Add a narrow pull-out pantry beside the fridge or range.
  • Consider a rolling island or slim peninsula when a full island won’t clear.
  • Pick an undermount sink to gain usable counter edge space.
  • Use light, consistent finishes to keep the room from feeling chopped up.

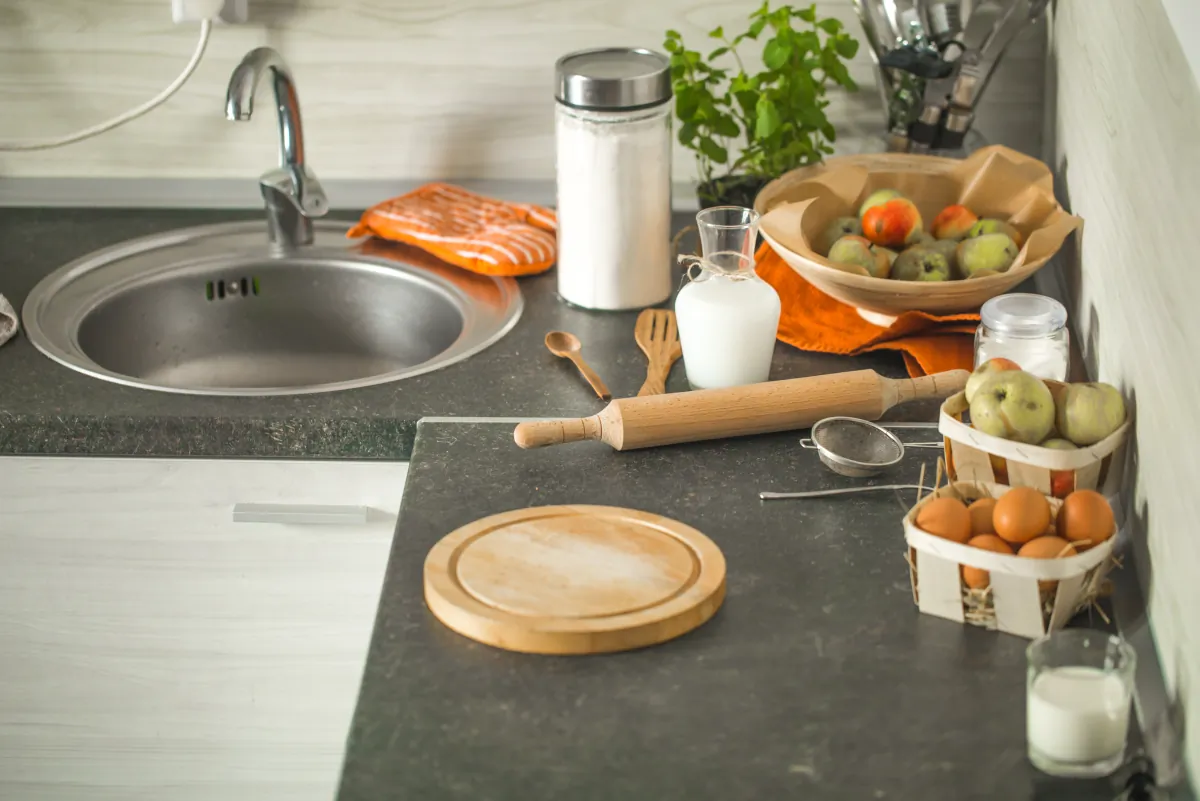
Cabinets, Counters, Flooring, And Tile

Material choices affect both DIY difficulty and long-term maintenance. Also, Focus on durable surfaces and repeatable details, not one-off custom tricks.

  • Cabinet boxes: plywood often holds screws and hinges better than particle board, but build quality varies by line.
  • Door styles: Shaker suits most homes; slab gives a cleaner look; raised panels read more traditional.
  • Finishes: factory finishes usually wear better than on-site paint, especially around sinks and dishwashers.

Countertops: Quartz is popular for low-porosity performance; granite is natural and heat-tolerant; butcher block is warm but needs regular sealing; laminate is budget-friendly and easy to clean when seams stay tight.

Flooring: Porcelain tile handles water well; luxury vinyl plank offers comfort underfoot; engineered wood looks great but needs moisture discipline. For example, Match the choice to your cooking habits and how you clean.

Backsplash tile: Larger tiles mean fewer grout lines. Meanwhile, Smaller mosaics can look great but take more time and show grout maintenance faster.

Fixtures and hardware: Choose a faucet with readily available cartridges and a finish you can maintain. Additionally, For pulls and knobs, buy a few extras so future repairs still match.

Layered Lighting Plan (Ambient, Task, Accent)

  • Ambient: recessed lights or a central fixture for overall room light.
  • Task: under-cabinet lighting and pendants aimed at prep zones.
  • Accent: toe-kick lighting or in-cabinet glass lighting for depth.

Plan switching early. For example, A simple, well-zoned lighting plan often feels like a bigger upgrade than a pricier countertop.

Budget Guardrails Without Guesswork

Instead of chasing a single number, break the project into buckets: cabinets, counters, trade work, flooring, tile, fixtures, paint, and disposal. In addition, That makes it easier to decide where DIY effort helps and where it adds risk.

  • Spend more on cabinets and installation if you want smooth doors, tight reveals, and drawers that last.
  • Reserve flexibility for “behind-the-walls” work; once demo starts, conditions can differ from what you expected.
  • Get product specs in hand before ordering: appliance cut sheets, sink dimensions, and hood requirements.

Permits And Inspections (General)

Permits aren’t about red tape; they’re about safety and documented compliance when you change structure, plumbing, gas, or electrical. For this reason, Even with DIY work, you still need to follow the same rules, and inspections can affect sequence.

San Francisco Permitting Note

San Francisco’s Department of Building Inspection (DBI) supports online permit tracking. For example, Depending on scope, some residential projects may qualify for faster or more online-friendly permit paths. Additionally, A quick check with DBI (or a contractor familiar with the process) helps you avoid scheduling work that can’t be closed up yet.

Inspection Touchpoints To Plan For

  • Rough plumbing and electrical checks before walls close.
  • Countertop templating after cabinets are installed and level.
  • Final inspection after fixtures, outlets, appliances, and ventilation are in place.

Key Milestones

A pro-led remodel often moves faster because materials and trades are sequenced. Additionally, DIY can work, but weekends and rework stretch the calendar quickly.

  • Design decisions and measurements (layout, cabinet plan, appliance specs)
  • Selections and ordering (cabinets, countertops, tile, fixtures, lighting)
  • Permitting and scheduling (as needed based on scope)
  • Demolition and prep (protection, dust control, disposal)
  • Rough-in work (plumbing, electrical, ventilation)
  • Inspections (where required) and close-up (drywall, paint)
  • Cabinet installation, then countertop template and install
  • Backsplash, flooring transitions, fixtures, and final punch list
DecisionDIY fitTime/cost drivers
Keep existing layoutHigherLess trade work, fewer inspection steps
Move plumbing or gasLowerRough-in, access behind walls, inspection sequencing
New cabinetsMediumLead time, delivery, leveling, precision install
Stone/quartz countersLowerTemplate, fabrication, install scheduling
Electrical upgradesMediumCircuits, lighting plan, device placement, inspections

Budget Ranges & Timeline (Typical)

  • Cosmetic refresh: often measured in days to a couple of weeks when layout and utilities stay put.
  • Mid-scope update: often several weeks when cabinets and counters change but utilities stay close to original.
  • Full remodel: plan for multiple months once layout changes, permitting, and lead times are involved.
  • DIY pace: depends on your availability; weekend-only work can stretch any timeline.

Common Mistakes To Avoid

Most kitchen DIY failures aren’t about taste. Additionally, They come from missing measurements, rushed ordering, and skipping the “boring” steps that keep work safe and inspectable.

  • Ordering cabinets before confirming appliance specs and clearances.
  • Underestimating how “out of level” walls and floors affect cabinet installation.
  • Choosing countertops without planning for seams, overhang support, and sink cutouts.
  • Skipping ventilation planning, then living with lingering odors and moisture.
  • Putting lighting on one switch, making the room harsh or dim at the wrong times.
  • Starting demo without a plan for trash, dust control, and surface protection.
  • Trying to DIY plumbing or electrical without understanding code and inspection steps.
  • Picking trendy materials that stain, scratch, or show every fingerprint in daily use.
  • Leaving too little time for tile and grout curing before using the kitchen normally.
  • Not documenting changes, which makes future repairs and upgrades harder.

Maintenance Tips To Keep The New Kitchen Looking New

  • Wipe spills quickly, especially around sinks and seams.
  • Use pH-neutral cleaners on stone and quartz; avoid harsh abrasives on finished cabinets.
  • Check and refresh caulk at sink edges and backsplashes when it starts to separate.
  • Use cutting boards and trivets; even tough surfaces last longer with basic habits.
  • Clean hood filters regularly so ventilation stays effective.
  • Tighten cabinet pulls and adjust hinges when doors settle after installation.
  • Seal grout where appropriate and avoid leaving standing water on floors.
kitchen flooring slim caucasian female cook countertop

Next Step In San Francisco

US Construction & Remodeling Corp. For this reason, helps San Francisco homeowners compare DIY options with full-service kitchen remodeling, so you can make decisions with real scope, sequencing, and finish expectations.

What To Have Ready

Request a written estimate and include a few photos, rough measurements, and your must-have list (appliances, cabinet style, countertops, and lighting goals). Additionally, You’ll get clearer pricing when selections are specific.

If you prefer to talk it through, call +1 (916) 234-6696.

Trust And Accountability Checklist

  • License and insurance: ask for current coverage and verify contractor status through California resources.
  • Permits: confirm who pulls permits when your scope requires them and how inspections will be scheduled.
  • Written scope: look for line-item clarity on cabinets, counters, trades, and finish work.
  • Change control: approve changes in writing before extra work begins.
  • Jobsite protection: plan for dust containment, floor protection, and a safe path for materials.
  • Walkthrough: test drawers, doors, outlets, lighting zones, and ventilation before sign-off.

Helpful Links

Frequently Asked Questions

It depends on what you change. Work that alters structure, plumbing, gas, electrical, or certain ventilation setups often triggers permits and inspections. For San Francisco, DBI is the authority for permit guidance and online tracking.

  • Keeping cabinets in place and repainting is typically simpler.
  • Moving a sink, adding circuits, or opening walls usually requires more oversight.
  • When in doubt, confirm requirements before scheduling demo or ordering materials.

DIY can be a good fit for cosmetic upgrades and simple replacements, as long as you keep safety and code in mind.

  • Paint, cabinet hardware, and basic trim work
  • Floating shelves or pantry organization systems
  • Backsplash tile for experienced DIYers with proper surface prep
  • Light fixture swaps where wiring already exists (done safely)

Once you move plumbing, change circuits, or install full cabinets and stone counters, most homeowners benefit from a contractor-led plan and coordination.

When weighing kitchen remodeling vs diy, the biggest cost swings usually come from choices that affect labor, lead time, and trade work.

  • Cabinet quality and installation complexity
  • Countertop type and fabrication (especially stone/quartz)
  • Layout changes that move plumbing, gas, or electrical
  • Flooring replacement and subfloor repairs
  • Appliance upgrades and ventilation requirements

A detailed scope and specific selections make estimates more reliable.

Contractor-led remodels tend to compress the schedule because ordering, trade sequencing, and inspections are planned up front. DIY timelines vary widely; if you can only work nights and weekends, the same scope can stretch much longer.

Either way, plan around two common slow points: product lead times (cabinets and counters) and inspection timing when permits apply.

For most households, durability and easy cleaning beat novelty. Match materials to your cooking habits and how much maintenance you’ll tolerate.

  • Cabinet doors: Shaker is versatile; slab reads modern; factory finishes usually hold up best.
  • Countertops: Quartz is low-porosity; granite is natural and heat-tolerant; butcher block needs regular sealing.
  • Flooring: Porcelain tile handles water well; quality vinyl plank is comfortable; engineered wood needs moisture discipline.

If you want minimal upkeep, prioritize good ventilation and easy-to-clean surfaces around the range and sink.

Pick a contractor the same way you’d pick a design: look for clarity, not hype.

  • Ask for a written scope that matches your selections and layout.
  • Confirm who coordinates permits and inspections when required.
  • Review the proposed schedule and how updates will be communicated.
  • Check that insurance and license status are current (no need to rely on review sites).
  • Make sure change requests are priced and approved in writing.

If you’re comparing bids in San Francisco, request the same level of detail from each contractor so you can compare apples to apples.

Licensed, insured & trusted local contractor

US Construction & Remodeling Corp.
9821 Business Park Dr, Sacramento, CA, 95827
Phone: +1 (916) 234-6696

CSLB License #: 1117562 Fully licensed and insured.

View our Google Business Profile

Related service

Looking for a step-by-step overview before you choose materials? Read Kitchen Remodeling.

Frequently Asked Questions

It depends on what you change. Work that alters structure, plumbing, gas, electrical, or certain ventilation setups often triggers permits and inspections. For San Francisco, DBI is the authority for permit guidance and online tracking.

  • Keeping cabinets in place and repainting is typically simpler.
  • Moving a sink, adding circuits, or opening walls usually requires more oversight.
  • When in doubt, confirm requirements before scheduling demo or ordering materials.

DIY can be a good fit for cosmetic upgrades and simple replacements, as long as you keep safety and code in mind.

  • Paint, cabinet hardware, and basic trim work
  • Floating shelves or pantry organization systems
  • Backsplash tile for experienced DIYers with proper surface prep
  • Light fixture swaps where wiring already exists (done safely)

Once you move plumbing, change circuits, or install full cabinets and stone counters, most homeowners benefit from a contractor-led plan and coordination.

When weighing kitchen remodeling vs diy, the biggest cost swings usually come from choices that affect labor, lead time, and trade work.

  • Cabinet quality and installation complexity
  • Countertop type and fabrication (especially stone/quartz)
  • Layout changes that move plumbing, gas, or electrical
  • Flooring replacement and subfloor repairs
  • Appliance upgrades and ventilation requirements

A detailed scope and specific selections make estimates more reliable.

Contractor-led remodels tend to compress the schedule because ordering, trade sequencing, and inspections are planned up front. DIY timelines vary widely; if you can only work nights and weekends, the same scope can stretch much longer.

Either way, plan around two common slow points: product lead times (cabinets and counters) and inspection timing when permits apply.

For most households, durability and easy cleaning beat novelty. Match materials to your cooking habits and how much maintenance you’ll tolerate.

  • Cabinet doors: Shaker is versatile; slab reads modern; factory finishes usually hold up best.
  • Countertops: Quartz is low-porosity; granite is natural and heat-tolerant; butcher block needs regular sealing.
  • Flooring: Porcelain tile handles water well; quality vinyl plank is comfortable; engineered wood needs moisture discipline.

If you want minimal upkeep, prioritize good ventilation and easy-to-clean surfaces around the range and sink.

Pick a contractor the same way you’d pick a design: look for clarity, not hype.

  • Ask for a written scope that matches your selections and layout.
  • Confirm who coordinates permits and inspections when required.
  • Review the proposed schedule and how updates will be communicated.
  • Check that insurance and license status are current (no need to rely on review sites).
  • Make sure change requests are priced and approved in writing.

If you’re comparing bids in San Francisco, request the same level of detail from each contractor so you can compare apples to apples.

Leave a comment

  1. Tyvek house wrap: hiring guide for homeowners | US Construction
    Permalink
This website uses cookies to improve your web experience.
Explore
Drag