
Can I Renovate My Own Bathroom
If you’re searching “can i renovate my own bathroom,” you’re probably weighing DIY confidence against budget and the risk of finding surprises once demolition starts. A bathroom is a wet room with tight tolerances, so planning matters as much as picking finishes—especially in California, where permit needs can change with scope.
Quick checklist:
- Define the scope and prioritize daily function (shower, storage, ventilation).
- Confirm what trade work is involved (plumbing, electrical, drywall) and the order of work.
- Choose finishes that hold up in wet areas and are easy to clean.
- Collect 2–3 quotes and compare line-by-line (scope, allowances, cleanup, warranty).
- Decide what needs to be ordered first (tile, fixtures, vanity) to keep the schedule moving.
TL;DR: DIY can make sense for surface-level upgrades when the layout and plumbing stay put. When you’re rebuilding a shower, moving plumbing, or touching electrical, many homeowners bring in a contractor to keep the work code-compliant and inspection-ready.
- Decide if you’re keeping the same layout
- Choose your shower waterproofing approach before tile
- Check permit needs with your local building department
- Order long-lead items early (vanity, tile, glass)
- Plan ventilation + lighting upgrades, not just finishes
- Set aside a contingency for hidden damage
Want a straightforward go/no-go answer for your home? Call +1 (916) 234-6696 to talk it through with US Construction & Remodeling Corp. (phone consults are fastest), or request an appointment online if that’s easier.
Why Homeowners Hire Help For Can I Renovate My Own Bathroom
| Decision | Why it matters | Quick check |
|---|---|---|
| Wet-area finishes | Wet zones need durable, easy-clean surfaces. | Choose materials rated for bathrooms and simple maintenance. |
| Ventilation | Helps prevent humidity and long-term damage. | Confirm fan sizing and vent routing. |
| Layout | Good layout improves daily usability. | Verify clearances and door swings. |
| Budget control | Keeps scope creep from blowing up the price. | Use allowances and a written change-order process. |
- Keep the existing plumbing locations while upgrading fixtures
- Convert a tub to a walk-in shower (when framing and drain allow)
- Add a recessed shower niche or corner shelf
- Use large-format wall tile to reduce grout lines
- Choose slip-resistant porcelain floor tile
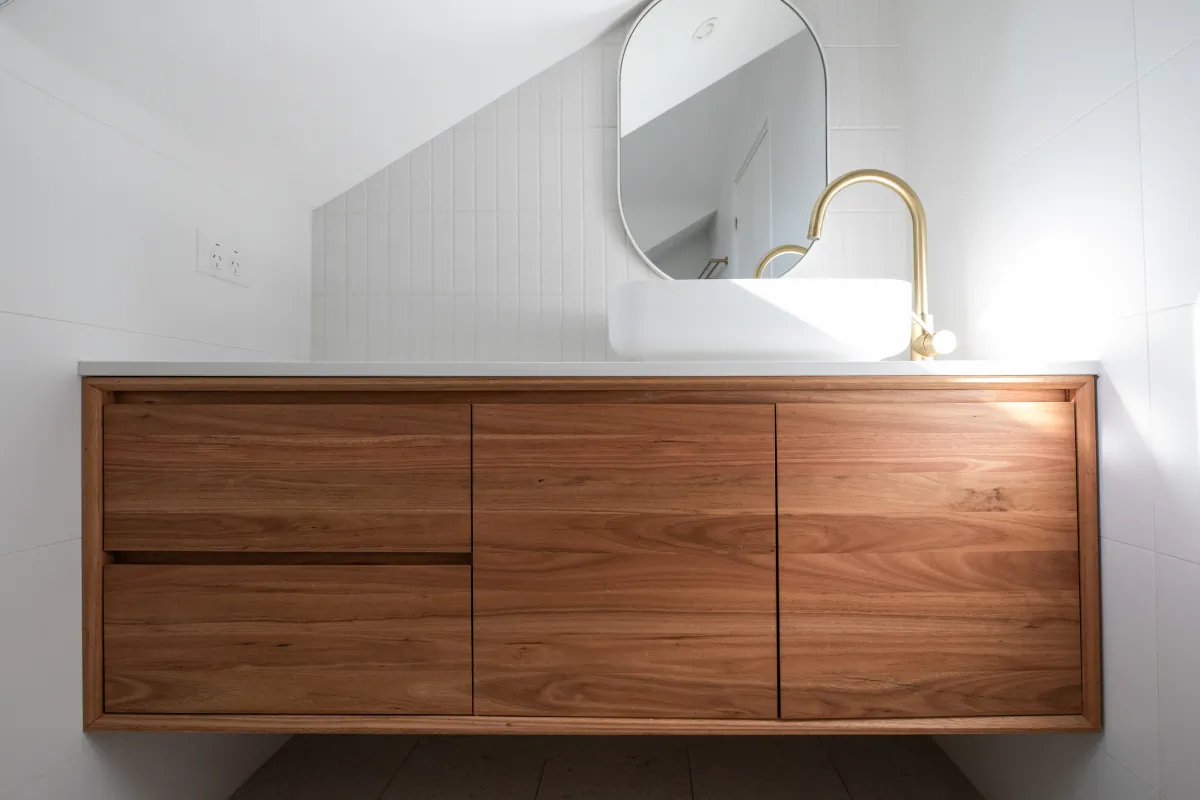
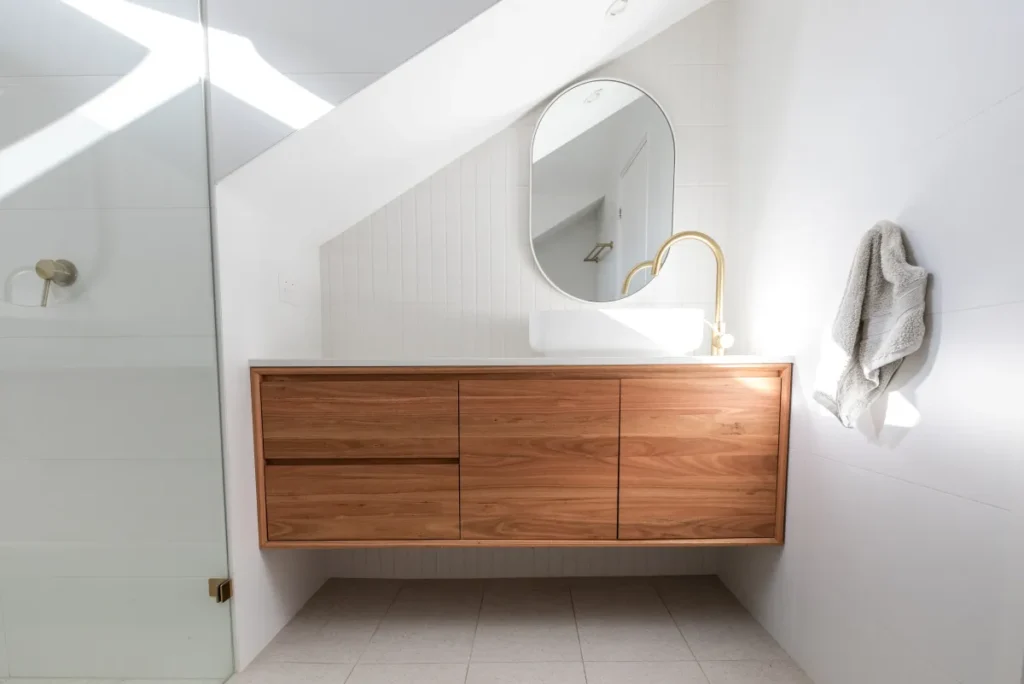
- Install a vanity with full-extension drawers for daily storage
- Recess a medicine cabinet to gain storage without crowding
- Layer lighting: ambient ceiling + vanity task + accent
- Upgrade ventilation with a timer or humidity-sensing switch
- Add blocking now for future grab bars
- Pick fixtures and trim with readily available replacement parts
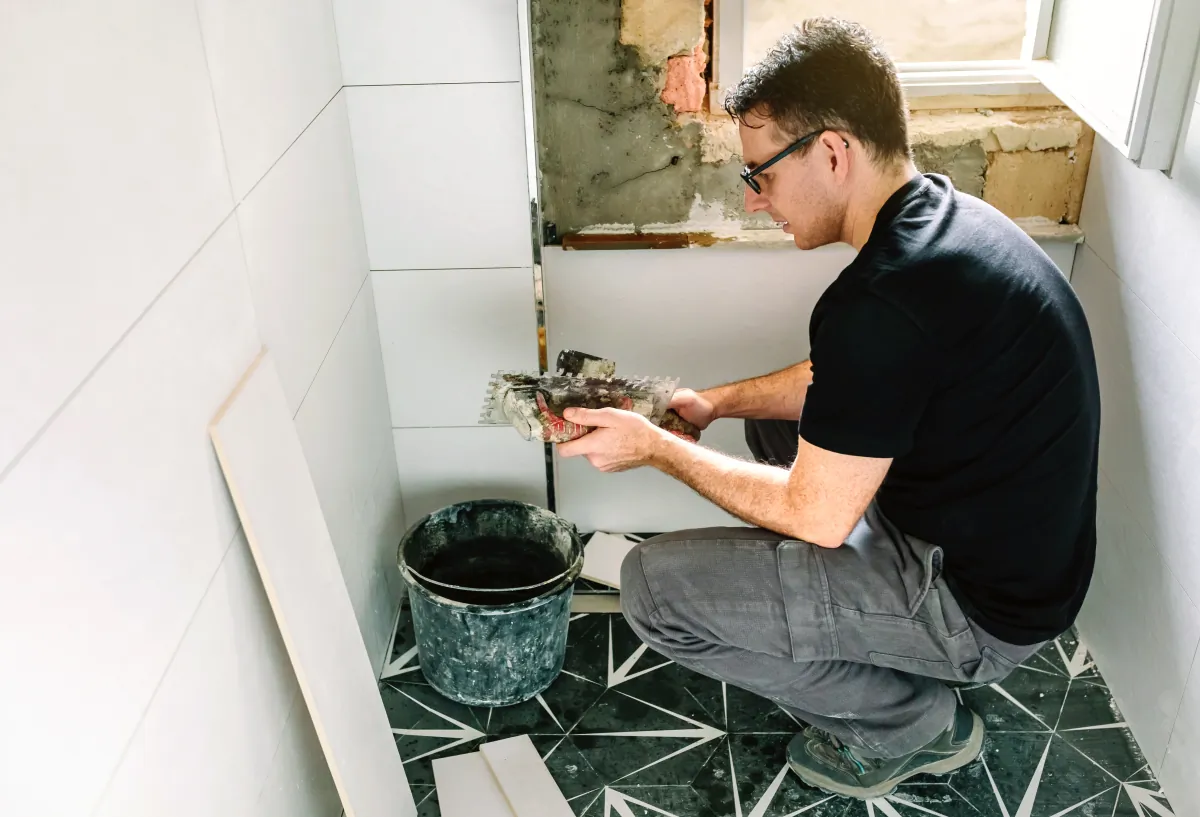
Bathrooms punish shortcuts. For example, A small leak behind tile or a loose drain connection can damage framing and subflooring, and the fix usually costs more than doing it right the first time. Overall, That’s why the decision isn’t “DIY vs contractor,” it’s “low-risk work vs high-risk work.”
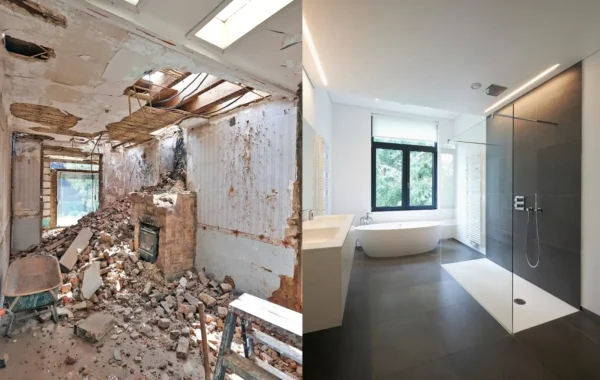
When homeowners ask “can i renovate my own bathroom,” the honest answer is: you can DIY parts of it, but you need a plan that protects the waterproofing and keeps the job moving. As a result, Hiring help often makes sense when the project includes a new shower pan, plumbing relocation, electrical changes, or any work that needs permits and inspections.
Storage Optimization That Doesn’t Feel Bulky
Storage is one of the best quality-of-life upgrades in a bathroom, and it doesn’t have to make the room feel smaller. Meanwhile, The goal is to use depth and height while keeping counters and walk paths clear.
- Choose drawers over doors in the vanity (faster access, also less digging)
- Add a recessed medicine cabinet instead of a surface cabinet
- Use a shower niche for bottles so corners stay open
- Install towel hooks behind the door to free wall space
- Consider a toe-kick drawer for small items and backups
Small-Space Layouts That Reduce “Pinch Points”
In a compact bathroom, inches matter. Overall, These layout moves usually do more for comfort than trendy finishes.
- Swap a swing door for a pocket door or out-swing (when framing allows)
- Size the vanity to clear the toilet and the door swing comfortably
- Use a wall-mounted or furniture-style vanity to show more floor
- Choose clear shower glass to borrow light and make the room feel open
- Place mirror and lights to avoid shadows at the vanity
How To Choose The Right Contractor
If you decide to hire help, don’t judge by photos alone. For this reason, Look for planning discipline: clear scope, a waterproofing strategy, realistic scheduling, and a clean way to handle changes. Meanwhile, A contractor should be able to explain what gets checked before walls close and before tile goes up.
Contractor Selection Checklist (Bathroom-Specific)
- Ask how shower waterproofing is handled and how it’s verified before tile
- Decide in writing who coordinates plumbing/electrical and permits (when needed)
- Request a written scope that lists demo, substrate repair, tile, paint, trim, fixtures, glass, and cleanup
- Discuss how changes are priced so upgrades don’t turn into surprises
- Get communication expectations up front (schedule updates, site access, punch list)
Finally, verify the basics: active licensing when required for the work, insurance, and clear payment terms. Additionally, A professional won’t be offended—you’re protecting your home.

Planning To Completion
A successful bathroom renovation is mostly about sequence. Also, When tasks happen out of order—finishes before prep, tile before waterproofing is confirmed, paint before final trim—you lose time and money. Overall, Use this roadmap to keep decisions and work moving in the right direction.
A Realistic Sequence Of Work (California Homeowners)
- Define scope and constraints: Decide what must stay (layout, window, tub) and what can change.
- Measure and document: Take photos, note plumbing locations, and confirm ceiling heights and vent routes.
- Lock the layout: Finalize where the vanity, toilet, and shower/tub will sit before ordering anything.
- Select materials and fixtures: Tile, vanity, valve/trim, lighting, mirrors, exhaust fan, and hardware.
- Check permit needs: If you’re moving plumbing, changing electrical, or modifying walls, contact your local building department about permits and inspection steps.
- Order long-lead items: Specialty tile, custom glass, and some vanities can drive the schedule.
- Demolition and substrate inspection: Remove finishes, then inspect framing/subfloor for water damage.
- Rough-in work: Plumbing/electrical/ventilation changes, followed by required inspections where applicable.
- Waterproofing and prep: Build the shower system, set slope, and confirm the waterproofing is complete before tile.
- Finish work and closeout: Tile/grout, paint, trim, fixtures, glass, punch list, and final walkthrough.
Layout And Materials Decisions To Lock In Early
Bathrooms have fewer layout options than kitchens, but the same logic applies: how you route movement and place “work zones” (vanity, toilet, shower) determines comfort. Common patterns include:
- Galley: Fixtures on two parallel walls with a walkway down the middle; great for narrow bathrooms but watch clearances.
- L-shape: Fixtures on two adjacent walls; common when you want a larger shower at the end of the room.
- U-shape: Fixtures on three walls; maximizes storage and counter space, but needs enough width to avoid feeling boxed in.
- Island-centered: A large primary bath where a freestanding tub or center vanity becomes the focal point; it looks great, but it increases plumbing and waterproofing planning.
For the vanity, cabinet door styles matter more than people think in humid spaces. In addition, Shaker doors hide wear, slab doors read modern and wipe clean, and raised-panel doors add detail but can trap dust in the profiles. Additionally, Pair that with a countertop that can handle water: quartz is low-maintenance, granite is durable but varies by slab, and solid-surface options can offer seamless sinks and easier spot repairs.
Flooring choices usually come down to porcelain tile (tough and water-safe), natural stone (beautiful but needs sealing and gentler cleaners), or waterproof LVP in low-splash bathrooms where you want warmer underfoot. Whichever you pick, plan layered lighting: ambient light for overall brightness, task light at the mirror for grooming, and accent light for the shower or niche so the room doesn’t feel flat.
Materials Deep Dive For Wet Zones (What Holds Up)
The shower is where DIY projects most often fail. In addition, Tile is not waterproof; the system behind it is. Define the waterproofing method, slope, drain connection, and how you’ll check it before closing walls.
- Waterproofing: Sheet membranes and liquid-applied membranes can both perform well when installed correctly; use compatible drains and corners and follow manufacturer instructions.
- Backer surfaces: Use a substrate designed for wet areas in shower zones; don’t rely on “water-resistant” paint as a waterproofing plan.
- Grout: Cement grout can work with proper sealing and maintenance; epoxy grout resists staining but needs careful installation and costs more.
- Fixtures: Spend wisely on valves and waterproofing details; you can change trim later more easily than you can fix a leak.
Quick Decision Table
| Decision | Why it matters | DIY risk level | Schedule impact |
|---|---|---|---|
| Keep plumbing locations | Less rough-in work and fewer surprises | Low | Often faster |
| Move shower/toilet | More demolition and coordination | High | Often longer |
| Complex tile patterns</ (herringbone, mosaics) | More cuts, more labor time, more waste | Medium | Can add days |
| Custom glass & specialty fixtures | Lead times can drive the critical path | Low | Can add weeks |
Budget & Timeline (Typical)
Bathroom remodel budgets swing mostly based on complexity, not square footage. Additionally, Keeping plumbing in place and choosing simple tile layouts usually lowers both cost and timeline. On the other hand, relocating plumbing, upgrading electrical, or addressing hidden water damage can change the scope quickly.
Budget Ranges & Timeline (Typical)
- Cosmetic refresh: Paint, lighting swap, vanity/fixture updates with layout unchanged—often 1–2 weeks of on-site work once materials are ready.
- Standard remodel: New shower/tub surround, flooring, vanity, lighting—often 2–4 weeks on-site, plus any permit/lead times.
- Full gut with layout changes: Rough-in changes, new shower system, more inspections—often 4–8+ weeks depending on scope and lead times.
- Big drivers: Plumbing relocation, custom glass, specialty tile, and hidden substrate repair.
Resale And ROI Priorities
If resale value matters, prioritize what buyers (and inspectors) can’t ignore: a dry, well-ventilated room with clean lines and durable surfaces. Meanwhile, Flashy upgrades can be nice, but fundamentals usually return more.
- Upgrade ventilation and lighting so the room feels bright and stays dry
- Choose timeless finishes (neutral tile, easy-to-clean vanity materials)
- Improve storage and counter usability (drawers, recessed cabinets)
- Keep documentation: product specs, warranties, and permit sign-offs when applicable
Maintenance Tips After Completion
A little routine care protects the work you just paid for. Also, Most bathroom “failures” start as small maintenance issues that get ignored.
- Run the exhaust fan during showers and for a while after to control humidity
- Squeegee shower glass and wipe pooling water to reduce mineral buildup
- Use pH-neutral cleaners on tile and stone; avoid harsh acids on natural stone
- Inspect and refresh caulk at corners and around tubs/showers as needed
- Address slow drains or dripping fixtures early—small leaks become big repairs
If you’re still unsure whether this is a DIY job for your home, a short call can save weeks of frustration. For this reason, Reach us at +1 (916) 234-6696.

How We Help In Sacramento
US Construction & Remodeling Corp. Also, helps Sacramento homeowners plan and build bathroom renovations that stay practical: clear scope, smart layout decisions, durable materials, and a job sequence that protects the waterproofing. Call +1 (916) 234-6696 for a quick consult, and we’ll talk through what’s realistic to DIY versus what’s better handled by a pro.
Request a free estimate online when you want a site visit and a written scope.
Local Permitting Notes In Sacramento
In Sacramento, permitting and plan review typically run through the City of Sacramento Community Development portal (Accela Citizen Access). In addition, Applications, payments, and status tracking are handled online, so having your scope and drawings organized from the start helps the process go smoother.
Trust Signals You Can Verify (Before You Sign)
- Licensing & insurance: Ask for proof appropriate to the scope and verify what you’re being told.
- Permit responsibility: Agree in writing who will pull permits and coordinate inspections when the work requires it.
- Communication: Set expectations for updates, site hours, and how change orders are approved.
- Workmanship checks: Ask how waterproofing is documented and what gets reviewed before tile and before final sign-off.
Helpful Links
Licensed, insured & trusted local contractor
US Construction & Remodeling Corp.
9821 Business Park Dr, Sacramento, CA, 95827
Phone: +1 (916) 234-6696
CSLB License #: 1117562 Fully licensed and insured.


