
Siding vs DIY in Rancho Cordova: Scope, Materials, Timeline
Planning new siding for your Rancho Cordova home can feel simple until you compare the details. If you’re searching for siding vs diy rancho, you’re likely weighing budget against risk—especially water protection and ladder safety.
Quick checklist:
- Pick a siding material and finish that matches climate and maintenance goals.
- Confirm moisture management details (housewrap, flashing, caulking) in writing.
- Define the full scope (trim, soffit/fascia, paint, insulation upgrades).
- Confirm access/safety plan and how landscaping/property will be protected.
- Compare 2–3 itemized quotes and verify warranty coverage.
- Check permit requirements if altering exterior walls or doing structural repairs.
DIY works best when the scope stays small and easy to reach. Full replacement changes everything: you’re managing window and door flashing (thin metal or membrane that directs water out), a water-resistive barrier or WRB (a layer that blocks bulk water), and hundreds of fasteners that must land in solid framing.
TL;DR: DIY can be reasonable for a small repair or a single wall. For a full re-side, plan the water-details and timeline before you buy materials, then decide what you can realistically execute without rework.
- Confirm scope: siding only, or also trim and sheathing (the panels under the siding).
- Map water-risk zones: windows, doors, roof-to-wall intersections, and decks.
- Choose material + finish: factory-finished vs site-painted, and matching trim.
- Plan access and safety: height, slopes, and tight side yards.
- Clarify permits/inspections if required and who handles them.
- Get a written scope and a start-to-finish timeline.
What Changes The Experience The Most
| Decision | Why it matters | Quick check |
|---|---|---|
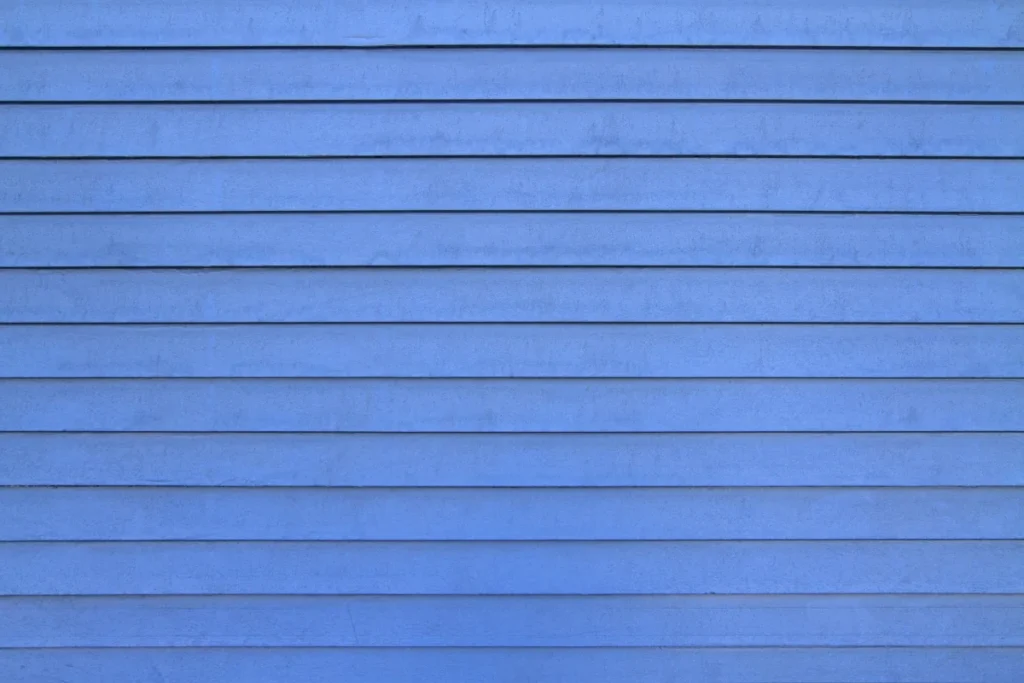
| Material choice | Durability and maintenance differ by material. | Compare fiber cement vs vinyl and verify warranties. |
| Moisture management | Water control prevents rot and mold. | Confirm housewrap and flashing details around openings. |
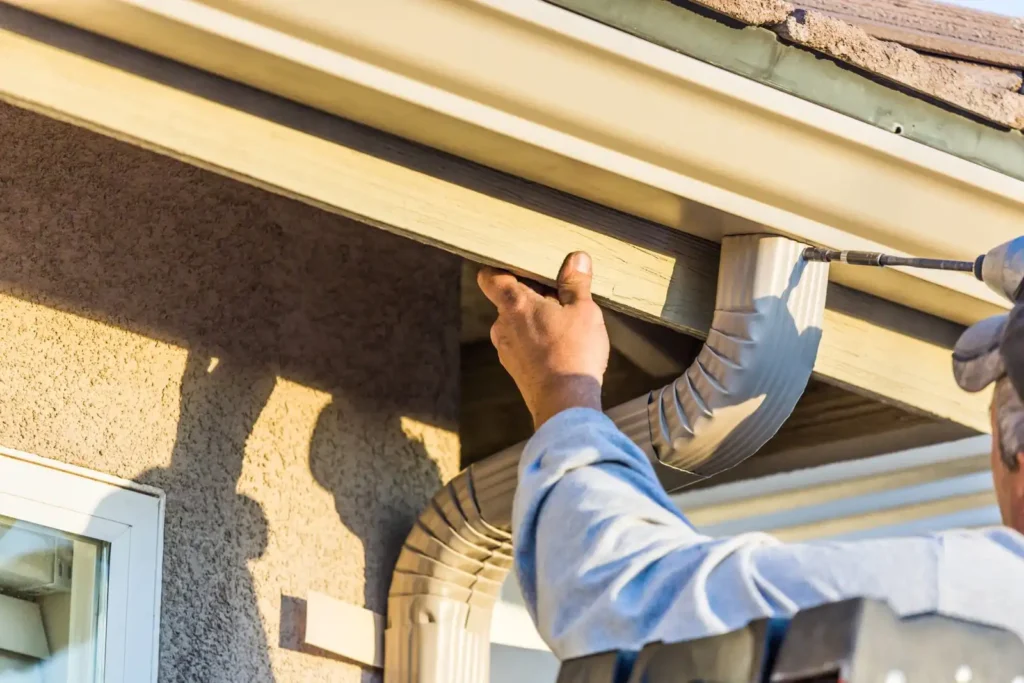
| Trim & transitions | Details control fit and long-term sealing. | Specify corners, soffit/fascia scope, and finish plan. |
| Access & protection | Staging affects speed, cost, and safety. | Plan scaffolding, landscaping protection, and cleanup. |
The biggest difference between hiring a crew and doing it yourself is not the final nail. In addition, It’s the planning and the hidden water-management work that keeps the wall dry for years.
When homeowners search siding vs diy rancho, most are trying to avoid paying for labor. That’s reasonable. As a result, Just know that siding is a system: the outer cladding sheds water, but the layers behind it must handle the water that gets past the siding during wind and rain.
When DIY Is A Good Fit
- Small repairs where you can also match existing siding and reach the work safely.
- Replacing a few trim boards, sealing gaps, or repainting sound siding.
- One low wall where you can inspect flashing and keep details simple.
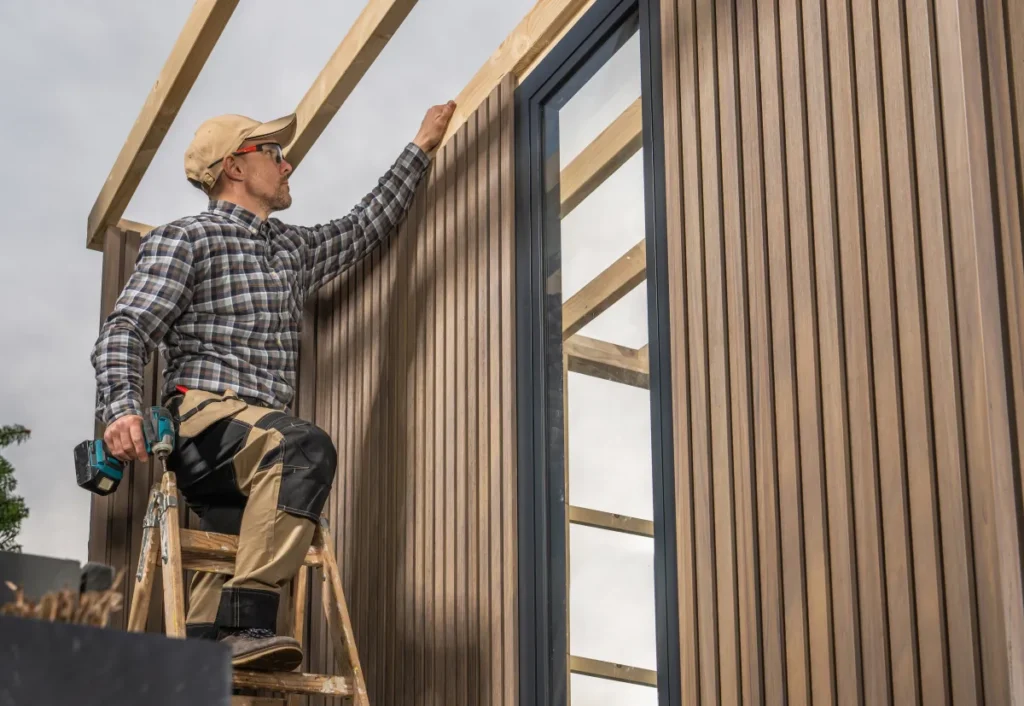
When A Pro Install Usually Pays Off
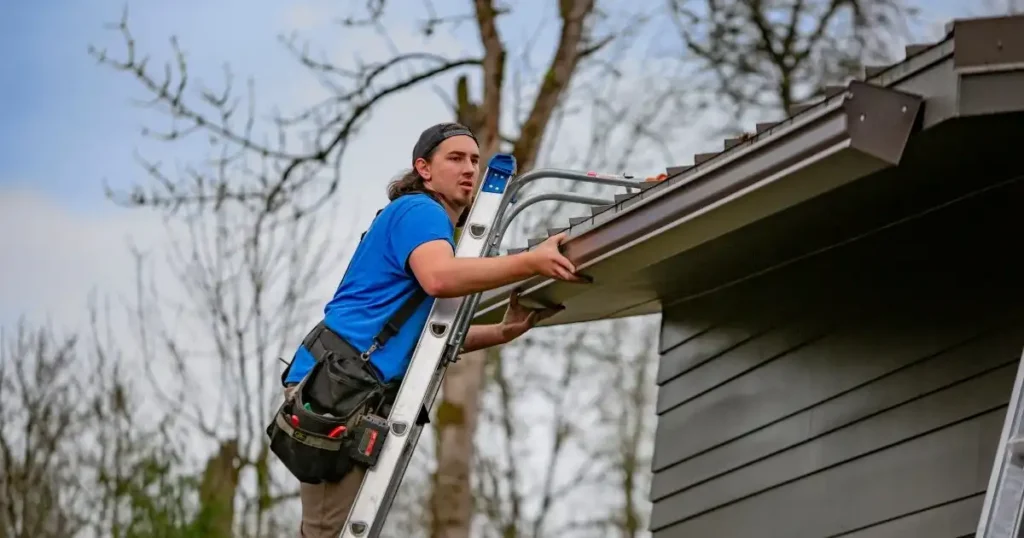
- Two-story work, steep grades, or tight access where scaffold and safety gear matter.
- Any sign of soft wood, stains, or recurring moisture around windows and doors.
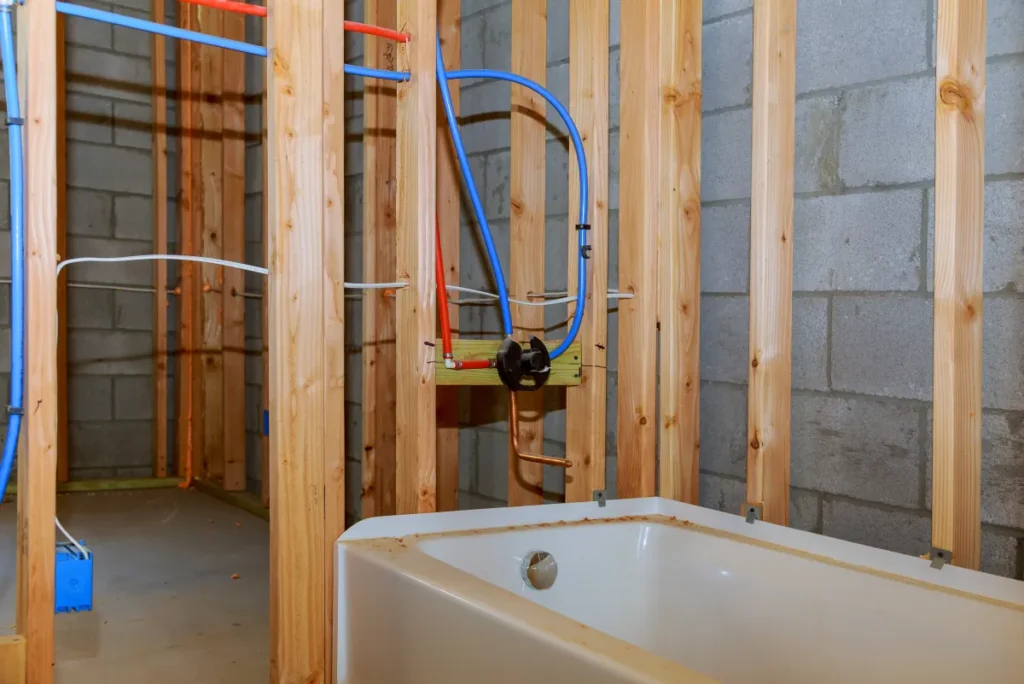
- Projects that need new WRB, new flashing, or sheathing repairs.
- Complex elevations (lots of corners, bump-outs, or multiple roof lines).
Before/After Snapshot (Hypothetical Example)
Hypothetical example: A homeowner starts with cracked siding and peeling paint on the sunny side of the house. For example, Once the old boards come off, they find a few sections of damaged sheathing near a window. Overall, A pro-scoped plan replaces the damaged panels, adds new WRB, installs proper flashing at the window head (top), and finishes with new lap siding and clean trim lines. Meanwhile, The exterior looks sharper, and the wall has a clear path to shed water.
Common Mistakes That Create Expensive Rework
- Skipping WRB repairs and relying on caulk as the “waterproofing.” Caulk is a sealant, not a drainage plan.
- Improper flashing at windows, doors, and roof-to-wall areas.
- Overdriving fasteners, creating waves, or missing studs.
- Mixing siding profiles or batches without checking color/texture match.
- Buying all materials before confirming measurements, waste factors, and trim details.
- Starting tear-off without a weather plan and secure overnight protection.
If you want to sanity-check scope and timing before you commit to DIY, call +1 (916) 234-6696 and ask for a timeline-focused planning conversation.
Quick Decision Rule For Siding Vs DIY Rancho
If any item below is true, consider hiring out the full install or at least the water-detail work:
- You can’t reach every wall safely without scaffolding.
- You need new WRB, flashing, or sheathing repairs.
- You want a clean, consistent look across multiple elevations.
- You need the job finished on a specific schedule.

Layout And Function Improvements
Even though siding is “just the outside,” layout choices change both curb appeal and how well the wall handles water. Meanwhile, Treat layout as a plan for seams, trim lines, vents, and transitions so everything lands cleanly.
Exterior Layout Planning That Prevents Headaches
- Courses and joints: plan where horizontal boards or vertical panels start and end so joints don’t stack.
- Trim strategy: decide corner boards, window trim thickness, and how siding terminates into trim.
- Penetrations: map hose bibs, vents, lights, and electrical boxes so each gets a proper block and seal.
- Drying path: a rainscreen (a thin air gap behind siding) can help the wall drain and dry.
Small-Space Realities (Tight Side Yards)
Tight access changes the DIY equation. Overall, Material handling and safe ladder angles can be tough when the side yard is narrow. Meanwhile, Plan smaller staging areas, protect AC units and landscaping, and avoid leaving walls open overnight.
Materials And Finish Options
Material choice affects durability, maintenance, and how forgiving the install is. “Low maintenance” still means you clean, inspect, and reseal joints over time.
Practical Pros And Cons
- Vinyl siding: affordable and paint-free, but it can look wavy if installed too tight and may crack on impact.
- Fiber cement siding: stable and durable with a crisp look; it’s heavier and slower to install, and cutting creates dust that needs the right safety controls.
- Engineered wood siding: warm, wood-like look with good impact resistance; edges and cuts need proper sealing to prevent swelling.
- Traditional wood: classic and easy to customize, but it demands regular paint or stain maintenance and careful moisture control.
Finish Choices That Change The Final Look
- Factory-finished vs site-painted (and how easy touch-ups will be later).
- Trim color contrast, corner boards, and window wraps for a cleaner “framed” appearance.
- Accent areas (like gables) using patterns such as board-and-batten.
Cost Drivers + Timeline (Typical)
Two homes can use the same siding and still price out very differently. For this reason, Cost and schedule usually move with access, tear-off, and how much detail work is included around openings.
For homeowners weighing siding vs diy rancho, the table below highlights the decisions that most often change both budget and calendar.
Budget Ranges And Timeline (Typical)
- DIY materials: roughly $3–$10+ per sq. ft. Additionally, for common siding products, plus tool rental and waste.
- Pro-installed: often $8–$20+ per sq. ft. Also, installed, depending on height, tear-off, repairs, and trim detail.
- On-site work: many full re-siding projects run about 1–3 weeks once work starts, with time added for ordering and permits (when required).
- Small repairs: 1–2 days is common when materials match and access is easy.
These are rough planning ranges, not a bid. As a result, A written estimate should spell out what’s included (and what isn’t) so you can compare apples to apples.
| Decision | What it affects | What to confirm |
|---|---|---|
| One-story vs two-story | Labor, safety setup, duration | Scaffold/ladder plan and site protection |
| Tear-off scope | Disposal cost and daily progress | How debris is contained and hauled away |
| Hidden damage repairs | Change orders and schedule | How repairs are documented and approved |
| Trim and flashing detail | Leak resistance and finish quality | Window/door flashing and trim specs |
| Permits and inspections | Start date and sign-off | Who pulls permits and schedules inspections |
What Typically Stretches The Schedule
- Material lead times and special-order colors.
- Discovering rot behind siding once tear-off begins.
- Extra detail work: new trim, new vent blocks, or upgraded flashing.
- Permit review and inspection timing when the scope requires it.
How To Prepare Your Home
Preparation is where DIY and pro projects often win or lose time. For this reason, A clean, safe site keeps work moving and protects your landscaping and belongings.
Homeowner Prep That Saves Days
- Clear 3–6 feet around exterior walls (patio furniture, planters, grills, storage).
- Trim back shrubs and move delicate items away from the work zone.
- Decide how to handle pets and kids during work hours.
- Remove wall décor from interior walls that may shake during demo.
- Plan parking and material staging so crews aren’t blocked.
- Confirm exterior outlets and water access if needed for tools and cleanup.
- If your home was built before 1978, assume old paint may contain lead and ask about lead-safe work practices.
Maintenance Tips After Installation
- Rinse dirt and pollen with a garden hose; avoid aggressive pressure-washing near seams.
- Inspect caulked joints once or twice a year and re-seal small gaps before they grow.
- Keep irrigation spray off siding and trim to reduce staining and swelling.
- Touch up damaged paint early so moisture doesn’t reach the substrate.

Next Steps For Rancho Cordova
US Construction & Remodeling Corp. Also, helps Rancho Cordova homeowners turn a “maybe DIY” idea into a clear scope, a realistic schedule, and a written plan for siding work. Meanwhile, If you’re still weighing siding vs diy rancho and want a timeline-first planning call, book here: https://usconstructioncali.com/free-estimate/.
Prefer to talk by phone? Meanwhile, Call +1 (916) 234-6696 and tell us what you’re weighing—repair, partial replacement, or a full re-side.
Rancho Cordova Permitting And Scheduling
Depending on the scope, siding work may require a permit or inspection. Overall, Rancho Cordova provides online permitting through its city permit portal, so applications, payments, and inspection scheduling can be handled online for many projects. Also, The key for your timeline is deciding early who is responsible for permits and having product specs ready.
Trust Checklist Before You Hire
- Licensing and insurance: ask for proof, and verify license status before work starts.
- Permit responsibility: get it in writing who pulls permits and schedules inspections when required.
- Water-details: confirm how flashing, WRB, and window/door transitions are handled.
- Workmanship checks: ask how joints, fasteners, and sealants are inspected during the job.
- Communication: agree on one point of contact and a simple update cadence.
Helpful Links
Frequently Asked Questions
DIY can work for a small repair or a single, easy-to-reach wall. Whole-house siding adds safety setup, WRB and flashing details, and the risk of finding hidden rot once tear-off starts.
If your siding vs diy rancho decision comes down to budget, consider hiring out tear-off and the water-detail work, then handle paint or minor trim later.
Most bids move up or down based on scope and access.
- Height and access (one-story vs two-story)
- Tear-off and disposal
- Sheathing repairs and framing fixes
- Trim and flashing complexity around windows/doors
- Material choice and special-order finishes
- Permit and inspection steps when required
It depends on what changes. A like-for-like replacement may be handled differently than work that involves sheathing repairs, structural changes, or altering openings.
Rancho Cordova supports online permitting through its permit portal, so checking requirements and scheduling inspections can often be handled digitally. When in doubt, confirm with the city before demolition starts.
Timelines vary with material lead times and scope, but many full re-siding jobs take about 1–3 weeks of on-site work once started.
Add time for ordering, detailed planning, and permit review or inspections when the scope requires it.
Vinyl is often the most paint-free option, but it still needs cleaning and careful installation so it doesn’t look wavy. Fiber cement is very durable and holds a clean profile, but it may need repainting over time depending on finish.
Ask what maintenance the finish needs and what you can do to keep water away from seams.
Compare scope line by line so you’re not surprised mid-job.
- WRB and flashing details (what’s included and where)
- Trim replacement vs re-use, and finish quality expectations
- How hidden damage is handled (photos, pricing, approvals)
- Debris control, cleanup, and disposal
- Start date, working days, and how the home is protected overnight
Licensed, insured & trusted local contractor
US Construction & Remodeling Corp.
9821 Business Park Dr, Sacramento, CA, 95827
Phone: +1 (916) 234-6696
CSLB License #: 1117562 Fully licensed and insured.


