Skip links

Solar Panels vs DIY in Folsom: A Homeowner Guide

Thinking about adding solar and weighing solar panels vs diy in Folsom? The choice is not just price—it’s who owns the risk for roof penetrations, electrical tie-ins, permits, and inspection sign-offs.

Quick checklist:

  • Verify roof condition first; plan reroof timing before installing panels.
  • Size the system from real kWh usage and shading, not just panel count.
  • Compare inverter options (microinverters vs string + optimizers) and monitoring.
  • Confirm permitting and utility interconnection responsibilities and timeline.
  • Review the contract (warranties, production assumptions, exclusions, roof penetrations).
  • Confirm any electrical panel upgrades and inspection steps.

This guide lays out what a licensed contractor typically includes versus what lands on the homeowner with a DIY kit, plus the local considerations that matter when you want the job approved and documented.

TL;DR: DIY can work for highly experienced homeowners with the right tools, safety gear, and time. For most households, a contractor-led install is the simpler path because it bundles design, permitting, and accountability into one scope.

  • Confirm your roof condition and remaining lifespan.
  • Check your main electrical panel capacity and clear working space.
  • Note any obvious shading from trees or roof obstructions.
  • Decide whether you want solar only or solar + backup battery.
  • Plan for permits, inspections, and any required utility paperwork.
  • Compare warranties: product coverage vs workmanship responsibility.

Options And What Each Includes For Solar Panels Vs DIY

DecisionWhy it mattersQuick check
Roof conditionInstalling over an aging roof risks rework later.Inspect first and plan reroof timing if needed.
System sizeDetermines cost and energy offset.Size from real kWh usage and shading.
Inverter typeAffects monitoring and shade performance.Compare microinverters vs string + optimizers.
Permits & interconnectionApprovals can drive the schedule.Ask who handles permits/utility and expected timelines.

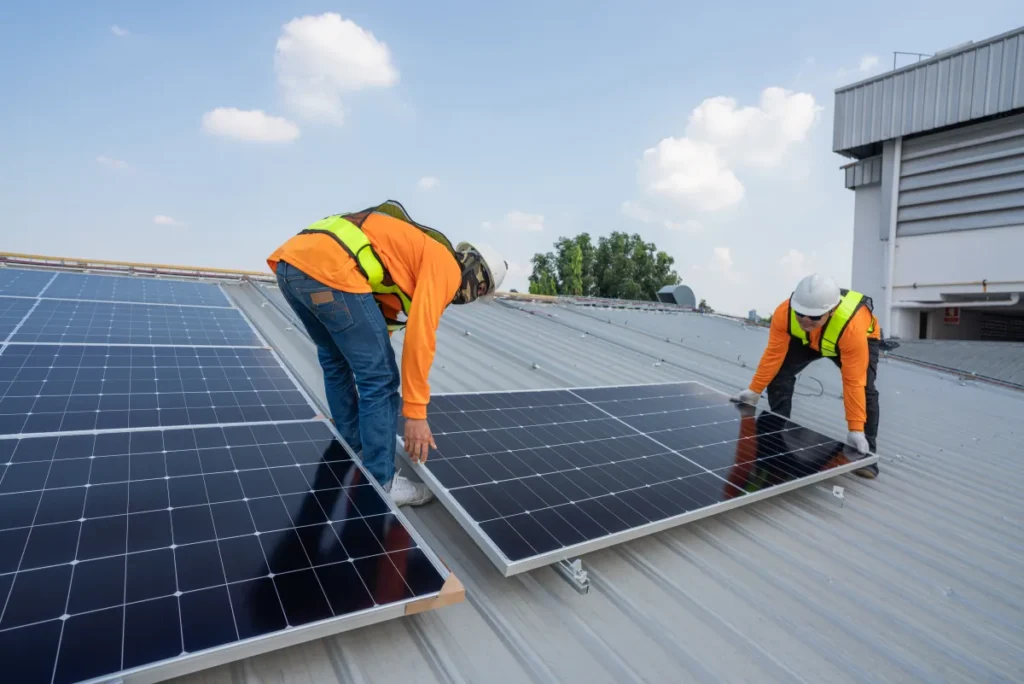
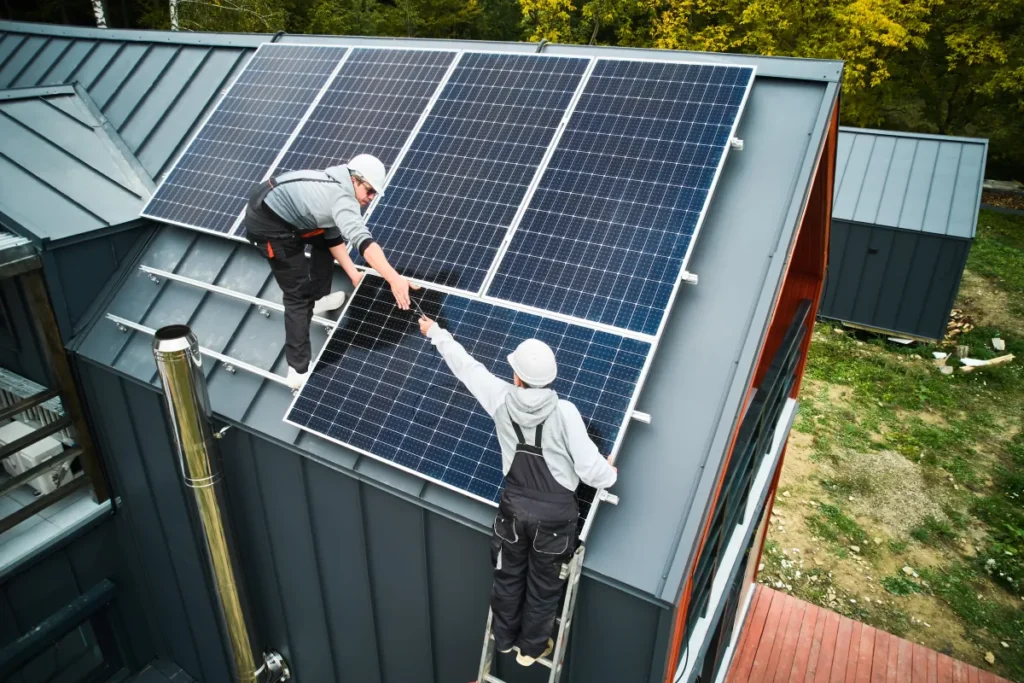
Two homeowners can buy similar equipment and still end up with very different results. As a result, The gap usually comes from planning and documentation: how the array is laid out, how the roof is sealed, and how the electrical work is inspected.

  • Site assessment: A contractor measures roof planes, also access, and electrical conditions; DIY relies on your measurements and photos.
  • Design + layout planning: Contractor-led installs include array layout and attachment planning; DIY requires you to confirm setbacks, pathways, and clearances.
  • Permits + plan set: Pros typically prepare permit-ready drawings and submittals; DIY means you gather documents and respond to corrections.
  • Roof waterproofing details: Contractors manage flashing and sealing at every penetration; DIY must protect the roof while keeping everything inspection-ready.
  • Electrical tie-in: Contractor scopes breakers, shutoffs, and labeling; DIY often still needs a licensed electrician for final connections.
  • Material compatibility: Pros source matched components that work together; DIY must confirm part compatibility, load ratings, and warranty terms.
  • Scheduling + coordination: A contractor lines up deliveries, labor, and inspections; DIY shifts all scheduling onto you.
  • Safety plan: Pros bring fall protection and jobsite controls; DIY adds real risk if you are not trained for roof work.
  • Documentation: Contractor-led jobs typically provide closeout docs (photos, spec sheets, inspection records); DIY requires you to build your own file.
  • Accountability: With a contractor, one scope covers workmanship; DIY makes you the GC, installer, and warranty coordinator.

DIY Or Contractor-Led? A Quick Fit Check

DIY can save labor, but it also makes you the designer, installer, scheduler, and warranty point-person. For example, That tradeoff feels fine on paper, yet it gets expensive when a permit correction or roof leak forces rework.

DIY tends to fit homeowners who:

  • Have real experience working safely on roofs (not just basic ladder comfort).
  • Can follow electrical and building requirements without guesswork.
  • Have time to handle permit corrections, inspections, and documentation.

A contractor-led install is usually smarter when:

  • You want the permit set, roof details, and electrical scope coordinated under one contract.
  • Your roof has complex geometry, multiple obstructions, or limited safe access.
  • You prefer one accountable party if something needs adjustment after inspection.

Scope Options (Refresh Vs Full Remodel)

Solar work is not always all-or-nothing. For this reason, Some homes benefit from a targeted refresh that addresses a specific need, while others are better served by a full-scope project that avoids patchwork and mismatched components.

Refresh Scope (Targeted Upgrades)

  • Add a small number of panels to expand capacity where roof space allows.
  • Replace damaged mounting parts and re-seal penetrations to protect the roof.
  • Re-route conduit for a cleaner exterior path and easier future service access.
  • Upgrade electrical disconnects, breakers, or labeling to meet current inspection expectations.
  • Plan for future battery readiness even if you do not add storage today.

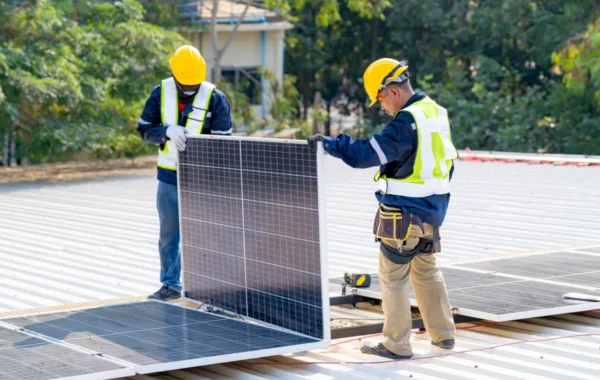
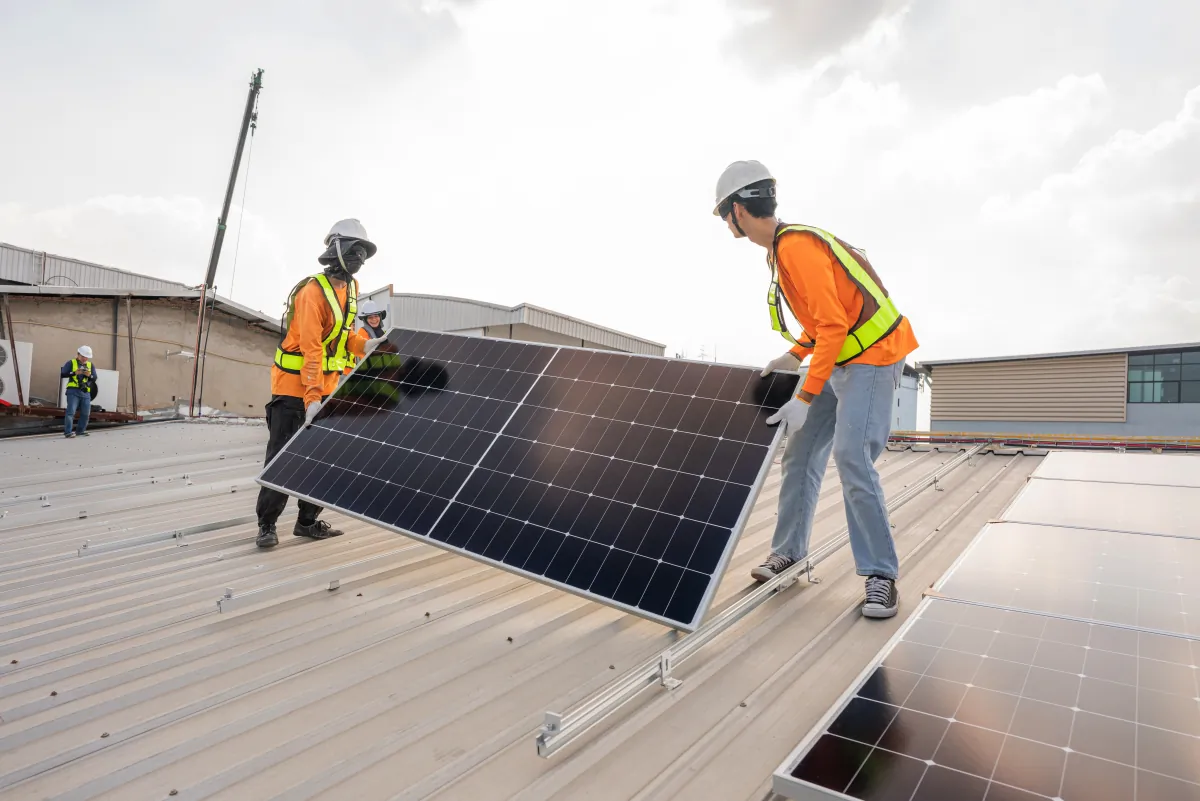
Full-Scope Solar Project

  • Full system design based on your goals, roof layout, and electrical constraints.
  • Coordinated permitting and plan review documentation from the start.
  • Complete roof-mount installation with consistent attachment and waterproofing details.
  • Full electrical tie-in scope and inspection coordination.
  • Optional add-ons like battery storage or EV charging planned into the same layout.

Layout Planning For A Clean Install

Good layout planning keeps the job code-friendly and serviceable. It also reduces the chance you end up moving hardware later because a vent, setback, or access path got overlooked.

  • Map roof obstructions (vents, skylights, chimneys) before choosing array size.
  • Preserve required roof access pathways and clear working space where applicable.
  • Avoid placing attachments where future roof repairs would require removing the whole array.
  • Keep wire runs tidy and protected, with accessible junction points.
  • Think ahead about where equipment will mount so it stays out of the way and easy to service.

Limited Roof Area: Smart Layout Ideas

If your usable roof space is tight, you still have options. Meanwhile, The key is to plan for fewer, higher-output modules and avoid a layout that creates hard-to-service corners.

  • Prioritize the sunniest roof plane instead of spreading panels across multiple shaded areas.
  • Consider leaving room for a future array expansion rather than forcing every inch today.
  • Choose a layout that keeps roof penetrations grouped and organized.
  • Discuss whether ground-level equipment placement can reduce rooftop complexity.
energy efficient upgrade expertise happy family near their house with solar panels

Materials And Finish Selections For Solar Panels Vs DIY

Materials are not just a spec sheet—they shape durability, aesthetics, and how often you will need service. Additionally, If you are comparing solar panels vs diy, look past the kit headline price and ask what is included for roof integration and electrical finish work.

Materials Deep Dive: Panels, Mounting, And Roof Integration

Solar panels: Most homeowners compare wattage and appearance first. In practice, you also want to compare warranty terms, frame quality, and how the manufacturer handles replacements for older models.

  • Panel style: All-black panels can look cleaner on many roofs, while silver-frame options sometimes come in at a lower cost.
  • Warranty terms: Ask for both product coverage and performance coverage in writing, and confirm who coordinates claims if something fails.
  • Matching and availability: If a panel gets damaged years later, availability matters—a good plan anticipates that.

Mounting and flashing: This is where long-term roof protection lives. Also, A quality install treats waterproofing as a system, not as a bead of sealant.

  • Racking: Look for corrosion-resistant metals and hardware appropriate for roof exposure.
  • Flashing: Proper flashing at each attachment point helps prevent leaks and protects roof decking.
  • Fasteners: Correct fastener type and placement reduce movement and help keep penetrations sealed over time.

Wiring and conduit: The safest, cleanest-looking jobs keep wiring protected, supported, and logically routed.

  • Conduit routing: Exterior conduit should look intentional and stay protected from impact, sun, and water pathways.
  • Labeling: Clear labels help inspectors and future electricians work safely.
  • Service access: Equipment placement should allow maintenance without cutting corners or crawling through unsafe spaces.

Finish Details Homeowners Notice

  • Conduit runs that follow clean lines instead of zig-zagging across exterior walls.
  • Grouped roof penetrations with consistent flashing details.
  • Neat equipment placement that avoids blocking walkways or tight service areas.
  • Clean labeling and a tidy electrical panel interior (no crowded, confusing additions).
  • Jobsite protection: careful staging so landscaping, gutters, and roof edges do not get damaged.

Timeline And Site Disruption (Typical)

A solar project touches multiple trades, so timing depends on how quickly plans are approved and inspections get scheduled. Overall, On-site work is usually quick; the planning and approvals often take longer.

Budget Ranges & Timeline (Typical)

  • Planning + permits: Often a few weeks or longer, depending on plan review and revisions.
  • On-site installation: Commonly 1–3 days for a straightforward roof-mount, with longer windows for complex roofs.
  • Inspections + approvals: Timing varies based on inspector availability and required paperwork.
  • Main budget drivers: System size, roof condition, electrical upgrades, and mounting complexity.

What The Install Window Looks Like At Home

Expect a busy jobsite, but you should not expect chaos. In addition, A well-run crew keeps the roof protected, keeps pathways clear, and communicates about any planned power shutoffs.

  • Early morning material staging and roof access setup.
  • Roof work noise during mounting and panel placement.
  • Short planned electrical shutdowns for tie-ins (communicated ahead of time).
  • Inspection scheduling that may require an adult on-site for a window of time.
  • Cleanup and a final walkthrough of equipment placement and labels.
DecisionWhy it mattersHow it changes DIY vs contractor
Roof conditionOld roofing and soft decking can cause leaks and rework.DIY often discovers issues mid-install; contractors typically flag prep upfront.
Permitting paperworkIncomplete submittals can delay approvals and inspections.DIY handles corrections; contractor scope usually includes plan-ready documentation.
Electrical panel capacityLimited space or service constraints can require upgrades.DIY may need extra trades; contractors coordinate electrical scope from day one.
Attachment + flashingWaterproofing mistakes can damage ceilings and framing.DIY carries full risk; contractor workmanship responsibility is clearer.
Schedule managementDelays often come from missed coordination points.DIY juggles deliveries and inspections; contractors manage the sequence.

Hypothetical Scenario (Not A Client Story)

Folsom buys a kit sized for their goals and starts a weekend installation. Meanwhile, Midway through, they find roof decking damage around an existing vent and stop to avoid leaks. In addition, After sourcing repair materials and reworking the layout, they still need a licensed electrician for the final tie-in and a permit correction for missing documentation. For example, A contractor-led job on the same roof would start with roof and electrical verification, submit a complete plan set, and schedule the install only after approvals—reducing stop-and-start work.

Maintenance Tips After Your System Goes Live

Solar is low-maintenance, but low is not none. Also, A few simple habits keep performance stable and help you spot small issues before they become roof problems.

  • Rinse or gently clean panels when dust and pollen build up (follow manufacturer guidance).
  • Keep roof valleys and gutters clear so water does not back up around penetrations.
  • Periodically review your system’s production dashboard for unexpected drops.
  • If output changes, look for new shading from tree growth or debris before assuming equipment failure.
  • Do a visual ground check after major storms for shifted panels or obvious damage.
  • Schedule periodic roof inspections so flashing and seals stay in good shape.

ROI And Resale: Prioritize The Basics

No one can promise a resale bump, but buyers do look for clean documentation and workmanship. Overall, Focus on the pieces that reduce buyer questions and inspection hiccups.

  • Keep permit approvals and final inspection records organized.
  • Save product spec sheets, warranty documents, and equipment model information.
  • Maintain clean, code-appropriate labeling so future electricians can work safely.
  • Prioritize roof protection details—leaks erase any financial upside quickly.
  • Avoid improvised wiring or exposed runs that raise red flags during a home inspection.
energy efficient upgrade expertise public school building with solar panels as sun

How To Get Started In Folsom

US Construction & Remodeling Corp. As a result, helps Folsom homeowners compare solar options, define a clear scope, and coordinate roof and electrical work so the install stays permit-ready. For this reason, Schedule your estimate online, or call +1 (916) 234-6696 if you prefer to talk it through.

Local Permitting And Inspections In Folsom

In Folsom, applications and plan review tracking commonly run through the City’s ePermit Center (eTRAKiT), with payments and inspection scheduling handled online. In addition, Because permit requirements depend on scope and address, it is smart to confirm what the City wants before you buy equipment.

  • Define the scope clearly (solar only, solar + storage, electrical upgrades, roof prep).
  • Gather manufacturer documents and a plan set appropriate for review.
  • Submit, track plan check comments, and respond with revisions as needed.
  • Schedule inspections based on the work sequence and inspector availability.
  • Keep the final approvals and closeout documents in your home records.

Trust Checklist For Any Solar Contractor

This is the part homeowners wish they asked earlier. Overall, A reputable contractor should answer these clearly in writing, not in vague sales language.

  • Licensing and insurance: Ask what coverage is carried and confirm it applies to your scope.
  • Permit responsibility: Clarify who pulls permits, who meets inspectors, and who fixes corrections.
  • Written scope: Look for line items covering roof attachment details, electrical work, labeling, and cleanup.
  • Communication: Confirm how you will get schedule updates and who your point of contact is.
  • Workmanship verification: Ask how roof penetrations are flashed, how wiring is protected, and what you will receive at closeout.

Ways To Request An Estimate

To keep your quote accurate, gather a few basics before you reach out. Overall, That small prep makes comparisons between bids much easier.

  • Bring recent electric bills and a photo of your main electrical panel label.
  • Take a few roof photos (wide shots plus obstructions like vents or skylights).
  • Decide whether backup power matters to you or if this is solar-only.
  • Use online scheduling if you want the fastest start, or call +1 (916) 234-6696 for questions.

Local Resources

Use these to verify contractor details and keep your planning organized.

Helpful Links

Licensed, insured & trusted local contractor

US Construction & Remodeling Corp.
9821 Business Park Dr, Sacramento, CA, 95827
Phone: +1 (916) 234-6696

CSLB License #: 1117562 Fully licensed and insured.

View our Google Business Profile

Leave a comment

This website uses cookies to improve your web experience.
Explore
Drag