Skip links

Standard Bathroom Sink Size: California Homeowner Guide

If you're researching standard bathroom sink size options for a California bathroom update, start with measurements, not guesswork. The sink you pick affects vanity width, faucet fit, splash control, and whether your plumbing lines up without extra wall work.

Quick checklist:

  • Define the scope and prioritize daily function (shower, storage, ventilation).
  • Confirm what trade work is involved (plumbing, electrical, drywall) and the order of work.
  • Choose finishes that hold up in wet areas and are easy to clean.
  • Collect 2–3 quotes and compare line-by-line (scope, allowances, cleanup, warranty).
  • Decide what needs to be ordered first (tile, fixtures, vanity) to keep the schedule moving.

TL;DR: Most bathrooms use a few common sink and vanity sizes, but the right choice depends on clearances, storage needs, and the existing drain location. If you'd like a quick sanity-check before you buy, call Call.

  • Measure the available vanity width and depth.
  • Confirm the drain centerline and supply shutoff locations.
  • Match faucet hole count (and spout reach) to the basin size.
  • Check door, drawer, and toilet clearance at full swing.
  • Pick sink type (undermount, drop-in, vessel) before ordering a top.
  • Order fixtures early so lead times don't stall the build.

A Practical Overview For Standard Bathroom Sink Size

  • Pick vanity width based on how the bathroom is also used and how much counter space you want.
  • Choose sink mounting style (undermount, drop-in, vessel) to match the countertop and your cleaning preference.
  • Use a shallower vanity depth in tight baths to protect walking clearance and door swing.
  • Match faucet reach to bowl size so water lands in the center and splashing stays under control.
  • Add side splashes or a backsplash where walls meet water zones around the sink.
  • Favor drawer-heavy storage under the sink so daily items stay accessible.
  • Center mirror lighting on the sink for real task visibility, not just ambiance.
  • Consider wall-mounted or floating vanities to open the floor and make cleaning easier.
  • Leave meaningful counter space between double sinks so two people can use them comfortably.
  • Coordinate faucet, hardware, and drain finish so the vanity reads as one clean package.

Most shoppers want a single number for size, but a standard label hides several measurements. In addition, When people say standard bathroom sink size, they usually mean a common range that fits typical vanity widths without forcing plumbing moves. Confirm the basin dimensions, the countertop cutout, and the cabinet interior clearance as a set.

Common Size Ranges (Quick Reference)

  • Single-sink vanities: 24, 30, or 36 inches wide are common choices, depending on room and storage needs.
  • Double-sink vanities: 48 to 60 inches wide is a common starting point, with larger options available for spacious primary baths.
  • Vanity depth: many standard-depth vanities sit around 18 to 21 inches front to back; narrower models can help in tight rooms.
  • Sink basin width: compact basins often land in the mid-teens to low 20s (in inches), while larger bowls need more deck space and better splash planning.
  • Bowl depth: deeper bowls can reduce splashing, but confirm faucet height and reach so the stream lands cleanly.

Small-Space Layouts That Still Feel Comfortable

Tight bathrooms can still feel finished and functional if the sink zone is planned around clearance and storage. For this reason, These are practical moves that keep a compact bath from feeling crowded.

  • Choose a shallow-depth vanity or a compact wall-mounted sink to protect the walkway.
  • Use an offset-drain sink if you want drawers without losing plumbing clearance.
  • Consider a corner sink in powder rooms where the door swing competes with vanity depth.
  • Add a recessed medicine cabinet to increase storage without shrinking the countertop.
  • Use a single-hole faucet with the right spout reach when deck space is limited.

Key Decisions At A Glance

DecisionWhat to measureWhat it affects
Sink typeCutout size or rim sizeCountertop work, cleaning, splash control
Vanity widthWall space and clearance to door/toiletStorage, counter space, comfort
Plumbing alignmentDrain centerline and supply locationsWall opening risk, schedule, possible permits
Lead timeAvailability of vanity/top/faucetStart date more than labor does

If you're deciding between two sizes, protect clearance and match the drain location. As a result, After that, choose the largest basin that still leaves usable counter space and does not interfere with drawers or cabinet rails.

ada compliance upgrades all inclusive all gender bathroom real image aut

Planning And Scope Decisions For Standard Bathroom Sink Size

Sizing works best when the scope is clear. For example, A like-for-like sink swap keeps the existing counter opening and usually keeps plumbing in place. Replacing the whole vanity lets you improve storage and counter space. Moving the sink location, changing drain height, or adding new electrical can add wall work and coordination with inspections.

Measure In The Right Order

  • Measure wall-to-wall space and note door swing and toilet clearance.
  • Measure the existing vanity width, depth, and height.
  • Measure the countertop cutout (or get the sink template if you have it).
  • Locate the drain centerline and the hot/cold supply stub-outs inside the cabinet.
  • Check how the trap and shutoffs fit with drawers and shelf placement.
  • Take photos of the inside cabinet and the faucet wall for reference while shopping.

Common Mistakes That Cost Time

  • Buying a sink by exterior dimensions only, then finding the cutout does not match.
  • Selecting a wider basin that collides with drawer boxes or cabinet braces.
  • Ordering a faucet with the wrong hole pattern for the sink or top.
  • Ignoring spout reach, which causes splashing on a smaller bowl.
  • Keeping old shutoff valves that fail during a swap and create unplanned downtime.
  • Starting demo before the vanity top and fixtures are on-site.

Resale And ROI Priorities

Most buyers notice daily function more than a trendy feature. Meanwhile, A clean layout, durable surfaces, and good lighting usually read as quality, while a complicated layout can raise concerns about maintenance.

  • Prioritize storage that works: drawers, organizers, and a medicine cabinet where possible.
  • Choose finishes that stay easy: low-maintenance tops and fixtures that handle hard water spotting.
  • Keep plumbing moves minimal unless the current layout is genuinely broken.
  • Put money into the sink zone that people touch every day: faucet feel, mirror lighting, and countertop durability.

Material Choices And Lead Times

Materials shape the look and the schedule. Overall, Stock vanities and sinks can be available quickly, while custom sizes, specialty finishes, and made-to-order tops can stretch timelines. Confirm lead times before you pick a demo date so you do not live without a working sink.

Vanity, Top, Sink, Fixtures

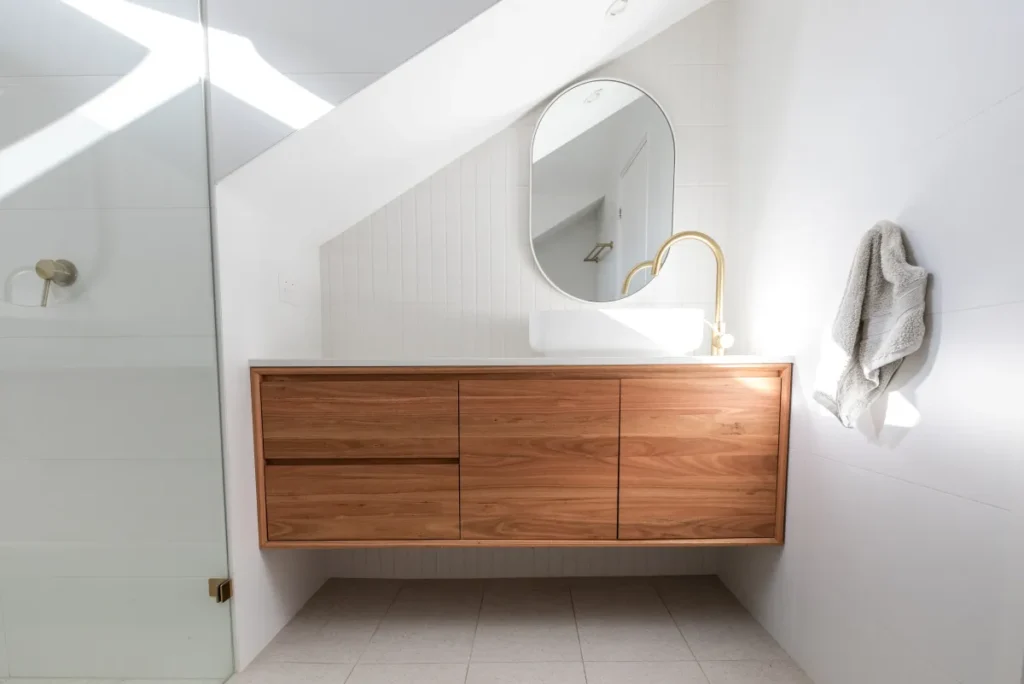
  • Vanity cabinet: MDF can stay stable and cost-effective; plywood boxes can handle moisture well. Additionally, Look for sturdy drawer hardware and quality hinges.
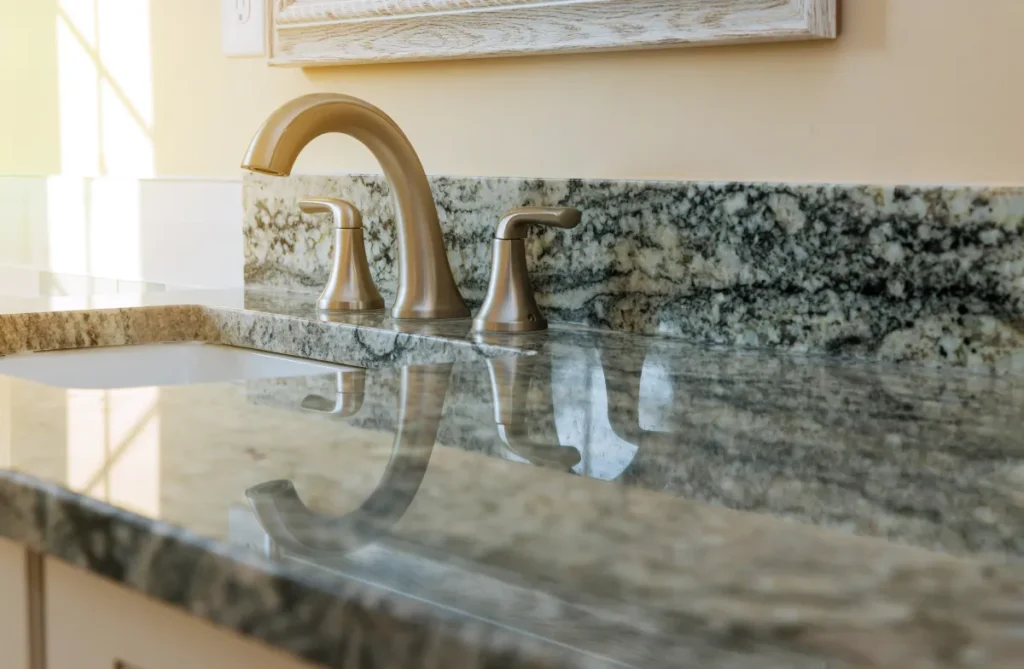
  • Vanity top: Quartz is consistent and low maintenance; solid-surface can be repaired; natural stone looks great but may need periodic sealing depending on the slab.
  • Sink material: Vitreous china/porcelain cleans easily and stays bright; fireclay feels substantial but needs careful handling during install.
  • Faucets and drains: Match finish and consider easy-to-find replacement parts. Also, Spout reach matters as much as style for splash control.
  • Tile and wall protection: A short backsplash or side splashes protect painted walls around the sink zone and help keep caulk lines tight.

Layout Patterns That Affect Sizing

Even in bathrooms, layout terms borrowed from kitchen design can help you picture the vanity run and the walking path. Overall, The goal is simple: the sink should feel generous without stealing clearance from the rest of the room.

  • Galley-style: A narrow bath with the vanity on one side and tub/shower opposite. Meanwhile, A smaller basin or a shallower vanity depth often improves comfort.
  • L-shape: A vanity run turns a corner. As a result, This can support a wider sink on the main run while the return leg carries storage or a makeup area.
  • U-shape: Cabinetry and counter space wrap around two walls in a larger bath. Also, This layout supports double sinks while keeping counter space between users.
  • Island-centered: In very large bathrooms, a furniture-style vanity can sit away from walls. Overall, Sink size is less constrained by wall depth, but plumbing routing and access still matter.

Cabinet Door Styles And Storage Choices

Door style sets the tone, while drawer layout sets the day-to-day experience. For this reason, Pick a look you can live with, then focus on storage that works around plumbing.

  • Shaker: Versatile, clean, and easy to pair with most finishes.
  • Slab: Minimal lines and easy wipe-down, often paired with modern hardware.
  • Raised panel: Traditional feel; it can fit homes with more classic trim details.
  • Storage tip: Drawer-heavy bases usually outperform door-only cabinets for everyday use.

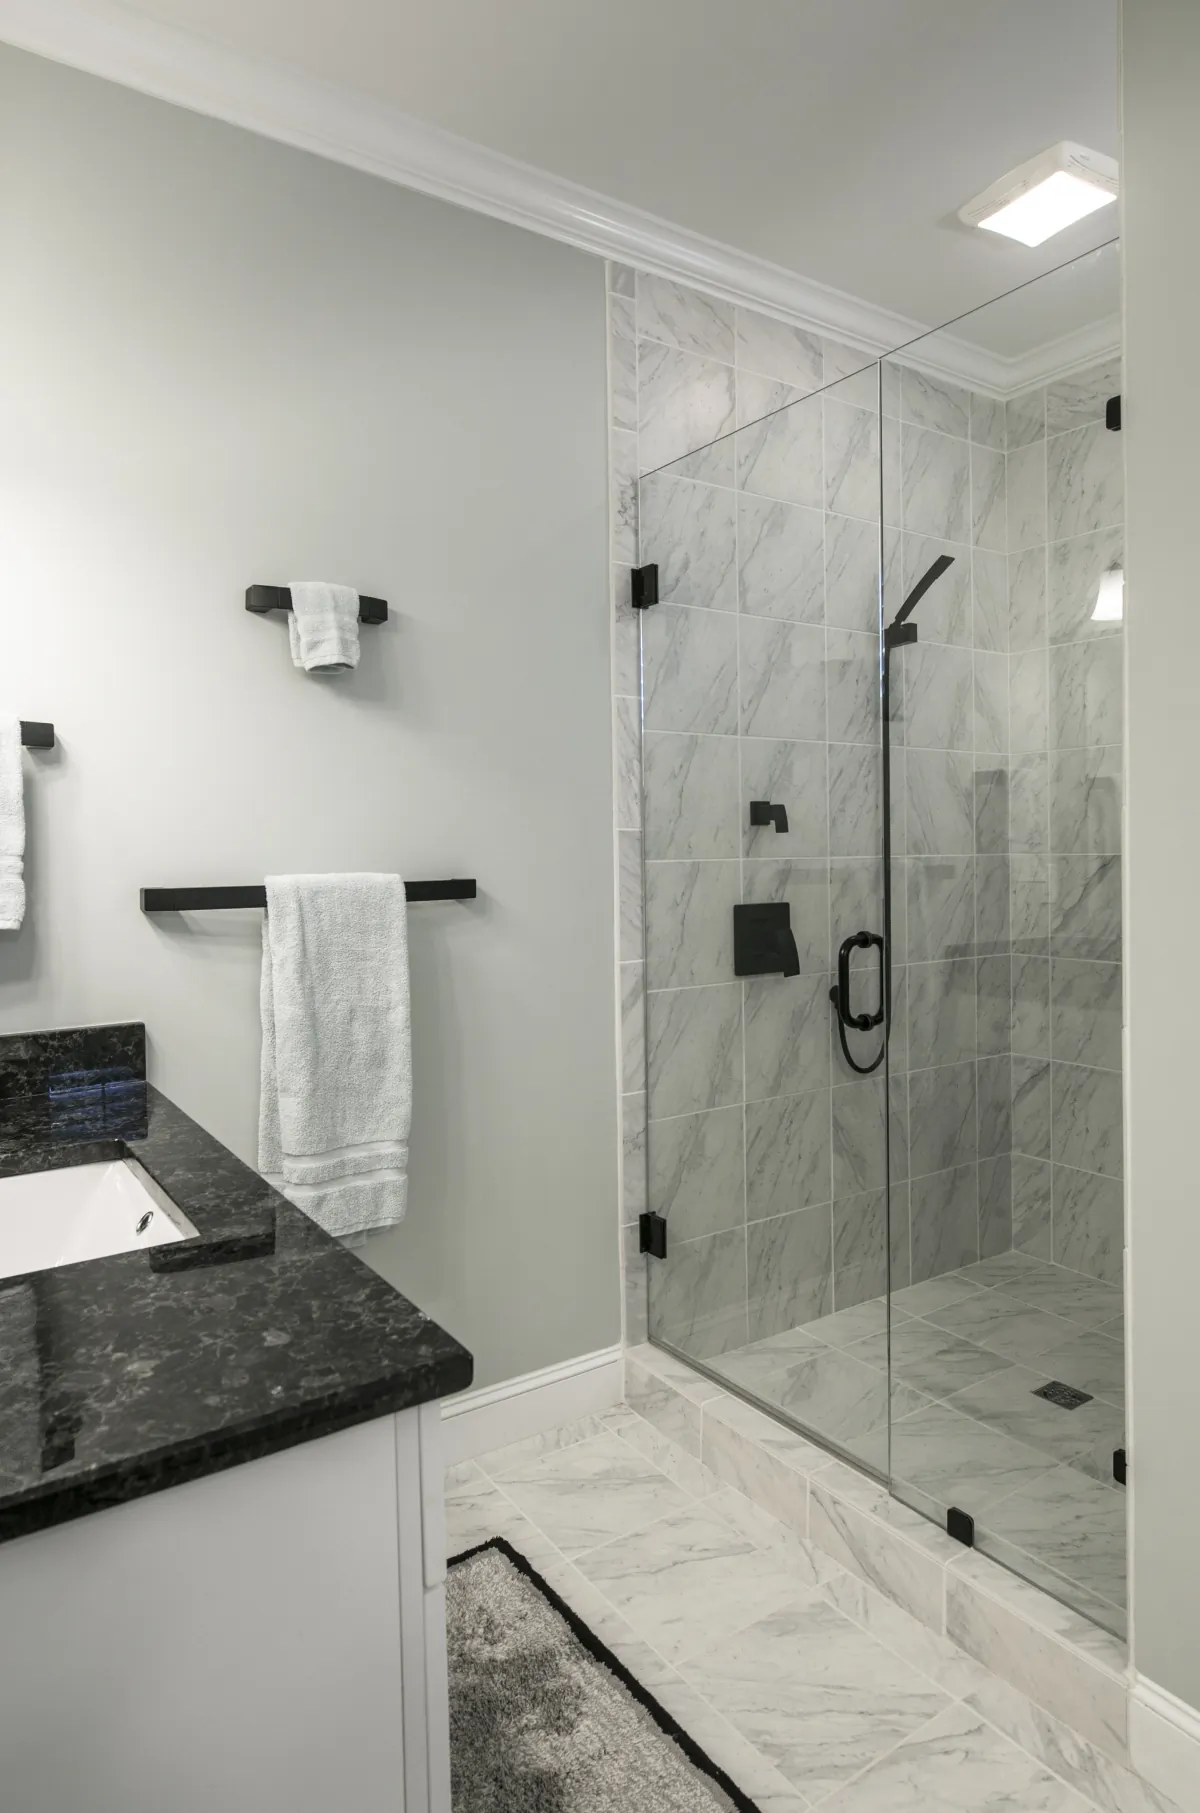
Countertop Options And Sink Mounting

  • Undermount: Clean look and easy wipe-into-the-bowl cleanup. As a result, Confirm cutout and cabinet rail clearance before ordering.
  • Drop-in: Fast installation and forgiving coverage if the cutout is not perfect.
  • Vessel: Can be a design statement, but it needs the right faucet height and thoughtful splash planning.

Flooring And Layered Lighting At The Vanity

Sizing decisions land better when the whole vanity zone works together. In addition, Flooring affects comfort underfoot, while lighting affects how the sink area feels every morning.

  • Flooring: Porcelain tile is durable and water-friendly; LVP can feel warmer underfoot if selected and installed for wet areas.
  • Ambient lighting: Even overhead illumination reduces shadows and makes the room feel larger.
  • Task lighting: Sconces or mirror lights help at the sink for shaving, skincare, and makeup.
  • Accent lighting: Toe-kick or niche lighting adds a finished look and improves nighttime safety.

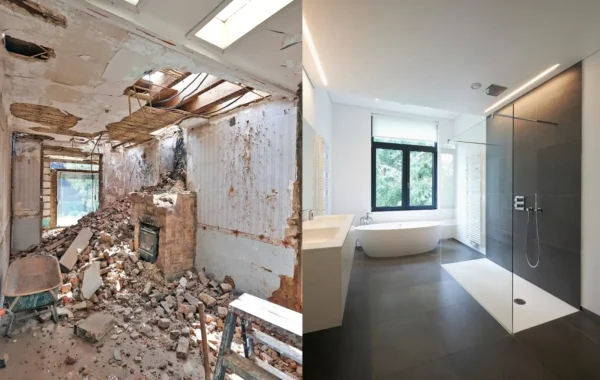
Timeline And Work Phases

The timeline for a sink update depends on whether you keep plumbing and surfaces in place. Additionally, A straightforward swap can be quick. A vanity replacement with new top, lighting, or tile needs more coordination, especially if inspections apply.

A Realistic Roadmap (From Measurements To Closeout)

  1. On-site measurements and a quick layout review.
  2. Choose sink type, vanity, top, faucet, and lighting.
  3. Confirm lead times and place orders.
  4. Protect nearby surfaces, demo as needed, and adjust backing/supports if required.
  5. Complete rough plumbing/electrical changes and schedule inspections if your scope requires them.
  6. Install the vanity and top, set the sink and faucet, and water-test all connections.
  7. Finish details: backsplash, paint, trim, caulk, and hardware.
  8. Punch list, cleanup, and handoff so the bathroom is ready for daily use.

Budget Ranges And Timeline (Typical)

  • Refresh: Same sink footprint with a new faucet and small plumbing parts; often 1 day on site once materials are in hand.
  • Upgrade: New vanity, top, and sink with no major plumbing move; commonly a few days on site, with timing driven by product availability.
  • Reconfigure: Moving drain/supplies, changing wall tile, or adding a second sink; plan for a longer timeline and coordination with inspections.

How To Avoid Delays

Most delays come from late decisions and mismatched parts. In addition, If you want the standard bathroom sink size you picked to install smoothly, confirm the cutout, faucet pattern, and plumbing alignment before anything is ordered.

Lock These Decisions Before Ordering

  • Sink type and exact cutout requirements.
  • Vanity width, depth, and drawer configuration.
  • Faucet hole pattern and spout reach.
  • Backsplash plan (tile vs slab vs side splashes).
  • Lighting locations and any outlet/switch changes near the vanity.

Site Prep That Keeps The Schedule Moving

  • Clear the vanity area and empty the cabinet before demo day.
  • Plan for a temporary sink routine if this is a single-bath home.
  • Confirm access for deliveries so installers can stay on schedule.
  • Do a quick order check so key parts are not missing on install day.

Maintenance Habits That Protect The Install

Good care prevents staining, swelling, and slow leaks that can damage cabinets over time.

  • Wipe standing water off the vanity top and around the faucet base.
  • Use non-abrasive cleaners on porcelain and most quartz or solid-surface tops.
  • Re-caulk when you see gaps at the backsplash or sink edge so water cannot get behind the top.
  • Check the trap and supply connections occasionally for drips, especially in the first month.
  • Vent the bathroom well after showers so moisture does not linger in the cabinet.
step-by-step bathroom remodeling in

Serving Homeowners In Sacramento

US Construction & Remodeling Corp. Overall, helps Sacramento homeowners choose a sink and vanity configuration that fits the room, matches existing plumbing when possible, and installs cleanly. We can handle a simple swap, a full vanity replacement, or a broader bathroom remodel that updates lighting, surfaces, and storage.

Talk it through before you buy: Call Call for a quick consult, or Free estimate.

Usconstructioncali.Com | Phone: +1 (916) 234-6696

How A Sizing-Focused Bathroom Project Typically Runs Locally

  1. Quick call to discuss goals, current layout, and any issues like splashing or low storage.
  2. On-site measurements of vanity space, door clearances, and plumbing alignment.
  3. Confirm scope: keep the same footprint or change sink/vanity size, lighting, or tile.
  4. Check whether permits apply based on the scope and clarify who will pull them.
  5. Select materials, confirm lead times, and schedule work around product arrival.
  6. Demo and rough-in adjustments (plumbing/electrical) with inspection coordination if required.
  7. Install vanity, top, sink, faucet, and finish protection (backsplash/caulk/trim).
  8. Punch list, cleanup, and a final water test so the sink area is ready for daily use.

Permits And Plan Review In Sacramento (High-Level)

Some sink and faucet swaps stay within a like-for-like scope, while plumbing moves or electrical changes can require permits. In Sacramento, permitting and plan review typically run through the City of Sacramento Community Development portal (Accela Citizen Access) for online applications, payments, and status tracking.

  • Keeping plumbing in the same location usually reduces complexity and downtime.
  • If you plan to move the drain or add new lighting/outlets, budget time for inspection scheduling.
  • Get permit responsibility in writing before work starts so there are no surprises mid-project.

Trust Checklist Before You Hire

  • Ask for proof of current licensing and insurance, and confirm the scope in a written agreement.
  • Clarify permit responsibility up front for any plumbing or electrical changes.
  • Agree on how change orders are priced and approved before extra work begins.
  • Set communication expectations (who you contact, when updates happen, and how schedule changes are handled).
  • Verify workmanship on install day: level vanity, tight caulk lines, and a documented water test for leaks.
  • Use the California Contractors State License Board (CSLB) license check to verify the contractor you hire.

Helpful Links

Frequently Asked Questions

There isn't one single number, but many sinks fall into common ranges that fit typical vanities. For many homes, a basin around 18 to 24 inches wide works well on a single-sink vanity. For accuracy, verify the spec sheet and confirm the countertop cutout and cabinet clearance before you order.

Single-sink vanities often land in the 24 to 36 inch range, depending on how much counter space and storage you want. Double-sink setups commonly start around 48 to 60 inches so you can keep usable counter space between basins. Room clearance, door swing, and plumbing alignment should drive the final choice.

Yes. Undermount sinks require a specific cutout and enough cabinet rail clearance, so you need to match the sink model to the top. Drop-in sinks hide minor cutout issues because the rim covers the opening. Vessel sinks sit on top of the counter, so you must plan faucet height and splash control more carefully.

A simple like-for-like swap often does not require a permit, but rules depend on your local jurisdiction and the scope. If you move plumbing, open walls, add electrical, or change venting, permits and inspections may apply. A contractor can help you identify permit triggers before work starts.

On-site work can be as short as a day for a straightforward swap, while a new vanity and top often takes a few days depending on scope and finish work. The bigger variable is usually lead time on the vanity, top, and fixtures. Ordering early and confirming compatibility reduces downtime.

Costs rise when the change forces additional work beyond the sink itself. The biggest drivers are moving the drain/supplies, replacing or modifying the countertop, changing backsplash tile, upgrading lighting/outlets, and repairing hidden water damage. Keeping the rough-in location the same is one of the simplest ways to control scope.

Start with basics: verify current licensing and insurance, get a written scope, and make sure the bid lists what is included (fixtures, disposal of old materials, and any plumbing or electrical work). Ask who is responsible for permits if they are necessary, and how change orders are handled. A good contractor will confirm measurements and compatibility before ordering materials.

Licensed, insured & trusted local contractor

US Construction & Remodeling Corp.
9821 Business Park Dr, Sacramento, CA, 95827
Phone: +1 (916) 234-6696

CSLB License #: 1117562 Fully licensed and insured.

View our Google Business Profile

Leave a comment

This website uses cookies to improve your web experience.
Explore
Drag