Skip links

Bathroom Wall Tile

Choosing bathroom wall tile is one of the biggest visual decisions in a remodel, and it also affects cleaning, grout upkeep, and how the room handles moisture.

Quick checklist:

  • Define the scope and prioritize daily function (shower, storage, ventilation).
  • Confirm what trade work is involved (plumbing, electrical, drywall) and the order of work.
  • Choose finishes that hold up in wet areas and are easy to clean.
  • Collect 2–3 quotes and compare line-by-line (scope, allowances, cleanup, warranty).
  • Decide what needs to be ordered first (tile, fixtures, vanity) to keep the schedule moving.

TL;DR: Define the wet zone and the tile layout before you buy, because late changes create delays and wasted material. Order extra from the same lot, and decide edge trim, niches, and hardware locations up front. Want a scope check? Schedule a free estimate online or call +1 (916) 234-6696.

  • Confirm where tile starts and stops (full-height, partial-height, or wainscot).
  • Pick tile size, pattern, and grout joint width.
  • Plan niches, shelves, and accessory locations before waterproofing.
  • Choose edge trim and transitions to drywall, paint, or stone.
  • Order 10–15% extra tile from one batch when possible.
  • Build the schedule around waterproofing and cure time.

A Practical Overview For Bathroom Wall Tile

DecisionWhy it mattersQuick check
Wet-area finishesWet zones need durable, easy-clean surfaces.Choose materials rated for bathrooms and simple maintenance.
VentilationHelps prevent humidity and long-term damage.Confirm fan sizing and vent routing.
LayoutGood layout improves daily usability.Verify clearances and door swings.
Budget controlKeeps scope creep from blowing up the price.Use allowances and a written change-order process.
  • Use large-format porcelain on shower walls to reduce grout lines.
  • Run a simple vertical stack pattern to make ceilings feel taller.
  • Tile a wainscot behind the toilet or vanity to protect painted walls from splashes.
  • Create one calm ‘feature’ wall behind the vanity and keep the other walls simple.
  • Choose matte tile for a softer look, also or glossy tile to brighten a dim bathroom.
  • Select grout color intentionally—match for a seamless look, contrast for definition.
  • Use metal edge profiles for crisp outside corners and clean transitions to drywall.
  • Add a recessed niche or a low-profile shampoo ledge instead of surface-mounted storage.
  • Coordinate tile undertones with fixture finishes so the room looks planned, not pieced together.
  • Use layered lighting to show texture without harsh shadows.

Good bathroom wall tile work depends on details you don’t see in a showroom: a flat substrate, straight layout lines, clean corners, and the right trim where tile meets paint or other materials.

This guide helps you scope a shower surround, a tub alcove, or a vanity backsplash so the installation looks intentional and stays easy to live with.

Resale And Long-Term Value

Tile rarely adds value by itself; the value comes from durable materials and workmanship that looks consistent. Meanwhile, If resale is on your mind, prioritize:

  • A neutral base tile with one controlled accent.
  • Even grout joints, clean cuts, and straight outside corners.
  • Finishes that hide water spots and fingerprints.
  • Built-in niches and shelves that feel integrated.

shower remodel modern bathroom decor

Planning And Scope Decisions For Bathroom Wall Tile

The fastest tile projects start with scope you can describe in one sentence and drawings you can point to. For this reason, Even if you’re not changing the layout, bathroom wall tile looks better when you plan cuts, trim, and stop lines before ordering.

Define The Wet Zone And Stop Lines

Decide where water regularly hits the wall and where tile should stop. Also, That decision affects waterproofing details, edge trim, paint transitions, and how the room looks from the doorway. Overall, If your plan includes moving plumbing, adding electrical, or changing walls, confirm permit requirements with your local building department before demolition.

  • Full-height shower walls to the ceiling vs. Overall, a lower stop line with painted drywall above.
  • Tile behind the vanity: a short backsplash, a half wall, or full-height up to the mirror.
  • Outside-corner details: wrap tile around the corner or end cleanly with trim.

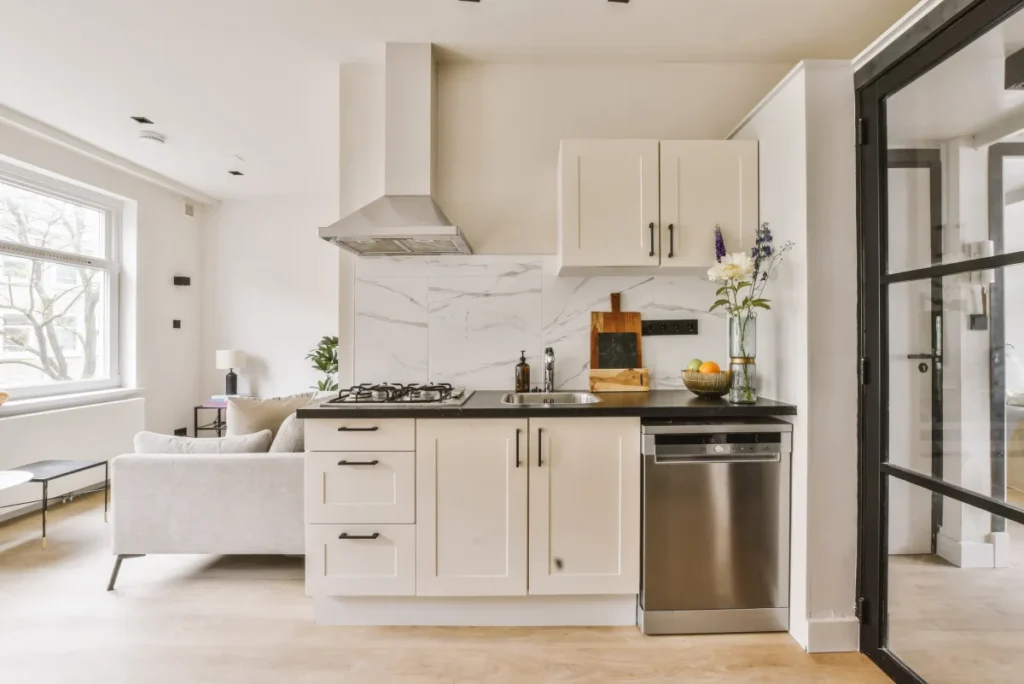
Small-Space Layout Moves That Make Tile Feel Bigger

Bathrooms vary, but layout language borrowed from kitchens can still help you visualize wall runs. Additionally, A galley layout places fixtures on opposing walls, an L-shape wraps one corner, a U-shape wraps three sides (common in tub or shower alcoves), and an island-centered plan can describe a larger bath with a freestanding tub as the visual center. Also, Whatever the footprint, keep grout lines predictable and avoid awkward slivers at the edges.

  • Center a feature wall on what you see first (often the vanity or shower back wall).
  • Align grout lines with the niche, valve trim, and shower head when possible.
  • Use larger tile on walls to reduce visual ‘noise’ in tight bathrooms.
  • Limit competing patterns—one statement surface usually reads more expensive than three.

Storage And Organization Details To Plan Before Tile

Tile is the finish layer, so you want blocking and framing in place for anything that mounts to the wall.

  • Recessed shampoo niches or a continuous ledge for bottles.
  • Recessed medicine cabinets (when framing allows) to reduce vanity clutter.
  • Towel bars, robe hooks, and grab bars with solid backing behind the tile.
  • Floating shelves in dry zones with planned anchor locations.

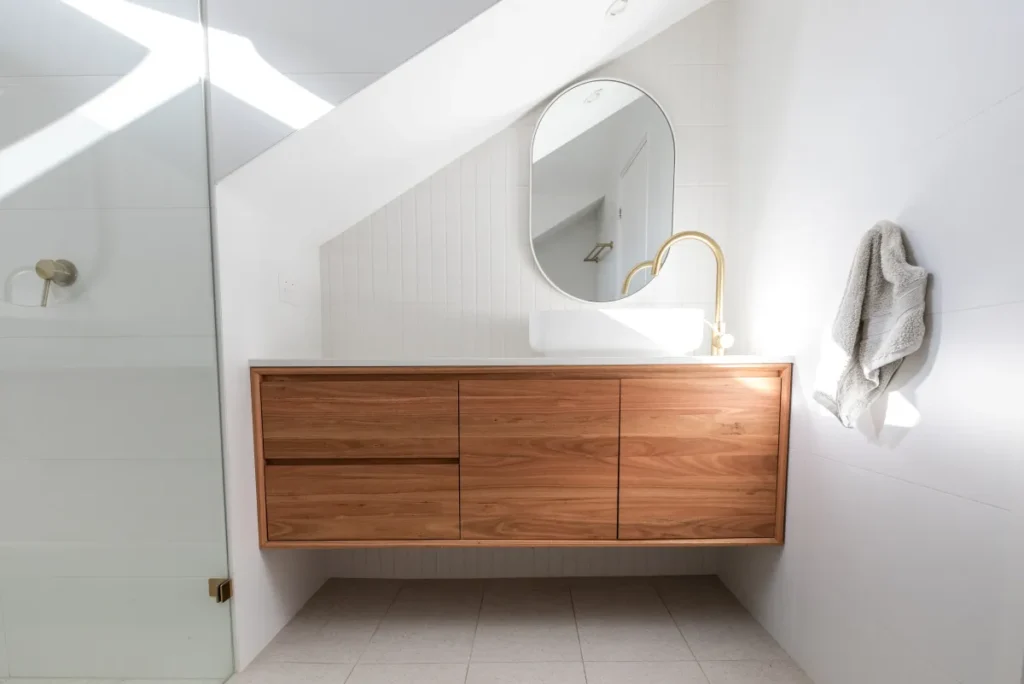
Vanity Cabinet Door Styles And Hardware (So Lines Look Intentional)

Your vanity is a ‘cabinet’ in every practical sense, so cabinet-door choices still matter. As a result, Shaker doors read classic, slab doors feel modern, and raised-panel doors lean traditional. In addition, Pick the door style and hardware finish early, then coordinate the tile pattern so grout lines don’t visually ‘fight’ the door rails and drawer reveals.

Countertop Options And Backsplash Height At The Vanity

Countertop choices affect the edge detail where wall tile meets the vanity. In addition, Common countertop options include quartz, solid surface, natural stone, cultured marble, and laminate. For this reason, Decide whether you want a short tiled backsplash, a full-height tiled wall, or a stone backsplash that matches the top, and confirm mirror height so everything lands cleanly.

Flooring Choices And Transitions

Wall tile should coordinate with the bathroom floor without forcing an exact match. For example, Porcelain floor tile handles water well, while other flooring products may need tighter transition details at the tub, shower, and toilet. Plan where the floor material changes at the doorway and how baseboards or tile base will finish the perimeter.

Layered Lighting (Ambient, Task, Accent)

  • Ambient: ceiling lighting that fills the room evenly.
  • Task: mirror lighting for shaving, makeup, and daily routines.
  • Accent: shower niche lighting or toe-kick glow to highlight texture.
DecisionWhy it affects time/costDecide it by
Tile size & patternChanges cuts, waste, and layout complexityBefore ordering
Niche/ledge locationsDrives framing and waterproofing detailsBefore waterproofing
Edge trim choiceSets corner quality and transitionsBefore tile install
Grout color/typeChanges maintenance and overall lookBefore setting tile
Vanity backsplash heightAffects mirror fit and splash protectionBefore countertop install
shower remodel bathroom close up wall new shower head in the ele

Material Choices And Lead Times

US Construction & Remodeling Corp. Overall, helps homeowners in Sacramento and across California translate a bathroom wall tile idea into a buildable plan—confirming quantities, trim pieces, and lead times so the job doesn’t stall mid-install.

If you want a material and scope check before you purchase, schedule your free estimate online. In addition, If you prefer to talk it through, call +1 (916) 234-6696.

Porcelain, Ceramic, And Natural Stone: Quick Comparison

  • Porcelain: dense, durable, and widely available; a strong default for showers.
  • Ceramic: often easier to cut; great for many wall applications when paired with a proper system.
  • Natural stone: beautiful, but it typically needs more sealing and careful maintenance.

Finish, Texture, And Edge Trim

Glossy tile reflects light and can make a bathroom feel brighter, while matte finishes hide water spots better. Also, confirm how outside corners will finish—many tiles don’t come with matching bullnose, so metal trims and profiles become part of the design.

Grout Choices That Balance Style And Upkeep

  • Choose a grout joint width that fits the tile edges (rectified vs. cushioned).
  • In high-splash areas, consider stain-resistant grout options and ask what maintenance they require.
  • Plan soft joints at changes of plane (corners) so the installation can move without cracking.

Maintenance Tips For Tile And Grout

  • Use a pH-neutral cleaner and avoid harsh acids that can weaken grout over time.
  • Wipe down shower walls after heavy use to reduce mineral buildup.
  • Keep caulk lines intact at corners and around penetrations; replace them when they separate.
  • Follow the grout manufacturer’s guidance on sealing (some products don’t need it).

Lead Times And Ordering Strategy

Many delays happen before the first tile is set. For this reason, Order tile, trim, and specialty pieces together when possible, and keep a few spare tiles for future repairs. If you’re using multiple boxes, mix from several boxes during installation to reduce shade variation.

Frequently Asked Questions

It depends on scope and prep. For bathroom wall tile in a dry zone (like a vanity backsplash), work can move quickly, while shower walls take longer because waterproofing and cure time create hold points.

  • Simple wall tile refresh: often measured in days.
  • Full shower walls: several days plus cure time, depending on details.
  • Custom patterns, niches, or stone: add layout time and cuts.

The biggest cost drivers are materials, prep, and complexity—not just the square footage.

  • Tile type and size (large-format and stone typically cost more to install).
  • Substrate repairs or leveling needed after demolition.
  • Waterproofing requirements in wet areas.
  • Niches, shelves, and edge trim details.
  • Access and protection for occupied homes.

In many cases, swapping wall finishes alone doesn’t require a building permit. However, permit needs can change if you move plumbing, add electrical, change framing, or alter the shower/tub assembly.

The safest approach is to confirm with your local jurisdiction based on your address and scope, and make sure your contractor spells out who is responsible for permit coordination when it applies.

Both can work when installed over the right waterproofing system. Porcelain is dense and durable, which makes it a popular choice for showers. Ceramic often cuts easier and can be a great wall tile when the product and installation method fit the application.

If you want natural stone, plan for sealing and more ongoing maintenance.

Grout selection affects both the look and the upkeep. Cement-based grout is common, while other options can offer higher stain resistance.

  • Match grout color to tile for a calmer look; contrast for a more graphic pattern.
  • Use flexible sealant where planes change (corners) to reduce cracking.
  • Follow the grout manufacturer’s guidance on sealing and cleaning products.

For most projects, ordering 10–15% extra is a practical starting point. Increase that buffer for diagonal layouts, complex patterns, lots of corners, or if you want attic stock for future repairs.

buy all tile at once when you can so dye lots match more closely.

Look for clarity and specificity before you look at price.

  • Ask what waterproofing system will be used in wet areas and how it’s detailed at niches and corners.
  • Confirm edge trim, grout type/color, and who provides materials.
  • Require a written layout approach so you avoid tiny edge slivers.
  • Verify license status through the CSLB and request proof of insurance.

Leave a comment

This website uses cookies to improve your web experience.
Explore
Drag