Skip links

Walk In Shower With Window: Planning, Privacy, and Waterproofing

A walk-in shower with a window can brighten a bathroom and improve comfort, but the window turns into a high-splash detail that needs real planning.

Quick checklist:

  • Define the scope and prioritize daily function (shower, storage, ventilation).
  • Confirm what trade work is involved (plumbing, electrical, drywall) and the order of work.
  • Choose finishes that hold up in wet areas and are easy to clean.
  • Collect 2–3 quotes and compare line-by-line (scope, allowances, cleanup, warranty).
  • Decide what needs to be ordered first (tile, fixtures, vanity) to keep the schedule moving.

TL;DR: Keep direct spray off the window, treat the sill like part of the wet area, and pick privacy you won’t regret. Make sure your written estimate spells out the window approach, waterproofing method, and inspection plan.

  • Decide whether to keep, replace, or resize the shower window
  • Choose privacy: obscure glass, film, or a higher window position
  • Plan a sloped, waterproof sill and trim (avoid exposed wood)
  • Lay out the shower so spray doesn’t hit the window
  • Confirm which permits/inspections apply to your scope
  • Request a written estimate with tile, glass, and window details

Planning, Permits, And Practical Decisions For Walk-In Shower

DecisionWhy it mattersQuick check
Wet-area finishesWet zones need durable, easy-clean surfaces.Choose materials rated for bathrooms and simple maintenance.
VentilationHelps prevent humidity and long-term damage.Confirm fan sizing and vent routing.
LayoutGood layout improves daily usability.Verify clearances and door swings.
Budget controlKeeps scope creep from blowing up the price.Use allowances and a written change-order process.
  • Add a fixed glass panel to keep spray off the window
  • Aim the shower head away from the frame (or use a rain head carefully)
  • Choose obscure or textured safety glass for privacy without losing daylight
  • Detail a solid-surface sill that slopes toward the drain
  • Use wet-area-friendly jamb/trim materials with fully sealed corners
  • Place a recessed niche on a side wall so bottles don’t live on the sill
  • Use easy-clean wall finishes (large-format porcelain is also a common pick)
  • Add a bench only where it won’t trap water at the window corner
  • Layer lighting so the shower stays bright after sunset
  • Match window hardware and fixture finishes for a finished, intentional look

With a shower window, you’re balancing light, privacy, and water control in the same corner. Overall, When you plan it well, the space feels open and comfortable. In addition, When you wing it, the window becomes the leak-prone detail you fight for years.

Homeowners usually choose this layout because they want daylight, ventilation, or they simply don’t want to lose a window that makes the bathroom feel bigger. Also, The tradeoff is detail work around the frame, sill, and splash path.

Storage Optimization That Stays Dry

Keep daily items off the window ledge so the area dries faster and cleans easier.

  • Recessed shampoo niche (single or double) on a side wall
  • Corner shelf kit placed away from the window splash zone
  • Floating vanity with deep drawers instead of open shelves
  • Recessed medicine cabinet to reduce countertop clutter
  • Towel hooks and a small tower cabinet outside the wet area

Who This Service Is For

This upgrade fits homeowners who want a brighter bathroom and also want the window handled as part of the wet-area build, not an afterthought.

  • You want better privacy without blocking natural light
  • You’re considering window replacement during a bathroom remodel
  • You want an accessible entry (low curb or curbless) with smart drainage
  • You prefer a clean, low-maintenance finish that’s easy to wipe down

shower remodel shower upscale home

Planning Checklist (Scope, Materials, Budget) For Walk-In Shower

The best plans answer a few practical questions early: Are you keeping the window or replacing it? For this reason, Will you change the shower size or plumbing locations? For this reason, Which surfaces will be solid-surface, tile, or glass? Those decisions control the waterproofing details and keep your pricing honest.

Layout Planning Around A Shower Window

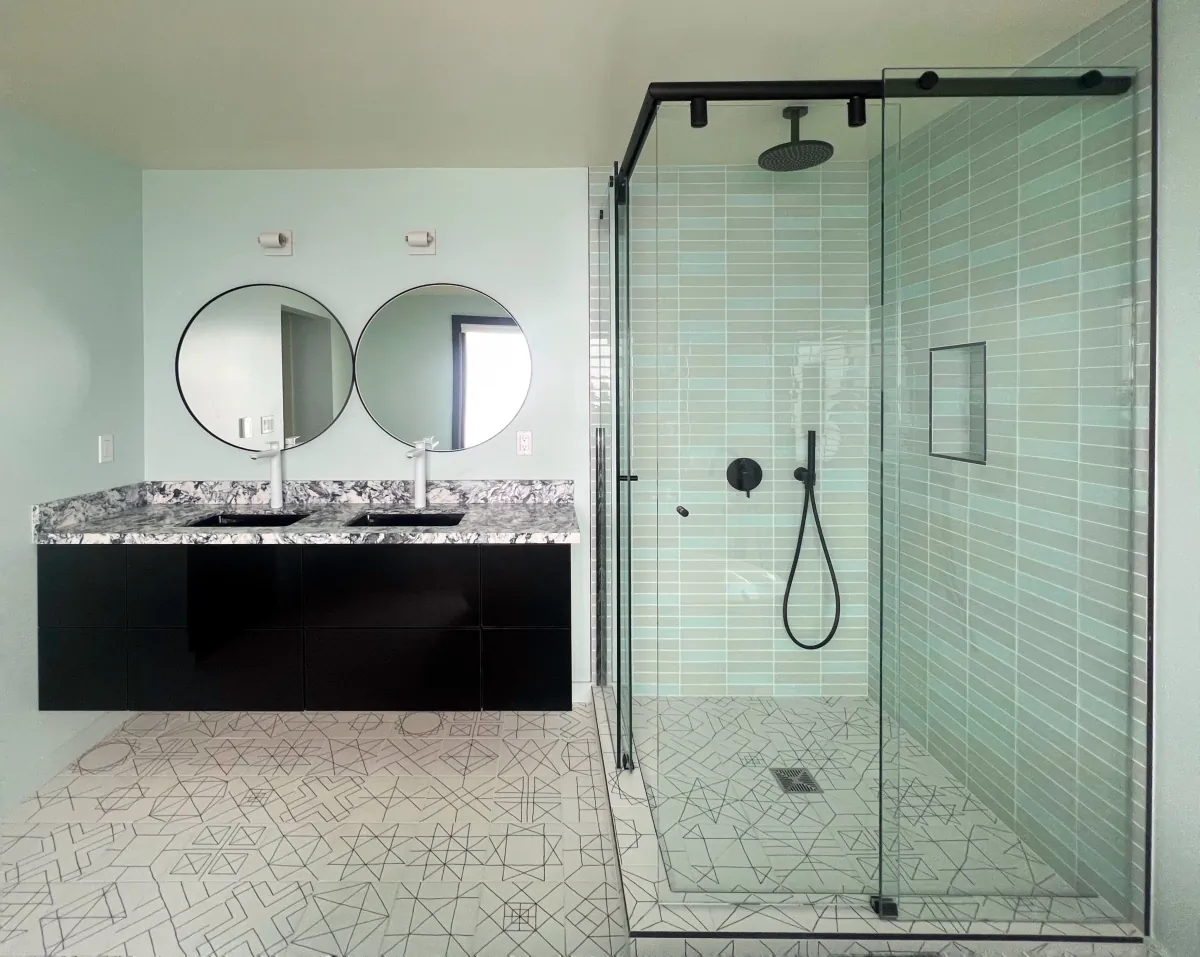
Bathrooms still follow layout rules. Meanwhile, A single-wall plan keeps fixtures on one side, while a galley layout places the vanity and shower across from each other. In addition, Larger rooms can support an L-shape or U-shape vanity zone, and some primary suites even use an island-centered vanity. Whatever the footprint, treat the window wall as a splash-risk area and plan glass, controls, and storage to keep it drier.

  • Place shower controls where you can reach them without getting blasted by cold water
  • Use a fixed panel or return glass to break the splash path before it reaches the window
  • Decide on curb vs. In addition, curbless early because it changes drain placement and slope
  • Confirm door swings and clearances so the shower entry stays comfortable
  • Keep towels, outlets, and switches outside the likely splash zone
  • Make sure the window can be cleaned and operated safely (if operable)

Materials Deep-Dive: Window, Sill, Tile, Trim

A shower window is not just a “window detail.” It’s part of the waterproof envelope. For example, Choose materials that tolerate water, and plan the transition so water always sheds back into the shower.

  • Window plan: Keep the existing unit when it’s in good condition and you can detail the sill properly; consider replacement when the frame is worn, drafty, hard to seal, or you want built-in privacy glass
  • Glass/privacy: Obscure or textured glass gives lasting privacy; film can work, but it can peel over time in humid conditions
  • Sill/jamb materials: Solid-surface, quartz, porcelain, or stone pieces clean easily and handle moisture better than wood trim
  • Waterproofing: Use a complete system (membrane + compatible sealants) and follow manufacturer instructions; ask how the window corners get reinforced
  • Tile: Porcelain resists water and stains well; natural stone can look great but typically asks for more maintenance and careful sealing
  • Grout and joints: Plan movement joints where planes change, and use the right sealant at transitions instead of forcing grout everywhere

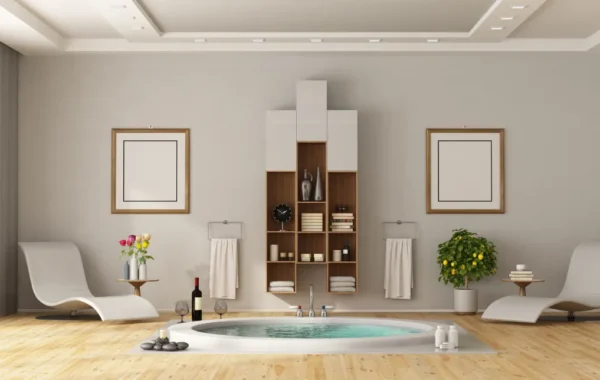
Coordinating Cabinetry, Counters, Flooring, Lighting

Even when the shower is the star, most bathrooms look better when the vanity zone and lighting match the new finish level. It also helps resale because buyers see a complete room.

  • Cabinet door styles: Shaker, slab, and raised-panel doors all work; pick a finish that handles humidity and cleans easily
  • Countertop options: Quartz, granite, solid-surface, and porcelain slabs are common; consider a short backsplash to protect the wall
  • Flooring choices: Porcelain tile is a go-to for wet rooms; natural stone can be premium; waterproof LVP can work in some bathrooms when detailed correctly around wet areas
  • Layered lighting: Combine ambient ceiling light, task lighting at the mirror, and accent lighting (like a niche light) for a balanced space
DecisionOptionsWhat it affects
Window planKeep / Replace / ResizeWaterproofing details, privacy, budget
PrivacyObscure glass / Film / Higher windowDaylight, cleaning, daily comfort
EntryLow curb / CurblessDrain placement, slope, accessibility
Wall finishPorcelain tile / Stone / PanelsMaintenance, install time, cost drivers
GlassFixed panel / Hinged door / SliderSplash control near the window
VentilationStandard fan / Humidity-sensingDry-down speed and comfort

Bring This Scope List To Bids

  • Shower size and entry style (curb/curbless)
  • Window keep/replace plan and privacy approach
  • Tile locations (floor, walls, ceiling) and grout preference
  • Niches, benches, shelves, and grab bar backing (if needed)
  • Plumbing fixtures (valve, head, handheld, drain type)
  • Glass type (fixed panel, door, or both)
  • Vent fan and lighting changes
  • Who handles permits and inspections

Permits And Inspections (General)

Permit needs depend on scope and jurisdiction. As a result, Simple finish swaps may not trigger permits, but opening walls, moving plumbing, changing electrical, modifying framing, or replacing a window often does. Additionally, A responsible contractor should explain what they plan to permit, who pulls it, and which inspections they expect before the work starts.

Project Flow (Estimate To Final Inspection)

  1. Site visit and measurements (including the window opening and sill condition)
  2. Written estimate that spells out the window plan, waterproofing approach, and materials allowances (if any)
  3. Final selections: tile, grout, fixtures, glass, and any window replacement details
  4. Permitting submittal (when required) and inspection planning
  5. Demo and rough-in work (plumbing/electrical/framing as needed)
  6. Waterproofing, then tile and finish work
  7. Glass install, final punch list, and closeout after any final inspection

Key Milestones

Most schedules get delayed by two things: waiting on approvals/inspections and waiting on special-order materials (glass, tile, or a replacement window). Additionally, When you lock in selections early, you reduce surprises.

  • Measure and confirm the window plan (keep vs replace) before ordering finishes
  • Finalize layout, drain location, and curb/curbless decision
  • Order long-lead items (custom glass, specialty tile, windows)
  • Complete demo and rough-in changes
  • Install waterproofing and complete any required check-ins
  • Set tile, grout, and seal transitions
  • Install glass and fixtures, then complete final walkthrough

Budget Ranges & Timeline (Typical)

  • Keeping the window and leaving plumbing in place usually keeps complexity lower
  • Window replacement, resizing, or plumbing moves add steps that can stretch the schedule
  • Tile format and pattern drive labor (and drying time) more than most homeowners expect
  • Custom glass and special-order windows often drive lead times more than on-site labor

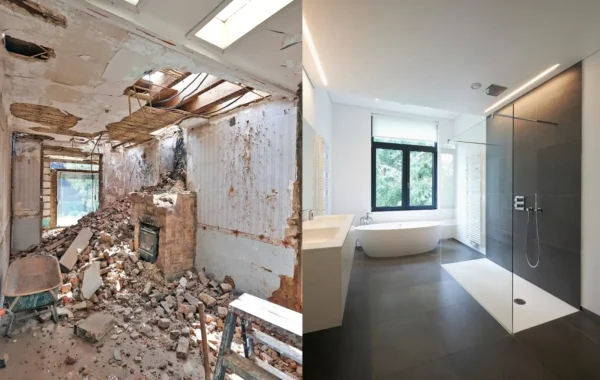
Hypothetical Before/After Snapshot

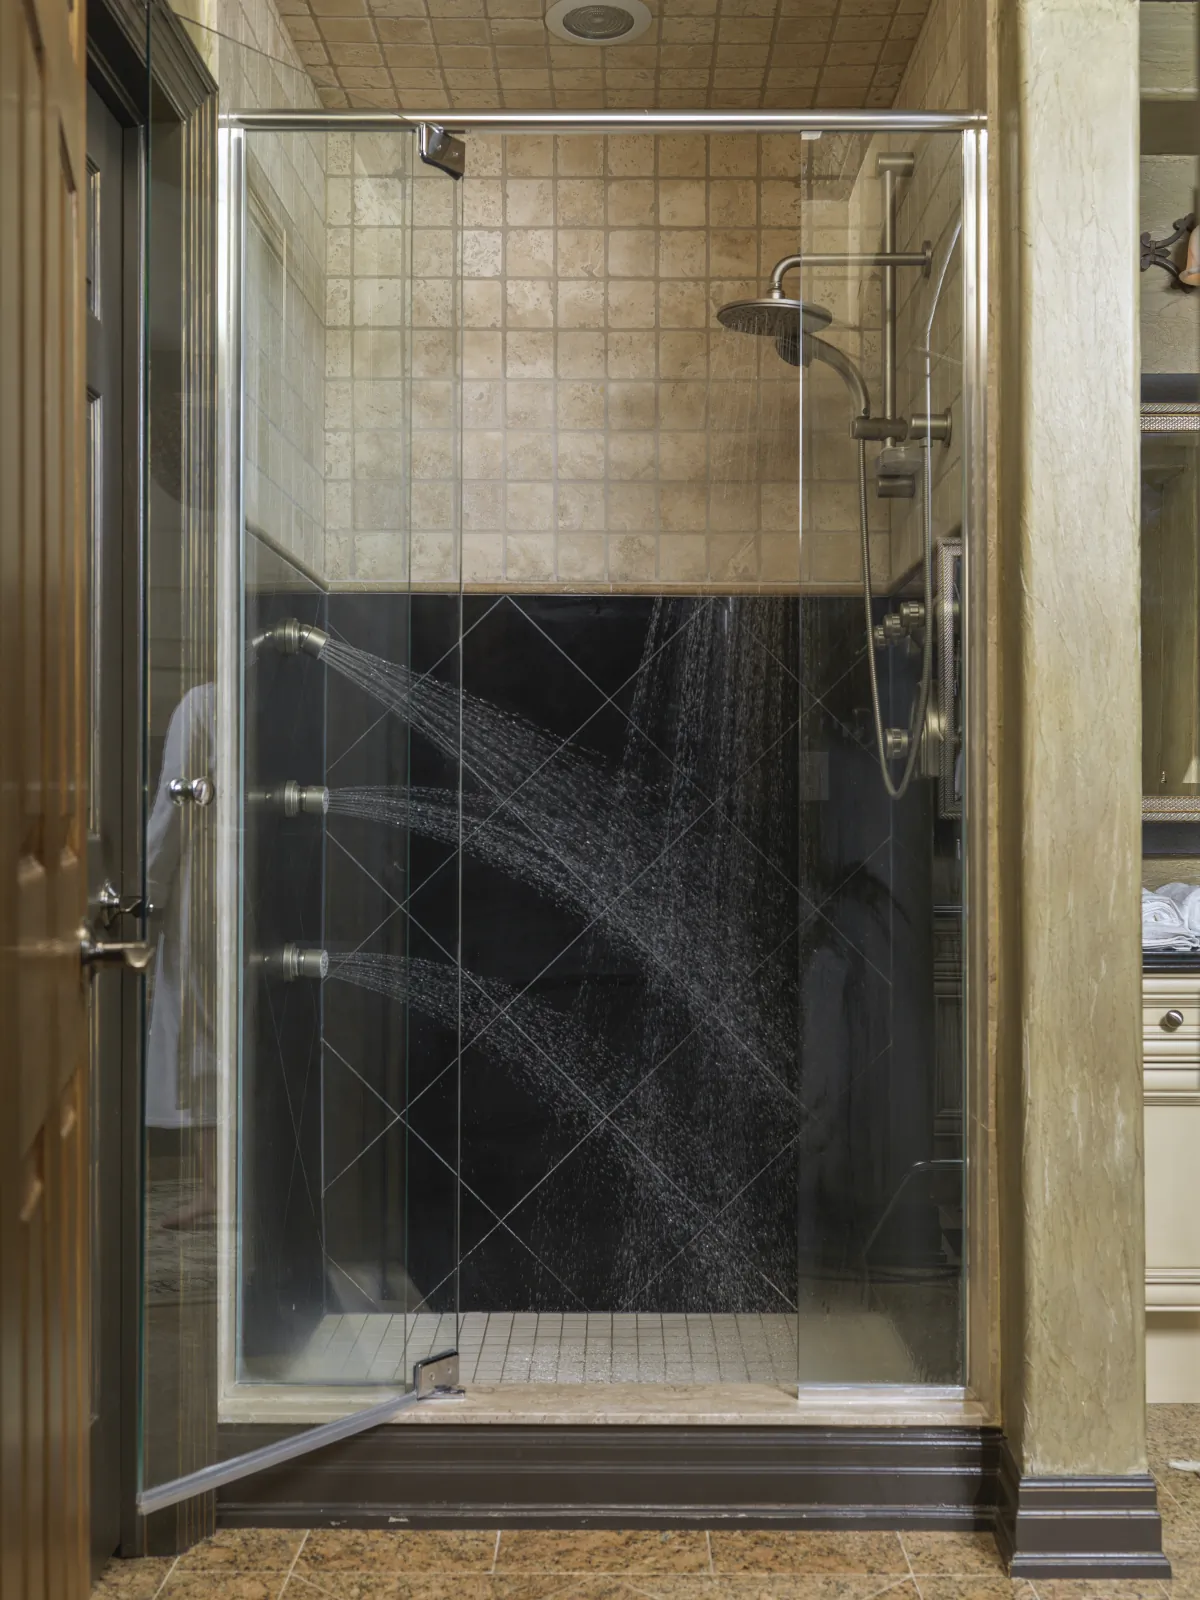
Hypothetical example: A homeowner starts with a standard tub/shower where the window sits in the spray path. For example, The wood trim shows staining, the caulk line fails repeatedly, and the sill holds water after every shower.

After redesign, the layout uses a fixed glass panel to shield the window, the sill slopes into the shower, and the jamb materials tolerate moisture. Overall, Storage moves to a niche on the side wall, so the window ledge stays clear and dries faster.

Common Mistakes To Avoid

Most shower-window failures come from small shortcuts. For this reason, The fixes cost more after tile goes up, so it’s worth catching them early.

  • Leaving a flat window sill that holds water instead of shedding it
  • Using wood trim in a true wet area
  • Relying on caulk alone instead of integrating the window into the waterproofing system
  • Skipping a splash-control plan (no fixed panel, poor shower head placement)
  • Choosing finishes that look great but are hard to maintain in a high-humidity corner
  • Forgetting ventilation upgrades and ending up with persistent condensation
  • Not planning for where shampoo bottles will live (the sill becomes the shelf)
  • Collecting bids that don’t spell out the same window approach, so pricing can’t be compared

Resale And ROI Priorities

Resale value depends on your neighborhood and overall home condition, but buyers consistently notice workmanship and water control. Also, Prioritize the items that reduce visible wear and future maintenance.

  • Simple, durable finishes (easy-clean tile and clean transitions)
  • Solid ventilation and lighting upgrades that make the room feel bright
  • Thoughtful storage so the shower stays uncluttered
  • Clear documentation: what was replaced, what was waterproofed, and what was permitted (when applicable)

If you want a second set of eyes on your plan before ordering materials, call +1 (916) 234-6696 and talk through the window and layout choices.

jacuzzi bath remodel modern shower bathtub modern stylish home

Next Step In Sacramento

US Construction & Remodeling Corp. Also, helps Sacramento homeowners plan and build shower upgrades that involve both wet-area construction and window decisions, so the details get priced clearly and built correctly.

Request a written estimate and send a few basics so the quote matches your real scope.

  • Photos of the current shower and the window (inside and outside if possible)
  • Approximate bathroom and shower dimensions
  • Whether you want to keep, replace, or resize the window
  • Your preferred finish direction (tile type, grout look, fixture finish)
  • Curbless vs low-curb preference and any accessibility needs
  • Your ideal start window and any deadline constraints

Sacramento Permit Logistics To Expect

If your address is within the City of Sacramento, permitting and plan review typically run through the City of Sacramento Community Development portal (Accela Citizen Access). Meanwhile, Applications, payments, and status tracking are handled online. For example, Requirements can still vary by scope, so confirm the permit path before demo starts.

Trust And Accountability Checks

  • Ask for license and insurance information and verify what you can independently
  • Confirm who pulls permits (when required) and how inspections will be scheduled
  • Request the waterproofing method in writing, including how window corners get detailed
  • Clarify communication: who your day-to-day contact is and how changes get approved
  • Expect a final walkthrough and a clean, itemized closeout list

Call: +1 (916) 234-6696

Helpful Links

Frequently Asked Questions

Not always. Keeping the existing window can work when the frame is in good condition and the new shower design can control splash at the sill.

Consider window replacement when the unit is drafty, damaged, hard to seal, or you want built-in privacy glass without relying on film. Replacing it while the walls are open can also simplify detailing.

Pick privacy that stays simple to clean and holds up in humidity.

  • Obscure/textured glass (lasting and low-maintenance)
  • Frosted film (budget-friendly, but can peel over time)
  • A higher window position or smaller opening (when layout allows)
  • Placing the shower head and glass to reduce direct sightlines

Often, windows near tubs and showers need safety glazing, but requirements depend on location and details. Your local building department or inspector can confirm what applies to your specific window placement and size.

If you replace the window, make sure the new unit meets the applicable safety and energy requirements for your jurisdiction.

It depends on what changes. Moving plumbing, opening walls, altering framing, upgrading electrical, or replacing/resizing a window commonly triggers permits.

In Sacramento, homeowners typically track applications and status through the City of Sacramento Community Development portal (Accela Citizen Access). Outside the city, the process varies by jurisdiction.

The schedule depends on scope, inspections, and material lead times. A straightforward refresh moves faster, while window replacement, plumbing changes, custom glass, or curbless designs add steps.

A good plan lists milestones (demo, rough-in, waterproofing, tile, glass, final) so you can see what’s next and why.

Cost usually follows complexity and materials, not just square footage.

  • Window replacement or resizing
  • Relocating plumbing or changing the shower footprint
  • Curbless entry and drain/slope requirements
  • Tile choices (format, pattern, and niche/bench details)
  • Custom glass and upgraded fixtures
  • Ventilation and lighting upgrades

Look for clear documentation and a plan that addresses the window as part of the wet area.

  • Verify licensing through the California CSLB and ask for proof of insurance
  • Insist on a written estimate that spells out the window plan and waterproofing method
  • Ask who will pull permits (when required) and how inspections will be handled
  • Confirm how changes get approved and priced before work continues
  • Request a final walkthrough and written warranty terms

Licensed, insured & trusted local contractor

US Construction & Remodeling Corp.
9821 Business Park Dr, Sacramento, CA, 95827
Phone: +1 (916) 234-6696

CSLB License #: 1117562 Fully licensed and insured.

View our Google Business Profile

Leave a comment

This website uses cookies to improve your web experience.
Explore
Drag