If you’re researching t1-11 siding for a California home, the details that matter most are the panel type, how seams and edges are protected, and what finish system is used. Done right, it’s a clean, classic look that also protects the wall assembly—provided the install and paint prep are handled carefully.
TL;DR: If you’re researching t1-11 siding for a California home, the details that matter most are the panel type, how seams and edges are protected, and what finish system is used. Done right, it’s a clean, classic look that also protects the wall…
Quick checklist:
- Pick a siding material and finish that matches climate and maintenance goals.
- Confirm moisture management details (housewrap, flashing, caulking) in writing.
- Define the full scope (trim, soffit/fascia, paint, insulation upgrades).
- Confirm access/safety plan and how landscaping/property will be protected.
- Compare 2–3 itemized quotes and verify warranty coverage.
- Check permit requirements if altering exterior walls or doing structural repairs.
This guide breaks down practical options, scope choices, finish selection, and a typical job timeline so you can plan confidently before you start calling contractors.
Options And What Each Includes For t1-11 Siding
TL;DR: Most issues people blame on “bad panels” come from moisture getting into edges, seams, or penetrations. Overall, A solid t1-11 siding result depends on the whole system: water-resistive barrier, flashing, panel fastening, caulking strategy, and the paint/stain schedule.
Quick Checklist (Before You Price Anything):
- Confirm panel type (plywood vs OSB) and thickness you want to match.
- Decide if you’re matching existing groove spacing or changing the look.
- Inspect bottom edges, also especially near soil, patios, and sprinklers.
- Plan how seams will be handled (H-joints, Z-flashing, battens, or trim).
- Choose the finish approach: paint, stain, or solid-color stain.
- Ask how wrap and flashing will be handled at windows/doors and roof-to-wall lines.
Common “Options” Homeowners Compare
“T1-11” gets used as a catch-all term, but the scope can vary a lot. In addition, In practice, homeowners usually choose one of these directions:
- Replace in-kind panels: Remove damaged panels and install new ones that match the existing profile, then prime and paint/stain.
- Upgrade the weather details: Keep the look, but improve water control with better flashing, trim strategy, and careful edge protection.
- Change the exterior style: Replace t1-11 siding with a different siding type (often more work because trim and openings may change).
What Buyers Notice
Exterior projects can help resale when they solve visible problems and reduce buyer “unknowns.” In other words, peeling paint, swollen edges, and stained seams raise questions. Meanwhile, A clean siding plane, crisp trim lines, and properly sealed penetrations tend to read as “well cared for,” which supports value without needing flashy upgrades.
For ROI, prioritize:
- Water management first: Fix leaks and flashing details so you’re not repainting in a year.
- Consistency: Match panel layout and trim reveals so repairs don’t look patchy.
- Durable finish system: Good primer/paint and proper cure time usually outperform “fast paint” jobs.
Scope Options (Refresh Vs Full Remodel)
Homeowners often start with the same question: “Do I need to replace panels, or can I refresh what’s there?” The right answer comes from a close inspection of edges, seams, and the wall behind the panels. For example, Some projects look like a quick repaint until you find soft areas at the bottom edge or around windows.
Refresh Scope (When It’s Realistic)
A refresh can make sense when panels are structurally sound and the main issue is aged coating. Additionally, The work typically focuses on scraping, sanding, spot repairs, caulking at appropriate joints, priming, and repainting or re-staining. For this reason, This route lives or dies by surface prep, so ask specifically what prep steps are included in writing.
Full Replacement Scope (When It’s The Smarter Spend)
Replacement is usually the better investment when panels show swelling, delamination, recurring moldy staining from trapped moisture, or widespread softness at fastener lines and bottom edges. Also, At that point, new panels plus upgraded flashing and wrap details can reset the wall system and stop the cycle of patch-and-paint.
Key Decisions At A Glance
| Decision | Best when | Main cost drivers | Timeline impact |
|---|---|---|---|
| Refresh (prep + repaint) | Panels are solid; coating is failing | Prep level, access, trim complexity | Often shorter; cure time still matters |
| Selective panel replacement | Damage is localized | Matching profile, hidden repairs | Depends on repairs discovered |
| Full re-side with t1-11 siding | Widespread swelling/rot risk | Wrap/flashing scope, elevations, trim | More demo and detailing time |
| Layout/trim redesign | You want a cleaner visual break-up | New trim plan, window/door detailing | More planning and finish work |

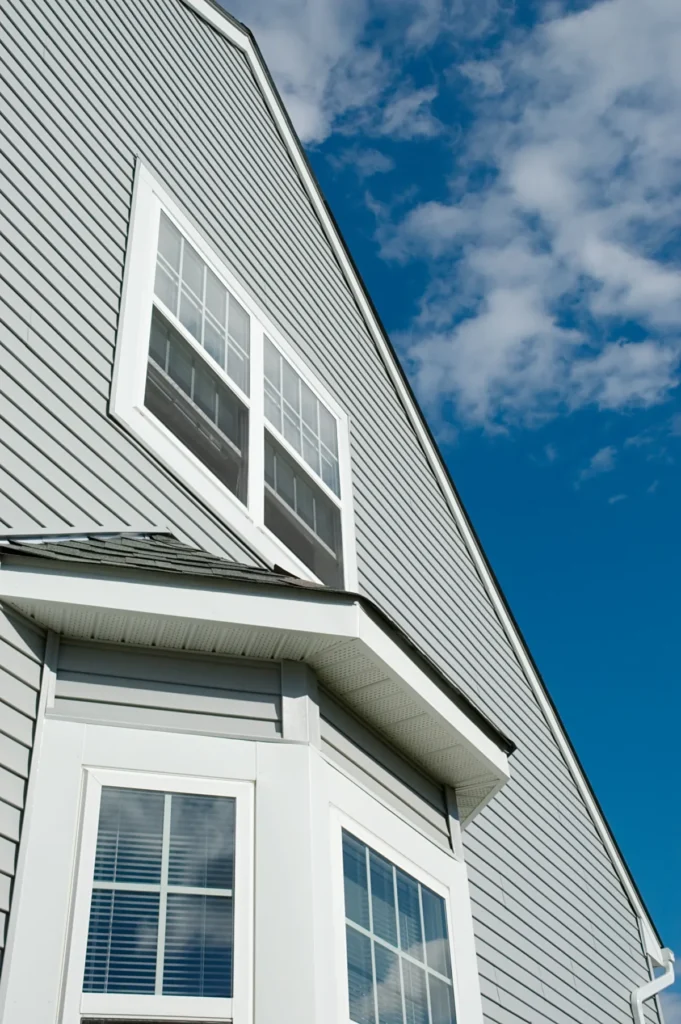
Materials And Finish Selections For t1-11 Siding
Material choice isn’t just a look decision. As a result, It affects how the wall handles moisture, how often you maintain it, and how forgiving it is when sprinklers, planters, or roof runoff get involved.
What To Compare
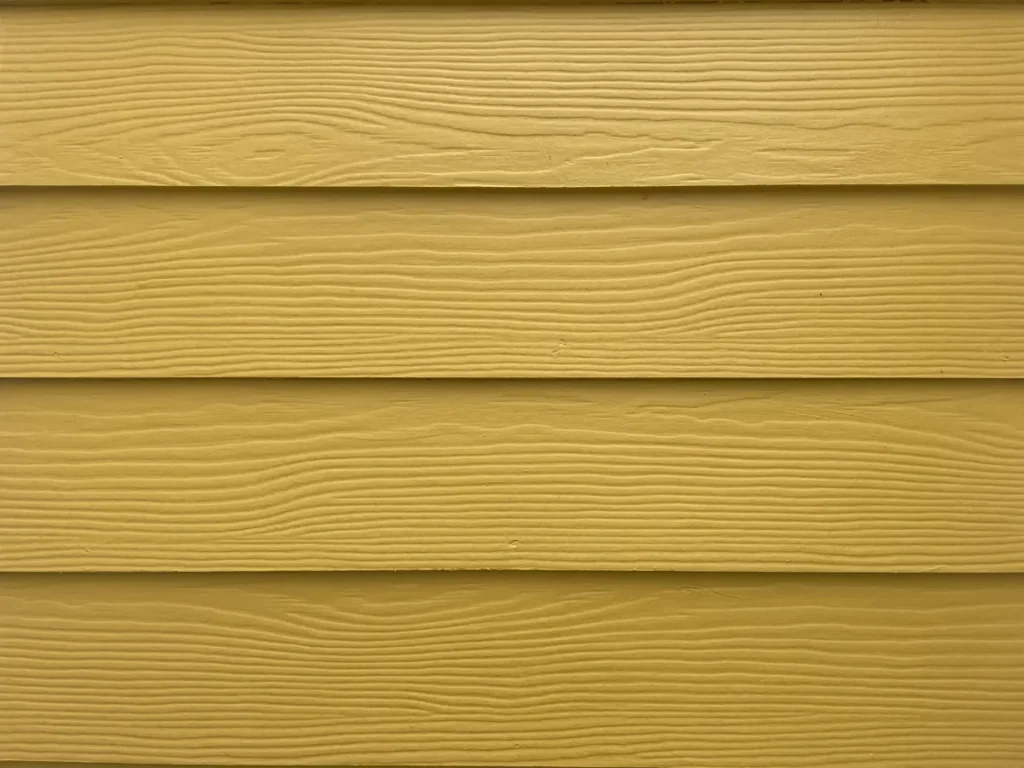
- Plywood vs OSB panels: Both are used in the market, and each behaves differently at edges when exposed to water. For this reason, Ask what panel type is being proposed and how edges will be sealed and protected.
- Thickness and stiffness: Thicker panels often feel more solid and can help reduce waviness. Matching existing thickness also helps trim details line up cleanly.
- Groove spacing and profile: The pattern (and how seams line up) changes the look more than most people expect. For this reason, If you’re doing partial replacement, profile matching matters.
- Primed vs unprimed: Factory-primed panels can help, but field cuts and edges still need attention. Also, Clarify what gets primed on-site, including cut edges and penetrations.
Finish Choices That Hold Up
Paint is common for a uniform exterior, while stain can highlight the panel texture. As a result, Solid-color stain can sit in the middle, offering a painted look with a different wear pattern. Whatever you choose, the finish system should include proper priming and an edge strategy; otherwise, you’ll see early failures at seams and bottoms.
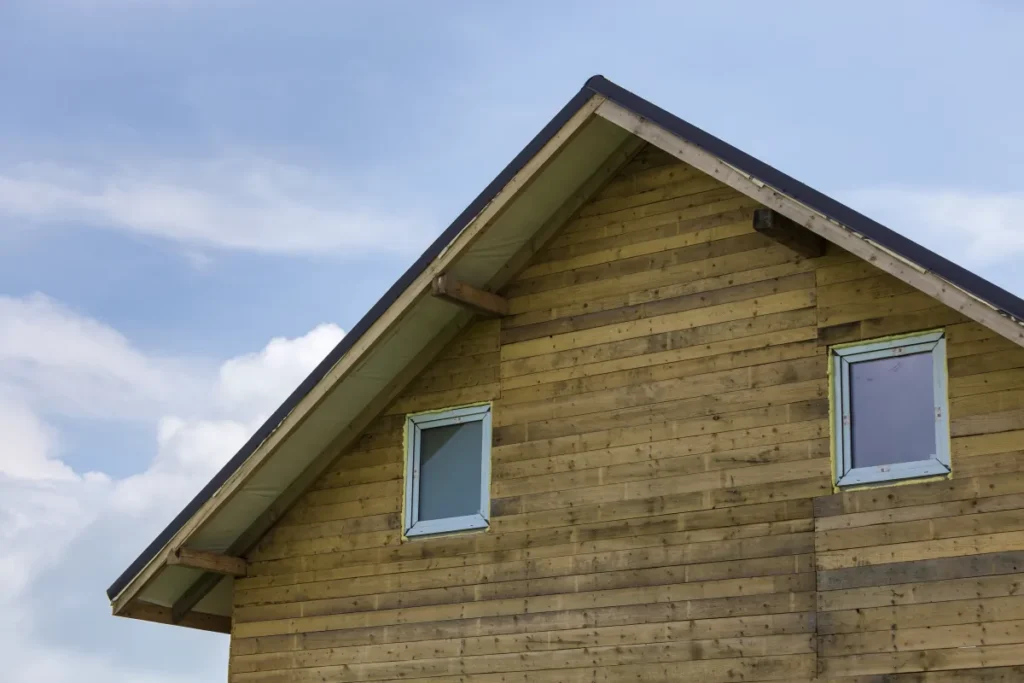
Panel Layout For Small Walls And Tight Areas
Small elevations, narrow side yards, porch returns, and garage faces can look “busy” if seams land in awkward places. In addition, A thoughtful layout uses consistent reveals and aligns vertical grooves with window/door sightlines where possible. When seams are unavoidable, trim boards or battens can make the joint look intentional instead of patched.
If your home has multiple small wall sections, it’s worth asking your contractor to walk you through the proposed seam locations before materials are ordered.
Maintenance That Keeps Panels Healthy
- Inspect caulk and paint at seams, window trim, and penetrations at least once a year.
- Keep bottom edges clear of soil and reduce splashback from irrigation where possible.
- Address gutters, downspouts, and roof runoff quickly—water management protects the finish.
- Spot-prime and touch up exposed wood early; small fixes beat full repaint cycles.
Timeline And Site Disruption (Typical)
Siding work is straightforward when the wall underneath is in good shape. In addition, Even so, most projects include at least some “unknowns” behind old panels, especially near windows, doors, and roof-to-wall intersections. Planning for that reality keeps the job from feeling chaotic.
Budget Ranges & Timeline (Typical)
- Planning + ordering: Often days to a couple of weeks, depending on material availability and finish decisions.
- On-site work: Many projects land in the range of several workdays to a couple of weeks, depending on home size, elevations, and repairs.
- Cost drivers: Access (height and obstacles), amount of trim detail, rot/sheathing repairs, and finish prep level usually move the budget most.
- Scheduling factors: Weather windows, cure time for coatings, and any required inspections can add time.
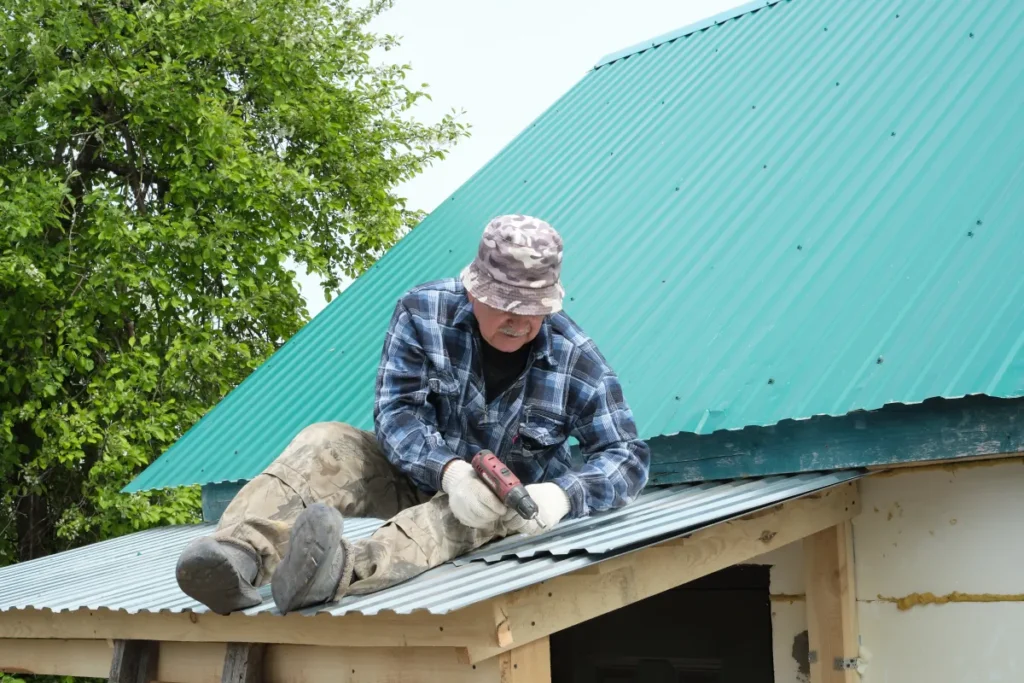
Local Step-By-Step (What A Well-Run Job Includes)
- Site walk and scope confirmation: Verify which walls are included, identify soft areas, and confirm the look you’re targeting.
- Protection and setup: Cover landscaping, protect walkways, and set up safe access.
- Removal and assessment: Carefully remove panels and evaluate sheathing/framing conditions where needed.
- Water-control details: Install/repair wrap and flashing at critical transitions before new panels go on.
- Panel install and trim: Set panels straight, handle seams intentionally, and detail corners/trim cleanly.
- Finish work: Prime as required (including edges/cuts) and apply the selected coating.
- Cleanup and walkthrough: Confirm punch-list items, touch-ups, and maintenance guidance.
An Anonymized Before/After Example (Hypothetical)
Before: A homeowner notices bubbling paint and dark staining under a few windows. Overall, Several bottom edges feel soft, and seams show repeated caulk failures. The exterior still “looks okay” from the street, but the problem keeps returning after touch-ups.
After (one sensible approach): The scope includes selective removal to confirm what’s happening behind the panels, targeted repairs where the wall is compromised, upgraded flashing at openings, and a new finish system applied over properly prepped surfaces. For this reason, The end result looks more uniform, and the homeowner has a clear maintenance plan to keep water out of the edges and seams.

How To Get Started In Sacramento
US Construction & Remodeling Corp. Overall, helps Sacramento homeowners plan and deliver t1-11 siding projects with clear scope definitions, realistic scheduling, and practical guidance on materials and finishes. The goal is simple: you should know what’s included, what can change once panels come off, and what your timeline looks like before work begins.
Timeline-first planning call: Book a short call to talk through timing, scope options, and the best way to sequence repairs and finishing. As a result, Schedule your planning call here, or call Call.
Sacramento Permitting (General Guidance)
Some siding scopes are straightforward maintenance, while others touch structural elements, shear walls, or window changes. Also, When permits apply, Sacramento projects typically run through the City of Sacramento Community Development portal (Accela Citizen Access) for application and status tracking. We’ll talk through the scope so you understand the permitting path in plain language.
Trust And Accountability Checklist
- Licensing and insurance: Ask for current proof appropriate to the work being performed.
- Permits: Clarify whether a permit is necessary and who is responsible for pulling it, before signing.
- Written scope: Expect a clear scope, material description, and finish plan—especially for seam/edge handling.
- Communication: Agree on update cadence and how change decisions are approved if hidden damage is found.
- Workmanship verification: Inspect flashing transitions, penetrations, panel edges, and finish prep details during the job—not only at the end.
Business info: US Construction & Remodeling Corp. • Phone: +1 (916) 234-6696 • Website: US Construction & Remodeling Corp.
Helpful Links
Frequently Asked Questions
How long does a t1-11 siding project usually take?
Many projects fall into a range of several workdays to a couple of weeks. The biggest schedule variables are access (height and obstacles), how much repair work is discovered after removal, and the finish system’s prep/cure time.
What drives the cost of t1-11 siding replacement?
Cost usually moves most with:
- Number of elevations and ease of access
- Amount of trim and detail work
- Rot/sheathing repairs and moisture corrections
- Seam strategy (trim/battens/flashing) and finish prep level
Do I need a permit to replace t1-11 siding in California?
It depends on scope. Simple in-kind maintenance may not require a permit, while structural changes, shear wall work, or window/door modifications often do. A local contractor should review your scope and explain the permit path before work starts.
Is plywood or OSB better for t1-11 siding?
Both exist in the market, and performance depends on the product grade and how well edges, seams, and penetrations are protected from moisture. When comparing options, ask what panel type is proposed, how cut edges are sealed, and what flashing and wrap details are included.
Can you just paint over old t1-11 siding?
Sometimes, but only if the panels are structurally sound and you address prep correctly. A quality refresh typically includes thorough cleaning, scraping/sanding, spot repairs, targeted priming (especially on exposed wood), and repainting with the right products.
How do I choose a contractor for t1-11 siding work?
Look for clear written scope, specific answers about seam/edge protection and flashing, and a realistic schedule. Also verify licensing through the CSLB and ask how changes are handled if hidden damage is discovered once panels come off.
Licensed, insured & trusted local contractor
US Construction & Remodeling Corp.
4424 Freeport Blvd, Sacramento, CA, 95822
Phone: +1 (916) 234-6696
CSLB License #: 1117562 Fully licensed and insured.
View our Google Business Profile
Related articles
- Kitchen Remodel Permits in El Dorado Hills: Checklist + Timeline
- Kitchen Remodeling
- Kitchen Remodeling
Many projects fall into a range of several workdays to a couple of weeks. The biggest schedule variables are access (height and obstacles), how much repair work is discovered after removal, and the finish system’s prep/cure time. Cost usually moves most with: It depends on scope. Simple in-kind maintenance may not require a permit, while structural changes, shear wall work, or window/door modifications often do. A local contractor should review your scope and explain the permit path before work starts. Both exist in the market, and performance depends on the product grade and how well edges, seams, and penetrations are protected from moisture. When comparing options, ask what panel type is proposed, how cut edges are sealed, and what flashing and wrap details are included. Sometimes, but only if the panels are structurally sound and you address prep correctly. A quality refresh typically includes thorough cleaning, scraping/sanding, spot repairs, targeted priming (especially on exposed wood), and repainting with the right products. Look for clear written scope, specific answers about seam/edge protection and flashing, and a realistic schedule. Also verify licensing through the CSLB and ask how changes are handled if hidden damage is discovered once panels come off.Frequently Asked Questions